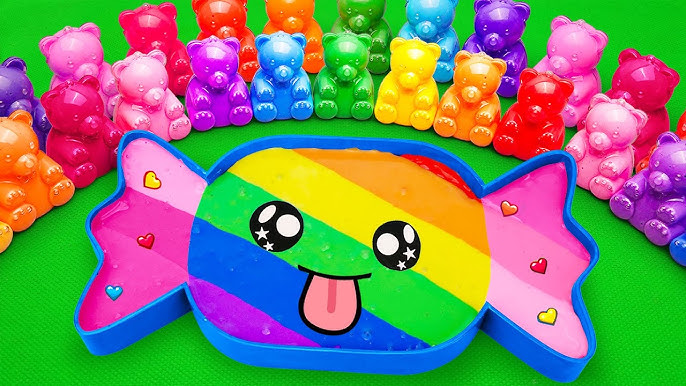
Are you ready to create a fun, colorful toy that you can play with again and again? Making colored clay slime at home is easier than you think—and it’s a perfect way to bring out your creativity.
Imagine mixing bright colors, feeling the soft texture, and watching your slime stretch and bounce in your hands. In this guide, you’ll discover simple steps to make your own vibrant clay slime toy with materials you probably already have. By the end, you’ll have a cool, squishy toy that’s totally unique and made by you.
Let’s get started!

Credit: www.youtube.com
Materials Needed
Gathering the right materials is key to making colored clay slime that’s both fun to play with and easy to create. Each item you choose affects the texture, stretchiness, and color of your slime. Knowing exactly what to pick can save you time and frustration while boosting your creativity.
Colored Clay Types
Start with soft, air-dry clay or polymer clay that comes in vibrant colors. Air-dry clay is lightweight and easy to mix with slime, making it perfect for beginners. Polymer clay, on the other hand, offers richer colors and firmer textures, but it needs baking to harden if you want a permanent shape.
Have you noticed how some clays blend more smoothly with slime? This is because of their moisture content and consistency. Try different brands to find the perfect balance between softness and color saturation.
Glue And Activators
White or clear PVA glue forms the base of your slime. It provides that stretchy, sticky quality everyone loves. Avoid school glue with added scents or colors, as they can change your slime’s final look and feel.
Activators turn glue into slime by creating chemical bonds. Common options include borax solution, liquid starch, or contact lens solution with baking soda. Choose an activator that’s safe and easy to find in your area. Have you ever experimented with different activators to see how they change slime’s texture?
Optional Add-ins
Add glitter, foam beads, or essential oils to personalize your slime. These extras don’t just make slime prettier—they also enhance the sensory experience. For instance, foam beads add crunch, while essential oils introduce calming scents.
Think about what you enjoy most in slime. Is it the visual sparkle or the tactile sensation? Adding small amounts of these extras lets you customize your creation without compromising its core slime qualities.

Credit: www.youtube.com
Preparing The Workspace
Preparing your workspace is key to making colored clay slime at home. A tidy area helps keep everything clean and easy to find. It also protects surfaces from stains and sticky messes. Take time to set up before starting the fun.
Surface Protection
Cover your table or countertop with a plastic sheet or old newspaper. This prevents stains from food coloring or glue. Use a washable mat or silicone mat for easy cleanup. Keep paper towels or wet wipes nearby for quick spills.
Organizing Supplies
Gather all materials before you begin. Place glue, clay, coloring, and activator in small bowls. Keep stirring sticks, measuring spoons, and containers within reach. This stops interruptions and keeps the flow smooth. Label each item if needed to avoid confusion.
Mixing Colored Clay And Glue
Mixing colored clay and glue is the key step to creating vibrant slime. This process determines the texture and color of your final slime toy. The right balance makes the slime stretchy, soft, and fun to play with.
Start by carefully measuring the ingredients. Accuracy helps achieve the perfect slime consistency. Too much glue makes it sticky; too much clay makes it stiff.
Measuring Ingredients
Use a measuring cup or spoon for precise amounts. Typically, use equal parts of colored clay and white glue. For example:
- 1/4 cup of colored clay
- 1/4 cup of white glue
Adjust the quantity based on how much slime you want. Make sure the clay is soft and pliable before mixing.
Combining Clay And Glue
Pour the glue into a clean mixing bowl first. Add the colored clay in small pieces. Stir gently with a spatula or spoon.
Mix until the ingredients blend into a smooth, even color. Avoid overmixing, which can make the slime tough.
The mixture should look shiny and stretch easily. If sticky, add a small amount of clay to balance.
Adding Activator
Adding activator is the crucial step that transforms your colored clay mixture into that perfect, stretchy slime toy you want. This is where the texture changes from sticky and wet to fun and pliable. Getting this right can be tricky, but with the right approach, you’ll have slime that feels just right in your hands.
Choosing The Right Activator
Not all activators work the same with colored clay slime. The most common choices are borax solution, liquid laundry detergent, and contact lens solution containing boric acid.
- Borax solution:Mix 1 teaspoon of borax powder with 1 cup of warm water. It’s very effective but can be harsh if overused.
- Liquid laundry detergent:Choose a clear detergent with minimal additives to avoid discoloring your slime.
- Contact lens solution:Look for one with boric acid and sodium borate; it’s gentle and easy to control.
Which activator you pick depends on what’s available and how sensitive your skin is. Have you tried different activators before? You might find one works better with your clay brand or color.
Mixing To Achieve Slime Texture
Start by adding activator slowly. Adding too much at once can make your slime rubbery and hard to stretch.
Use small amounts—just a few drops or a teaspoon at a time—and mix well before adding more. You want to watch the slime start to pull away from the sides of your bowl and stick together without feeling sticky.
If your slime feels too stiff, add a tiny bit of water or lotion to soften it. If it’s still sticky, more activator is needed. This trial and error is part of the fun and learning process.
How does your slime feel right now? Keep adjusting bit by bit until it feels just right in your hands—stretchy, soft, and fun to squish.
Kneading The Slime
Create colorful clay slime at home. Mix clay, glue, and your favorite food coloring. Knead until smooth and enjoy.
Kneading the slime is the heart of creating your perfect colored clay slime toy. This step is where the magic happens, transforming your gooey creation into a fun, pliable toy that holds color and shape. It’s not just about mixing; it’s about developing the right texture and consistency so your slime feels fantastic in your hands.Techniques For Smooth Texture
To achieve a smooth texture, start by slowly stretching and folding the slime. This gradual process helps to distribute the ingredients evenly, avoiding lumps. Imagine kneading bread dough, but much more colorful and playful. Use the warmth of your hands to your advantage. It softens the clay, making it easier to blend with the slime base. If your slime feels too tough, a few drops of warm water can soften it instantly.Adjusting Consistency
If your slime is too sticky, sprinkle a small amount of baking soda over it. Work it in with your fingers until the stickiness reduces. This trick saves the day when your slime refuses to leave your hands. On the flip side, if the slime is too stiff, add a small amount of lotion. It makes the slime stretchier and more pleasant to play with. How do you know when it’s just right? The slime should stretch without breaking and feel smooth to the touch. What adjustments have you made to your slime to get that perfect texture? Share your experiences and tips in the comments below!
Credit: www.youtube.com
Customizing Your Slime
Customizing your colored clay slime makes the experience more fun and personal. It lets you create unique textures and looks. Small changes can make your slime stand out and feel special. Try different additions to see what you like best. Experimenting with colors and decorations adds a creative touch. This section shows easy ways to customize your slime for an exciting result.
Adding Glitter And Beads
Glitter adds sparkle to your slime. It catches light and makes your slime shine. Use fine or chunky glitter for different effects. Beads bring texture and fun sounds. Small plastic or foam beads work well. Add them little by little while mixing. Avoid adding too many beads to keep slime stretchy.
- Choose glitter colors that match or contrast your slime.
- Add beads slowly to avoid clumping.
- Mix well so decorations spread evenly.
Mixing Multiple Colors
Mixing colors creates beautiful swirls and patterns. Use two or three colors for best results. Add small amounts of each color to your slime base. Fold and twist the slime gently to blend colors. Avoid over-mixing to keep distinct color patterns. This creates a marbled or tie-dye look that is fun to watch.
- Pick colors that look good together.
- Use separate clay pieces for each color.
- Stop mixing when colors start to blend but still show lines.
Storing Colored Clay Slime
Storing your colored clay slime properly is key to keeping it fresh, stretchy, and fun for longer. Without the right storage, slime can dry out, get sticky, or lose its vibrant color. Let’s look at how you can keep your slime in perfect condition with the right containers and care tips.
Best Containers
Choosing the right container makes a huge difference. Airtight containers are your best bet—they lock in moisture and keep air out, which helps prevent your slime from drying. Small plastic jars with screw-on lids or sealable plastic bags work well.
- Look for containers that close tightly to avoid air leaks.
- Clear containers help you see the slime’s condition without opening them.
- Containers with smooth surfaces prevent the slime from sticking too much.
Have you ever opened a container only to find your slime hardened and unusable? That’s why investing in good storage is essential.
Tips For Longevity
Keeping slime fresh isn’t just about the container—it’s about how you treat it too. Always store your slime at room temperature and avoid exposing it to extreme heat or cold, as these can change its texture.
- Before storing, wipe off any dust or debris from the slime to avoid contamination.
- If the slime starts to dry out, add a small amount of water or lotion and knead it back to softness.
- Clean your hands before playing with slime to reduce dirt getting inside the container.
Did you know that slime can last several weeks if stored correctly? Think about how much more fun you’ll get from your DIY slime by simply taking a few extra minutes to store it right.
Troubleshooting Common Issues
Making colored clay slime is fun, but sometimes the texture doesn’t turn out quite right. Troubleshooting these common issues can save you time and frustration. Whether your slime feels sticky or too hard, small adjustments can fix the problem and bring your DIY slime to life.
Slime Too Sticky
Sticky slime can be frustrating to handle. If your slime sticks to your hands or surfaces, it likely needs more activator. Add a few drops of contact lens solution or liquid starch, then knead it thoroughly.
Don’t add too much activator at once—doing so can make the slime tough. Add it slowly and test the texture frequently. If the slime remains sticky after activator, try dusting a little baking soda and knead it in to reduce stickiness.
Also, consider the humidity in your environment. High humidity can make slime stickier than usual. Would adjusting your workspace or storing the slime in an airtight container help keep it just right?
Slime Too Hard
Slime that feels hard or brittle is usually over-activated. If you find your slime breaking apart or difficult to stretch, it needs more moisture. Add a small amount of warm water or lotion and knead it gently.
Adding too much activator too quickly is a common mistake. Take your time and add activator little by little next time to avoid this issue. If your slime is too hard but still sticky, balancing with water and activator can bring back the perfect stretch.
Have you noticed how different brands of glue or activators change your slime’s texture? Experimenting with these ingredients can prevent hardness and improve your overall slime experience.
Frequently Asked Questions
How Do You Make Colored Clay Slime At Home?
To make colored clay slime, mix white glue, clay, and food coloring. Add activator like borax solution gradually. Knead until smooth and stretchy. Adjust color intensity by adding more dye. Store slime in an airtight container to keep it soft.
What Type Of Clay Is Best For Slime?
Air-dry clay or lightweight modeling clay works best for slime. These clays blend well with glue and activators. Avoid oil-based clays as they don’t mix properly. Use non-toxic clay for safe, kid-friendly slime making.
Can I Use Natural Colors For Clay Slime?
Yes, natural colors like turmeric, beet juice, or spirulina powder can color slime. They are safe and eco-friendly alternatives to synthetic dyes. Add small amounts for subtle colors. Natural colors may slightly change slime texture.
How Long Does Homemade Clay Slime Last?
Homemade clay slime lasts about 1 to 2 weeks if stored properly. Keep it in an airtight container at room temperature. Avoid exposure to sunlight or heat to prevent drying out. If slime hardens, add lotion to restore softness.
Conclusion
Making colored clay slime at home is fun and simple. You only need a few ingredients and a little time. This DIY project lets you create slime in any color you want. It’s a great activity for kids and adults alike.
Enjoy the soft, stretchy texture and bright colors. Try mixing different shades to see what you can make. Keep your slime in a sealed container to stay fresh. Have fun crafting your own colorful slime toys today!


