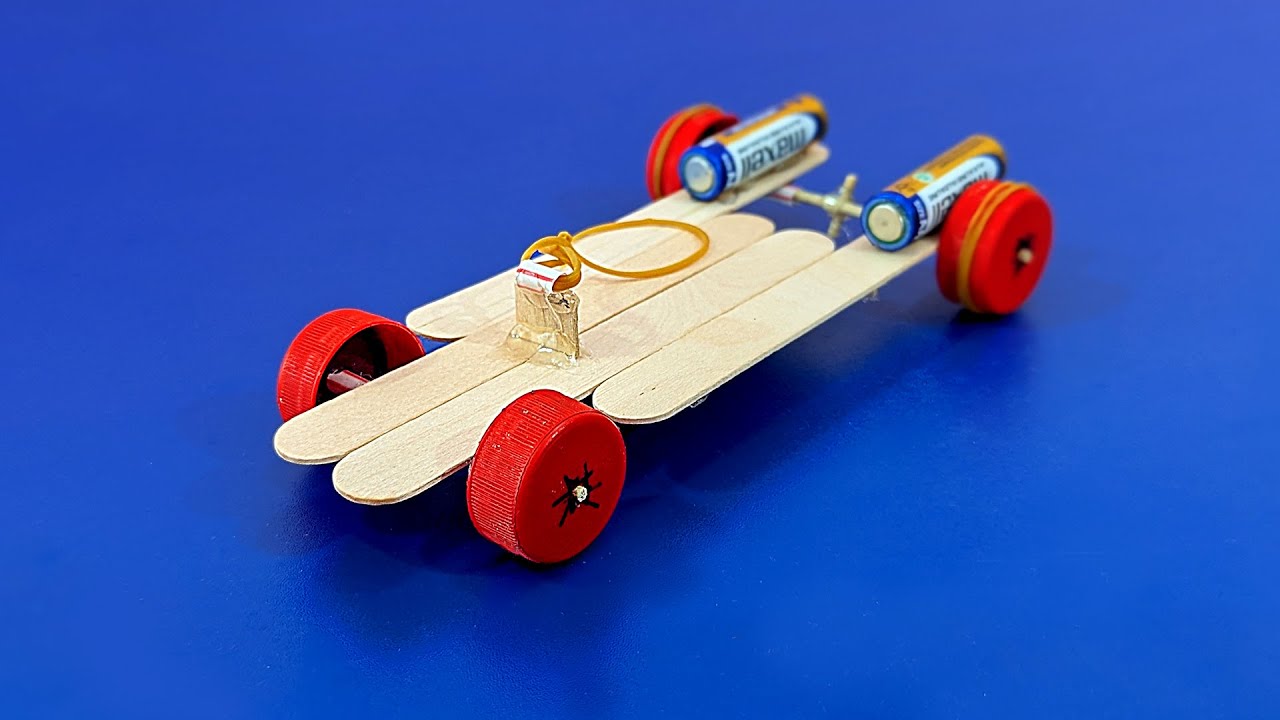
Are you ready to create something fun and exciting with your own hands? Making a DIY toy car is a simple and rewarding project that anyone can enjoy.
Whether you want a cool car for your child, a unique gift, or just a fun activity to pass the time, this guide will show you exactly how to build your own toy car step-by-step. You don’t need any special skills or expensive tools—just a bit of creativity and some basic materials.
Keep reading, and by the end, you’ll have a fantastic toy car that you made yourself. Let’s get started!

Credit: www.youtube.com
Materials Needed
Gathering the right materials is the first key to building your DIY toy car. The supplies you choose will shape how your car looks and moves. Think about what you have around the house before buying anything new—you might be surprised by the treasures you find.
Basic Supplies
- Cardboard or lightweight wood:This forms the body of your car. Cardboard is easy to cut and shape, making it perfect for beginners.
- Plastic bottle caps or small wheels:Use these as wheels. Bottle caps work well, but if you want smoother movement, small toy wheels are ideal.
- Straws or wooden skewers:These act as axles to connect the wheels. They should fit snugly through the wheels without too much wobble.
- Glue or tape:Choose a strong adhesive to hold parts together. Hot glue is quick and sturdy, but regular craft glue can work if you’re patient.
- Scissors or a craft knife:Necessary for cutting materials. Always be careful and ask for help if you’re using sharp tools.
- Markers or paint:Use these to add color and details to your car body.
Optional Decorations
- Stickers or decals:Add personality with fun designs or logos.
- Googly eyes or small beads:Give your car a playful face or extra texture.
- Colored paper or foam sheets:Layer these for windows, headlights, or flames.
- Pipe cleaners:Twist these into antennas or spoilers for a custom look.
- Glitter or metallic markers:Make your car shine and stand out on the track.
What small, unexpected item could you add to make your toy car truly unique? Sometimes, the simplest decoration sparks the most joy and creativity.

Credit: www.youtube.com
Choosing The Design
Choosing the design is a fun and important part of making a DIY toy car. The design sets the style and feel of your car. It also affects how easy or hard the building process will be. Picking the right design helps match the toy car to your skills and materials. Simple shapes or creative styles can both work well. Think about what you want your car to look like before starting.
Simple Shapes
Simple shapes are great for beginners. They are easy to cut and assemble. Basic shapes like rectangles, squares, and circles make the build faster. They also need fewer materials and tools.
- Use a block shape for the car body.
- Round wheels made from bottle caps or wooden discs.
- Straight lines keep the design clean and clear.
Simple designs focus on function and ease. They offer a solid starting point for learning.
Creative Styles
Creative styles allow more freedom and fun. You can design cars that look like race cars, trucks, or even fantasy vehicles. This style uses different shapes and colors.
- Mix curves and sharp angles for unique looks.
- Add details like spoilers, windows, or decals.
- Use bright paint or markers for color.
Creative designs encourage imagination and skill growth. They can be challenging but rewarding to build.
Cutting And Shaping
Cutting and shaping are key steps in making a DIY toy car. This process turns raw materials into the parts needed for the car. Proper cutting and shaping ensure the pieces fit well and look neat. Safety matters a lot during these steps. Both kids and adults must handle tools carefully to avoid accidents.
Safe Tools For Kids
Kids need tools that are easy and safe to use. Blunt scissors work well for cutting paper or thin cardboard. Plastic or child-friendly knives can shape soft materials like foam. Small hand saws with safety guards are good for light wood or plastic. Always choose tools with handles that fit small hands. Safety gloves help protect fingers from cuts. Keep sharp tools out of reach when not in use.
Tips For Adults
Adults should prepare the workspace before starting. Use sharp tools to make clean cuts. Dull blades can cause slips and uneven shapes. Guide kids when using tools like saws or craft knives. Use clamps to hold materials steady. Sand edges smoothly to avoid splinters. Dispose of scraps and sharp bits properly. Always wear protective gear like goggles and gloves. Check tools regularly for damage or wear.

Credit: www.youtube.com
Assembling The Car
Begin by connecting the wheels securely to the car body for smooth movement. Carefully attach the axles and ensure all parts fit snugly. Test the toy car’s balance and adjust if needed for better performance.
Assembling a DIY toy car brings fun and learning together. It’s a simple and rewarding project. Let’s dive into how to put all the pieces together.Attaching Wheels
Start with four bottle caps for the wheels. Use a nail to make a hole in the center of each cap. Take four wooden skewers or straws. These will act as axles. Push one skewer through each hole. Secure the wheels with glue or tape. Make sure they rotate smoothly.Building The Body
Choose a sturdy base like a small box or a thick piece of cardboard. Cut it to your desired car shape. Attach the axles to the underside. Use rubber bands or string to hold them in place. For the top, decorate with paint or stickers. Consider adding a bottle cap or a small cup for the driver’s seat. Keep the design simple and fun.Painting And Decorating
Painting and decorating your DIY toy car is the fun part that brings your creation to life. This step lets you show your style and creativity. Bright colors and cool designs make the toy car more exciting and unique. Use safe, non-toxic paints to keep it kid-friendly. Let each layer dry well for the best look.
Color Ideas
Choose colors that make your toy car stand out. Use bold colors like red, blue, or yellow for a sporty look. Soft colors like pastel green or light blue give a calm feel. Try mixing colors for a cool effect. Use stripes or dots for extra fun. Think about the color of real cars you like.
Adding Details
Details make your toy car special. Use a fine brush to add windows, headlights, and doors. Stick on small parts like paper or stickers for extra design. Draw racing numbers or flames for a fast car look. Add glitter or shiny paint to catch the light. Small touches bring your car to life and make it unique.
Testing And Playing
Testing and playing with your DIY toy car is the most exciting part. It shows how well your creation works and brings joy. This stage lets you find out if the car moves smoothly and how fun it is to play with.
Checking Movement
Place the toy car on a flat surface. Give it a gentle push and watch it roll. Check if the wheels spin freely without wobbling. Make sure the car moves straight and does not veer off. If it stops quickly, see if anything blocks the wheels. Adjust the wheels or axles to improve movement. A smooth ride means your car is ready for play.
Fun Play Ideas
Create simple race tracks using books or cardboard. Challenge friends or siblings to races. Try pushing the car down a small ramp to see how far it goes. Use different surfaces like carpet, tile, or wood for varied rides. Invent stories or adventures with your toy car as the hero. Playing this way boosts creativity and makes the toy last longer.
Troubleshooting Tips
Troubleshooting your DIY toy car can be a rewarding part of the building process. It helps you understand how each piece works and how to get the best performance out of your creation. Below are practical tips to solve common problems and make your toy car last longer.
Fixing Common Issues
If your toy car isn’t moving smoothly, check the wheels first. Sometimes they might be too tight or loose on the axles. Try adjusting the fit so the wheels spin freely but don’t wobble.
Another common problem is the car veering to one side. This usually means the wheels aren’t aligned properly. You can fix this by gently bending the axles or repositioning the wheels so they line up straight.
Is the car moving slower than you expected? Look for parts that might be rubbing against each other. Sanding down rough edges or adding a little oil to the axles can reduce friction and boost speed.
Improving Durability
Your toy car will face a lot of bumps and crashes, so durability matters. Using stronger materials for the chassis, like thicker cardboard or lightweight wood, can make a big difference.
Glue isn’t always enough to hold parts together during rough play. Try reinforcing joints with small nails, tape, or extra glue layers. This will keep your car intact even after many races.
Have you thought about protecting the wheels? Adding rubber bands around them can improve grip and prevent wear. It’s a simple trick I learned that keeps the wheels from slipping and breaking too fast.
Frequently Asked Questions
What Materials Are Needed To Make A Diy Toy Car?
You need cardboard, plastic bottle caps for wheels, glue, scissors, and markers. These basic items are easy to find and safe for kids. Using recyclable materials also promotes eco-friendliness. Simple tools help create a fun and creative toy car at home.
How Long Does It Take To Make A Diy Toy Car?
Making a DIY toy car typically takes 30 to 60 minutes. The time depends on the complexity of the design and drying time for glue. This quick project is perfect for a fun, educational activity with children.
Can Kids Make A Diy Toy Car Alone?
Yes, kids can make a DIY toy car with adult supervision. Younger children may need help with cutting and gluing. This project encourages creativity, fine motor skills, and problem-solving in a safe environment.
How To Make Diy Toy Car Wheels Spin Smoothly?
Use plastic bottle caps or buttons as wheels for smooth rotation. Attach wheels with toothpicks or straws as axles. Ensure the wheels are loose enough to spin but secure enough to stay attached.
Conclusion
Building a DIY toy car is fun and simple. You only need a few materials and some patience. This project helps you learn and be creative. Kids and adults both enjoy making their own cars. Try different designs to see what works best.
Spend time together, share ideas, and have fun. Making a toy car can bring joy and pride. Give it a try and see your creation move!


