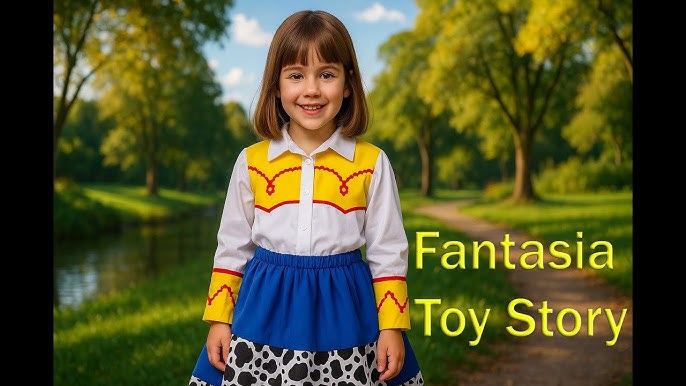
Are you ready to bring the fun and spirit of Toy Story’s Jessie to life? Making your own DIY Jessie costume is easier than you think, and it’s a fantastic way to stand out at any party or event.
Imagine the excitement on everyone’s faces when they see you rocking that iconic cowgirl look — and the best part is, you can create it with simple, affordable materials you probably already have. Keep reading, because I’m going to show you step-by-step how to make your very own Jessie costume that looks amazing and feels great to wear.
Let’s get started!
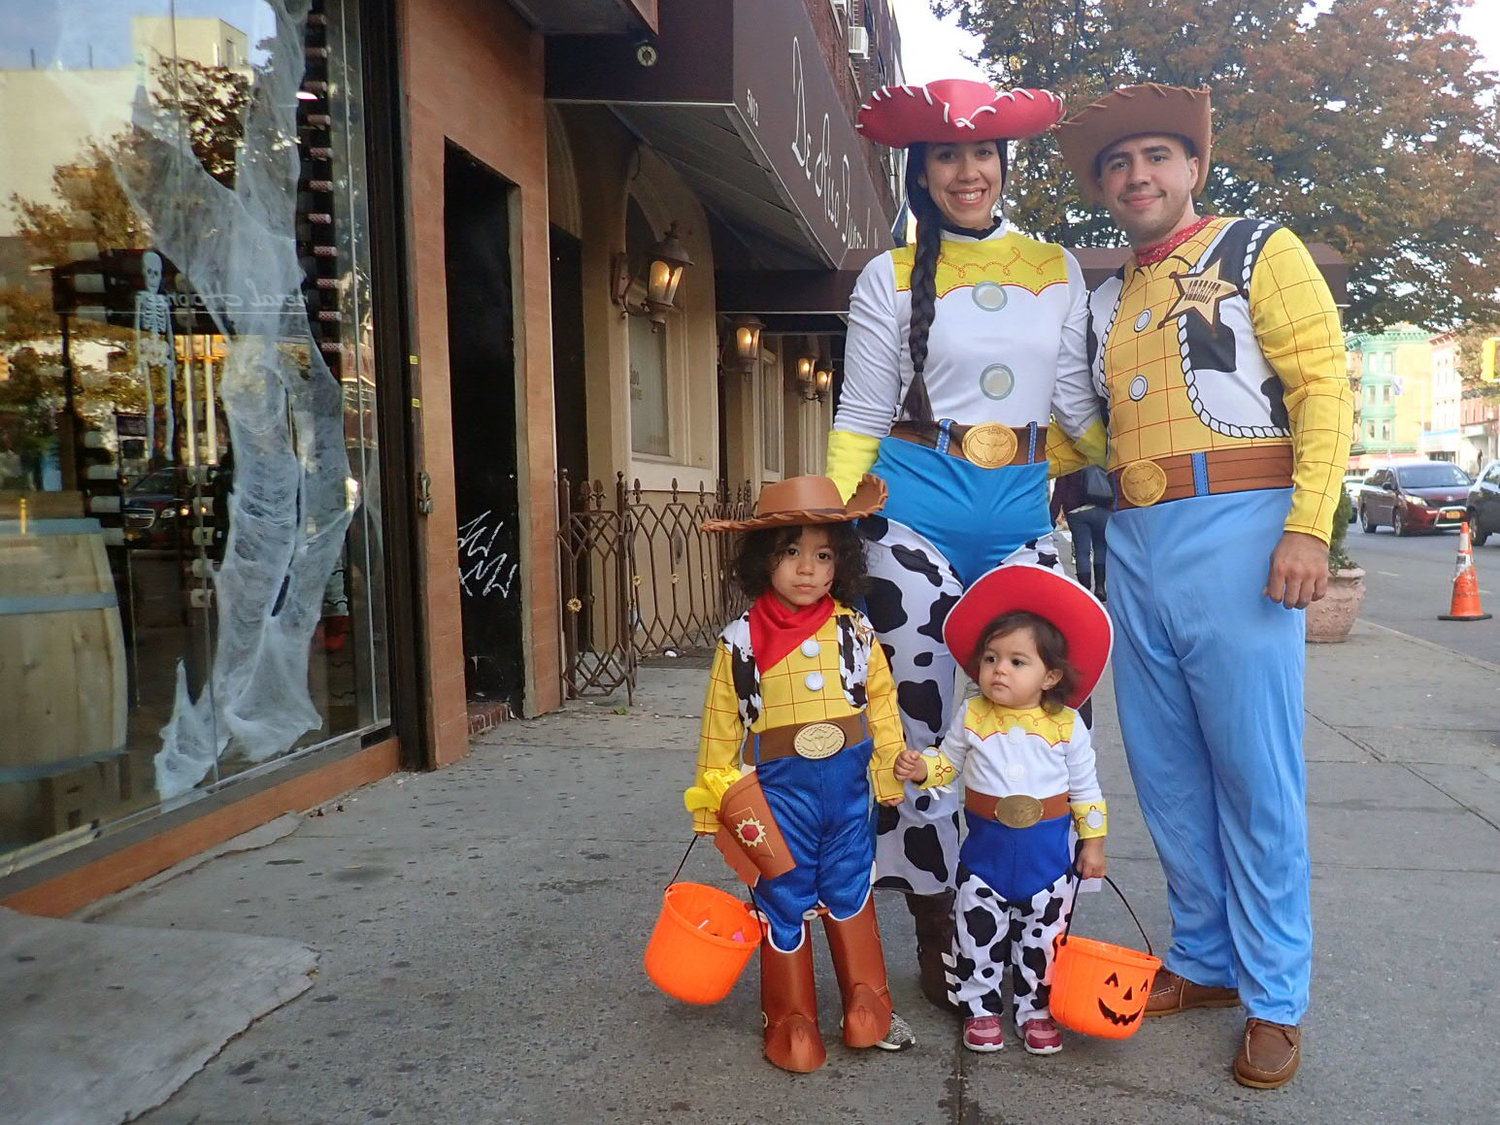
Credit: www.anajacqueline.com
Materials Needed
Creating a DIY Jessie Toy Story costume starts with gathering the right materials. These items form the base of your costume and help you capture Jessie’s vibrant look. Focus on simple pieces that you can easily find or already own.
Separate your materials into three main groups: clothing items, accessories and props, and tools and supplies. This approach keeps you organized and makes the crafting process smoother.
Clothing Items
- White long-sleeve shirt with yellow cuffs and collar
- Blue jeans or denim pants
- Red vest with white stitching or fabric paint
- Brown belt with a large buckle
- Red cowgirl hat with white trim
Accessories And Props
- Yellow fabric or felt for shirt details
- White fabric paint or felt for cow print on vest
- Red yarn or fabric strips for Jessie’s braided hair
- Brown boots or boot covers
- Optional: a toy lasso or rope
Tools And Supplies
- Fabric glue or hot glue gun
- Scissors
- Needle and thread (red, white, and yellow)
- Measuring tape
- Fabric markers or paintbrushes
- Cardboard for hat structure (optional)
Credit: www.hgtv.com
Creating The Hat
The hat is a key part of the DIY Jessie Toy Story costume. It gives the costume its iconic look. Making the hat with the right shape and colors makes the outfit stand out.
Focus on the details to capture Jessie’s fun and lively style. Use simple materials that are easy to find. This keeps the project budget-friendly and enjoyable.
Selecting The Base
Choose a white cowboy hat as your base. Look for one with a wide brim and a rounded crown. Felt or sturdy fabric hats work best for shaping. Avoid hats that are too soft or floppy. The base must hold its form well for adding details later.
Adding The Red Details
Jessie’s hat has bright red accents around the brim. Use red felt or fabric strips to create these. Cut strips about one inch wide and long enough to wrap the brim. Attach the red strips with fabric glue or a hot glue gun. Make sure the strips lie flat and even. This red trim brings the hat to life.
Shaping The Hat
Jessie’s hat has a curved brim and a slightly pinched crown. Gently bend the brim upward on the sides. Pinch the front and back of the crown to give it a classic cowboy shape. Use steam or a warm iron to help shape the fabric if needed. Hold the shape in place until it cools and sets. This shaping makes the hat look just right for Jessie.
Making The Shirt
Making the shirt is a key part of your DIY Jessie Toy Story costume. Getting the details right will make your costume stand out and feel authentic. Let’s break down the process into simple steps that anyone can follow, whether you’re new to sewing or a seasoned crafter.
Choosing The Right Fabric
Jessie’s shirt is bright white with bold yellow and red accents, so picking the right fabric matters. Look for a crisp cotton or cotton blend that holds its shape well. Avoid fabrics that are too thin or stretchy, as they won’t give you that authentic cowboy shirt feel.
Think about comfort too—if you plan to wear the costume for hours, choose a breathable fabric. I once picked a shiny polyester by mistake, and it felt sticky after a while. Don’t let that happen to you!
Painting The Yellow Accents
The yellow accents on Jessie’s shirt are what make it instantly recognizable. Use fabric paint to create those bold yellow shapes on the shoulders and cuffs. Make sure to tape off the areas carefully to get clean edges.
Try painting on a scrap piece of fabric first to see how the paint behaves. Some paints need multiple layers for vibrant color, so patience is key. Have you ever tried fabric painting? It’s easier than it looks and gives you total control over the design.
Adding The White Cuffs
Jessie’s shirt has distinctive white cuffs that add to the western style. You can sew on white fabric strips or use pre-made cuffs if you want to save time. Attach them firmly with a sewing machine or hand stitch if you prefer precision.
Make sure the cuffs fit comfortably around your wrists and allow movement. I recommend testing the fit before sewing completely. A loose cuff can ruin the look, while a tight one can be uncomfortable all day.
Crafting The Vest
Crafting the vest is the key step in making a DIY Jessie Toy Story costume. Use a plain white vest as the base. Add red and yellow felt shapes to mimic Jessie’s western style. This simple touch completes the authentic look, making it perfect for any costume party.
Crafting the vest for your DIY Jessie costume can be a fun task. It adds an authentic touch to the overall look. This iconic piece brings Jessie’s vibrant character to life. Let’s dive into the simple steps to create your own vest.Cutting The Vest Shape
Start with a piece of yellow felt fabric. Measure your child’s chest and back. Use these measurements to cut the fabric into a vest shape. Remember to include armholes. The vest should be a bit loose for comfort. Use a simple vest pattern as a guide if needed. Double-check the size before making the final cuts.Attaching The Cow Print
Jessie’s vest features a unique cow print pattern. You can easily replicate this with black felt. Cut irregular shapes from the black felt. These should resemble cow spots. Use fabric glue to attach them to the vest. Spread them evenly for a balanced look. Let the glue dry completely before moving on.Finishing Touches
For authenticity, add a red ribbon along the vest’s edges. Sew or glue it carefully for a neat finish. You can also add decorative buttons for extra flair. Ensure all attachments are secure. This helps the vest withstand hours of play. Once done, admire your handiwork. Your DIY Jessie vest is ready to shine.Designing The Pants
Designing the pants for a DIY Jessie Toy Story costume brings the character to life. The pants must look bright and playful, just like Jessie’s. Focus on choosing the right fabric, adding a yellow patch, and sewing key details. This creates an authentic and fun look.
Selecting Denim Or Similar Fabric
Choose a sturdy fabric like denim or cotton twill. Denim works best because it looks like Jessie’s classic cowboy pants. Pick bright blue or medium blue shades. Avoid fabrics that are too dark or faded. The fabric should be comfortable and easy to sew. Stretch denim can add comfort but may be harder to sew.
Adding The Yellow Patch
The yellow patch is Jessie’s signature feature on the pants. Use bright yellow felt or fabric for the patch. Cut the patch into a large oval or rounded rectangle shape. Place it on the outside of each pant leg, near the thigh area. Use fabric glue or pins to hold the patch in place. Sew around the edges with a zigzag stitch for a neat finish.
Sewing The Details
Sewing details adds authenticity. Use red thread to create a cowboy-style stitching pattern. Add red stitching around the pockets and seams. Use white or cream thread to sew small decorative accents on the pants. Make sure all stitches are even and secure. This step gives the pants a finished, professional look.

Credit: www.yahoo.com
Making The Belt And Buckle
The belt and buckle are key pieces that bring Jessie’s look to life. Getting these details right adds authenticity to your DIY Jessie Toy Story costume and makes you stand out. Let’s dive into how you can craft these elements with simple materials and a bit of creativity.
Choosing Materials
Start by picking a sturdy base for your belt. Faux leather or thick felt works great because they hold shape and feel close to the real thing. You want something comfortable to wear but strong enough to support the buckle.
For the buckle, think lightweight but durable materials like craft foam, plastic, or even cardboard covered with metallic paint. Avoid heavy metals or bulky items that might weigh you down or feel awkward.
Creating The Buckle
Cut out a rectangular shape with rounded edges from your chosen base material. Use reference images to get the size and proportions close to Jessie’s signature buckle. You can add dimension by layering smaller shapes on top.
Paint the buckle with metallic gold or brass paint. Adding a second coat helps it look polished and shiny. If you want extra detail, use a black marker to outline edges or add faux screws.
Assembling The Belt
Attach the buckle to one end of your belt material. You can sew it on, use strong glue, or even secure it with small rivets if you have the tools. Make sure it’s firmly in place so it won’t fall off during wear.
Next, punch holes or add Velcro on the other end of the belt to make it adjustable. This way, you can fit it perfectly around your waist, just like Jessie’s belt.
Have you considered how the belt feels when worn? Try it on during assembly to ensure comfort and fit. A well-made belt not only looks great but also keeps your costume functional throughout your event.
Adding Final Details
Adding final details brings your DIY Jessie Toy Story costume to life. These small touches complete the look and make your outfit stand out. Focus on hair, makeup, and footwear for the best results. Pay attention to each part for an authentic Jessie appearance.
Wearing Red Hair Or Wig
Jessie’s bright red hair is her signature look. Choose a red wig with a long ponytail to match her style. Secure the wig tightly for comfort and stability. Use hair ties and pins to keep the ponytail neat. If you prefer, style your natural hair with red spray or temporary dye.
Applying Makeup
Keep makeup simple and fresh to suit Jessie’s cheerful character. Use light foundation and a bit of blush for a healthy glow. Apply brown eyeliner to define your eyes softly. Finish with a natural lip color or light pink lipstick. Avoid heavy makeup to maintain a playful look.
Adding Boots Or Shoes
Jessie wears cowgirl boots that complete her western look. Choose brown or tan boots with a slight heel for authenticity. If boots are not available, use shoes in similar colors. Adding boot cuffs or spurs can enhance the cowboy style. Make sure shoes are comfortable for all-day wear.
Tips For Comfort And Fit
Creating a DIY Jessie Toy Story costume is fun, but comfort matters most. Wearing the costume for hours needs a good fit. Comfort keeps you happy and moving freely. Here are tips to make your costume fit well and feel light.
Adjusting Sizes
Measure yourself before cutting fabric or buying materials. Use a soft tape measure around your chest, waist, and hips. Leave extra space for easy movement. Add adjustable features like elastic bands or Velcro straps. These let you change the fit during wear.
Using Lightweight Materials
Choose fabrics that are light and soft. Cotton and polyester blends work well for comfort and breathability. Avoid heavy materials that cause sweating or stiffness. Lightweight materials make wearing the costume easier all day.
Ensuring Mobility
Design the costume with enough room for bending and stretching. Avoid tight sleeves or pants that limit movement. Use stretchy fabrics or add panels where needed. Test your range of motion before final sewing. A flexible costume feels better and looks natural.
Frequently Asked Questions
What Materials Are Needed For A Diy Jessie Costume?
You need a red cowgirl hat, white shirt with yellow cuffs, blue jeans, cow-print vest, and red braided wig. Adding a red belt and boots completes the look.
How To Make Jessie’s Cowgirl Hat For The Costume?
Use red felt fabric and shape it into a wide-brimmed hat. Sew or glue white trim around the edges for an authentic Jessie look.
Can I Create Jessie’s Costume On A Budget?
Yes, use inexpensive fabrics and repurpose clothes. Thrift stores and craft shops offer affordable materials for a great DIY Jessie costume.
How Do I Style The Wig For Jessie’s Look?
Use a red braided wig or braid red yarn. Secure with a red ribbon to mimic Jessie’s signature hairstyle perfectly.
Conclusion
Creating a DIY Jessie Toy Story costume is fun and simple. Use materials you have at home to save money. Follow the steps carefully for the best results. Add small details to make the costume look real. This costume is perfect for parties or Halloween.
You will enjoy making it and wearing it. Try it yourself and feel proud of your work. Easy to make and fun to show off!


