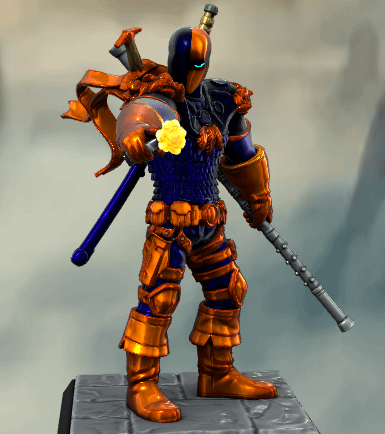
Are you a fan of Deathstroke and love getting creative? Imagine having your very own Deathstroke toy, made by your own hands.
It’s easier than you think, and it’s a fun way to bring your favorite character to life. In this guide, you’ll discover simple steps and tips to make a cool Deathstroke toy yourself. Whether you’re a beginner or just looking for a new project, this DIY idea will keep you hooked until the very end.
Ready to start building your own Deathstroke toy? Let’s dive in!

Credit: www.reddit.com
Materials Needed
Gathering the right materials is the first step to creating a Deathstroke toy that looks impressive and lasts long. Without the proper supplies, your project could become frustrating or less satisfying. Let’s break down what you’ll need to bring your DIY Deathstroke toy to life.
Basic Supplies
Start with a solid foundation of basic supplies. These include:
- Modeling clay or polymer clay:This forms the body and armor pieces. Choose a brand that hardens well without cracking.
- Wire or armature:Use this to create a sturdy skeleton inside your toy, giving it strength and flexibility.
- Scissors and craft knife:Essential for precise cutting of clay, wire, and other materials.
- Glue:A strong adhesive like super glue or epoxy will help assemble parts securely.
Think about your workspace: is it well-lit and organized? Having your basic supplies ready saves time and keeps your creativity flowing.
Specialty Tools
Specialty tools make detailed work easier and more professional. Consider adding these to your toolkit:
- Sculpting tools:These small tools help carve fine details, like Deathstroke’s armor textures and facial features.
- Needle files:Perfect for smoothing edges and refining shapes after cutting or baking clay.
- Pin vise or small drill:Useful for making tiny holes to attach parts or add accessories.
- Heat gun or oven:Necessary if you’re using polymer clay that requires curing.
Are you ready to bring out the intricate details that make Deathstroke unique? These tools give you the control to do exactly that.
Paints And Finishes
Color brings your Deathstroke toy to life. Choosing the right paints and finishes is crucial:
- Acrylic paints:These are easy to use, dry quickly, and come in many colors suitable for Deathstroke’s iconic look.
- Fine brushes:Invest in a set of small, quality brushes to add sharp lines and details.
- Primer:Applying primer before painting ensures better paint adhesion and vibrant colors.
- Sealant or varnish:Protect your paint job with a matte or glossy finish, depending on your desired look.
Have you ever noticed how a fresh coat of paint can transform a simple figure into a striking piece? The right finish keeps your toy looking great for years.

Credit: toystlkr.com
Choosing A Base Figure
Choosing the right base figure is crucial for making a Deathstroke toy DIY. It sets the foundation for your project. A good base figure helps achieve the desired look and pose. It also saves time during modification. The choice depends on size, articulation, and detail. Picking the right model ensures your toy looks close to the original character.
Selecting The Right Model
Start by finding action figures similar in size to Deathstroke. Look for figures around 6 to 7 inches tall. Choose models with flexible joints for better posing. Figures from superhero lines often work well. Check the sculpt details, especially on the face and body. A figure with a muscular build suits Deathstroke’s appearance. Also, consider the material quality for easier painting and sculpting.
Modifying Existing Figures
Many DIYers use existing figures as a base. You can reshape parts using putty or clay. Cutting and sanding help adjust armor or weapons. Swapping heads or hands from other figures adds customization. Use paint to match Deathstroke’s costume colors. Adding small accessories enhances the final look. Keep tools handy for trimming and assembling parts cleanly.
Sculpting Details
Sculpting details brings your Deathstroke toy to life. Careful work here adds depth and realism. Focus on small elements that define the character’s look. Use soft clay or modeling putty for easy shaping. Keep your tools handy to create sharp lines and smooth surfaces.
Adding Armor Pieces
Start by shaping thin armor plates from clay. Use reference images to match Deathstroke’s design. Press the clay gently onto the toy’s body. Smooth edges with a small sculpting tool. Add texture with fine lines or dots. Let each piece dry before adding the next. This keeps the armor neat and solid.
Creating The Mask
The mask defines Deathstroke’s fierce look. Roll out a thin layer of clay for the base. Cut out eye holes carefully with a craft knife. Shape the mask’s sharp angles and smooth curves by hand. Add small ridges for detail around the eyes and mouth. Use a toothpick to create breathing holes or markings. Attach the mask firmly to the head and let it set.
Enhancing Weapons
Weapons complete the toy’s battle-ready feel. Sculpt the sword and gun with firm clay. Keep blades thin but strong by layering clay. Use a needle or pin to carve grooves and edges. Add grip texture on handles with tiny dots or lines. Attach weapons securely to the toy’s hands or holsters. Paint details later for a realistic effect.
Painting Techniques
Painting a Deathstroke toy requires smooth brush strokes and careful color layering. Focus on small details to make the figure look realistic and vibrant. Use basic colors like orange, black, and gray to match Deathstroke’s iconic armor.
Painting your Deathstroke toy can be a thrilling adventure, bringing the character to life with every brush stroke. Whether you’re a seasoned hobbyist or a beginner, mastering a few key techniques can make your DIY project stand out. Let’s dive into some essential painting techniques that will give your Deathstroke toy the dynamic look it deserves.Base Coating
Start with a solid foundation by applying a base coat. This layer sets the stage for all subsequent colors and details. Use a primer that matches the overall tone of Deathstroke’s costume, typically a dark blue or black. Spray primers work well for an even coat and dry quickly, allowing you to move onto more detailed work. Remember, a thin, even layer is better than a thick one that can obscure details. If you want a smoother finish, lightly sand the surface before priming.Detail Work
Detailing is where your Deathstroke toy gains personality. Use fine-tipped brushes for precision, focusing on the mask, armor, and weapons. Consider using acrylic paints for their versatility and ease of use. Mix colors to achieve the perfect shade for Deathstroke’s iconic orange and black costume. Highlight raised areas with a lighter shade to add depth and dimension. Don’t rush this process; patience is key to achieving a professional look.Weathering Effects
To give your toy a battle-worn appearance, apply weathering effects. This technique adds realism, as if Deathstroke has just stepped off the battlefield. Dry brushing is an effective method where you use a small amount of paint on the brush to highlight edges and raised details. You can also use a wash—a thinned-down paint mixture—to fill in crevices, enhancing shadows and textures. Be strategic in your application to prevent overdoing it. By using these techniques, you can transform a plain model into a masterpiece. What creative touches will you add to your Deathstroke toy?Assembly And Final Touches
Putting your Deathstroke toy together is where your creation really starts to come alive. This stage demands patience and precision as you join the pieces and add those final details that bring out the character’s unique vibe. You’ll find that the right assembly and finishing touches can transform simple parts into a striking figure ready for display or play.
Attaching Parts
Begin by carefully fitting each part together without forcing them. Check that joints align well to avoid damage or loose connections. Using a small amount of plastic-safe glue can help secure tricky spots, especially on smaller pieces like the mask or armor plates.
Keep extra pins or clips handy—they’re lifesavers if any parts feel unstable. Take your time here; a solid connection means your Deathstroke will hold up better in handling or posing.
Sealing The Figure
Sealing your toy protects your hard work and gives it a polished look. Choose a clear matte or satin sealant spray to avoid unwanted shine that can detract from the paint details. Spray evenly from about 12 inches away, applying several thin layers rather than one thick coat.
Let each layer dry completely before adding the next. This careful process prevents drips and ensures your figure stays vibrant and durable. Have you ever noticed how a sealed model lasts much longer without paint chipping? That’s the power of sealing.
Posing Tips
Think about how you want to display your Deathstroke. Dynamic poses enhance the figure’s personality and make it stand out. Try bending the knees slightly or angling the head to give a ready-for-action look.
Use small stands or display bases if needed to balance tricky poses. Remember, subtle shifts can make a big difference in how your toy communicates attitude. What pose will tell your Deathstroke’s story best on your shelf?
Troubleshooting Common Issues
Troubleshooting is a key part of any DIY project, especially when creating a detailed Deathstroke toy. You might face issues like paint smudges, broken parts, or stability problems. Handling these challenges quickly keeps your project on track and your satisfaction high.
Fixing Paint Smudges
Paint smudges can ruin the sharp look of your Deathstroke toy. If you catch the smudge early, gently wipe it off with a damp cloth before it dries. For dried smudges, use fine-grit sandpaper to smooth the area, then carefully repaint with a small brush.
Consider sealing your paint with a clear coat once dry to prevent future smudges. Have you tried using painter’s tape to protect areas you don’t want to paint? It’s a simple trick that saves a lot of cleanup time.
Repairing Broken Parts
Broken pieces can be frustrating but are fixable. Use super glue or plastic epoxy to bond small broken parts securely. Hold pieces together firmly until the glue sets to avoid weak joins.
If a part is missing, look for similar pieces from other toys or use modeling clay to recreate the missing detail. Have you ever replaced a broken weapon or accessory with a custom-made one? It adds a personal touch and solves the problem.
Improving Stability
Wobbly or unstable toys don’t stand well for display. Strengthen joints by applying a tiny bit of clear nail polish or glue to loose connections, but avoid overdoing it to keep articulation smooth.
Adding a small base or stand can dramatically improve stability. Try using a piece of sturdy cardboard or wood, then secure your toy with removable adhesive putty. How stable is your current setup? Sometimes a small adjustment makes a big difference.
Displaying Your Custom Figure
Displaying your custom Deathstroke toy is just as important as crafting it. A well-presented figure not only highlights your hard work but also brings the character to life in your space. How you showcase your creation can make a big difference in how others see and appreciate it.
Creating A Stand
A sturdy stand keeps your Deathstroke figure stable and upright, preventing accidental falls. You can use materials like acrylic sheets, small wooden blocks, or even LEGO pieces to build a base that fits the figure’s size.
Try adding a peg or clip that attaches to the figure’s feet or waist for extra support. Painting the stand in a dark color or matching Deathstroke’s palette helps the figure stand out without distractions.
Have you considered customizing the stand with decals or small props, like miniature weapons or a nameplate? These little touches can add personality and make your display unique.
Photography Tips
Taking great photos of your custom toy can help you share your work with others or document your progress. Use natural light when possible, as it reveals details better than harsh artificial lighting.
Set up a simple backdrop with solid colors or comic book art to enhance the figure’s theme. Try shooting from different angles to capture the best pose and highlight your custom paintwork and accessories.
Focus on the eyes and face—they are the most expressive parts of Deathstroke. If you have a smartphone, explore its macro mode or use a clip-on lens to capture close-up details.
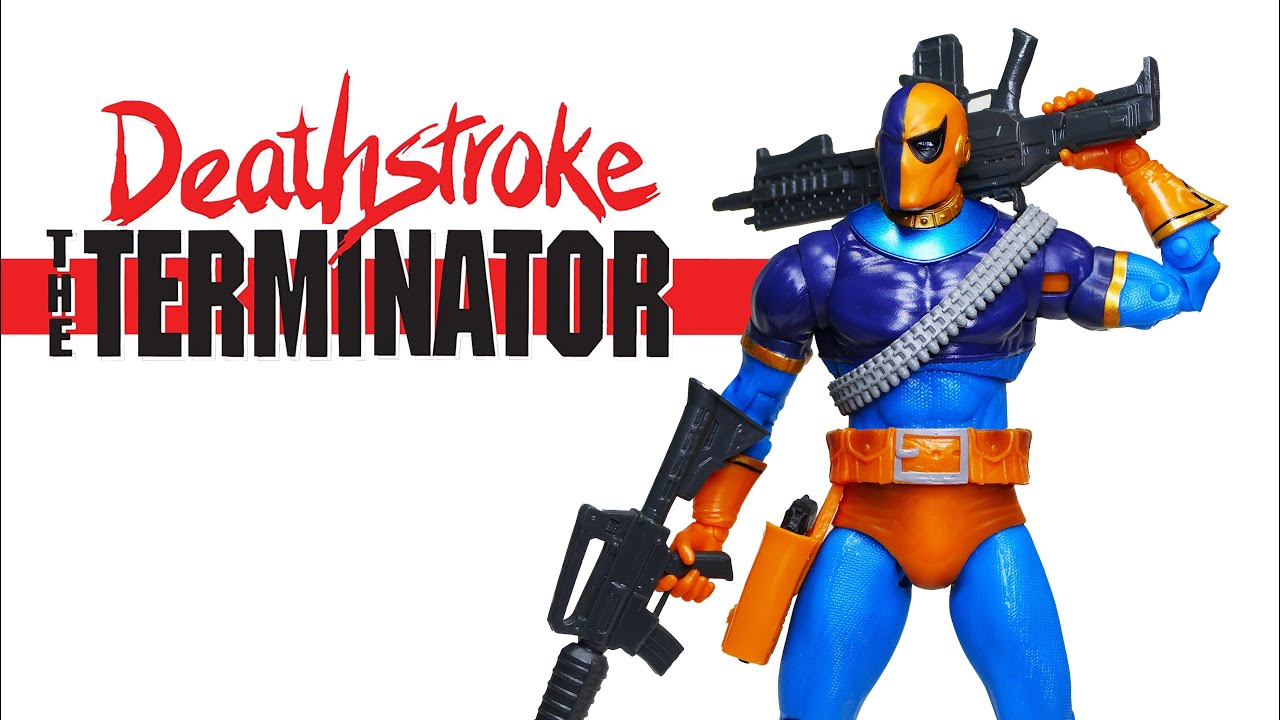
Credit: www.youtube.com
Frequently Asked Questions
What Materials Do I Need For A Deathstroke Toy Diy?
You need clay or foam, paint, brushes, glue, and small accessories. Use craft knives for shaping. These materials ensure durability and detail in your Deathstroke toy.
How Long Does It Take To Make A Deathstroke Toy Diy?
It typically takes 3 to 5 hours. Time varies based on complexity and drying times for paint and glue. Patience is key for a quality toy.
Can Beginners Create A Deathstroke Toy Diy Easily?
Yes, beginners can create it with basic crafting skills. Follow step-by-step instructions carefully. Start with simple shapes and gradually add details for best results.
How To Paint A Deathstroke Toy For Best Results?
Use acrylic paints for vibrant colors. Apply thin layers and let each dry before adding another. Detail the mask and armor accurately for authenticity.
Conclusion
Making your own Deathstroke toy can be fun and rewarding. You only need simple materials and a little time. Follow the steps carefully to create a cool figure. This DIY project helps you learn and enjoy crafting. Plus, you get a unique toy that shows your effort.
Try different colors or details to make it special. Keep practicing to improve your skills. Enjoy the process and share your creation with friends. Creating toys by hand feels great and builds creativity. Give it a try and see what you can make!


