Imagine having a pair of adorable cat plush toys that you made with your own hands. Wouldn’t it feel amazing to create something cute and personal, just for you or as a gift for someone special?
In this guide, you’ll learn exactly how to make couple cat plush toys step by step. No need to worry if you’re new to crafting—this tutorial is simple, fun, and perfect for anyone. By the end, you’ll have soft, charming cats that show your creativity and care.
Ready to start? Let’s dive in and bring your plush toy ideas to life!
Materials Needed
Gathering the right materials sets a strong foundation for your couple cat plush toys project. Choosing quality supplies not only makes the process smoother but also ensures your finished plushies feel soft and look adorable. Think about what you want your cats to express and select materials that help bring that vision to life.
Fabric Choices
Pick fabrics that feel soft and are easy to sew. Cotton, fleece, and felt are popular options because they hold shapes well and come in many colors. If you want a fluffy finish, consider minky fabric—it’s cozy but can be a bit tricky to work with if you’re new to sewing.
Don’t forget to think about durability. Plush toys get lots of hugs, so sturdy fabric keeps them looking great longer. Have you tried mixing textures? Combining smooth and fuzzy fabrics can add an interesting touch to your cats.
Tools And Accessories
Having the right tools makes your crafting experience enjoyable. You’ll need sharp fabric scissors, pins, and a sewing needle or sewing machine. A fabric marker or chalk helps mark your patterns clearly.
Buttons or safety eyes add personality to your cats’ faces, but make sure they’re securely attached if the plushies are for kids. You might also want a ruler or measuring tape to keep your shapes consistent. How precise do you want your cats to look? Small details can make a big difference.
Stuffing Options
Stuffing brings your plush cats to life by giving them shape and softness. Polyester fiberfill is the most common choice—it’s light, fluffy, and easy to work with. You can find it at most craft stores and it washes well.
If you prefer an eco-friendly option, look for natural stuffing like cotton or wool. Some crafters even use scraps of fabric to fill their toys, which adds weight and texture. What kind of feel do you want your plush cats to have—super squishy or firm and cuddly?
Designing Your Couple Cats
Designing your couple cat plush toys is a fun and creative part of the project. This step lets you bring your ideas to life before cutting any fabric. It helps you imagine how the cats will look side by side. You can plan their shapes, colors, and special features. Thoughtful design makes your plush toys unique and full of personality.
Sketching Your Cats
Begin by drawing simple sketches of each cat. Use basic shapes like circles and ovals for heads and bodies. Sketch different poses to see what fits best. Keep the lines light and easy to change. Focus on the size and position of ears, tails, and eyes. Sketching helps you visualize your couple cats clearly.
Choosing Colors And Patterns
Pick colors that match your vision for each cat. Consider soft pastels or bright tones depending on the mood. Mix solid colors with patterns like stripes or spots. Use contrasting colors for the two cats to make them stand out. Remember, color choice affects the toy’s charm and appeal.
Adding Personal Touches
Make your cats special with personal details. Add accessories like tiny scarves, bows, or glasses. Use embroidery to create unique facial expressions. Think about including initials or small symbols on their bodies. These touches make your couple cat plush toys truly yours.
Cutting And Preparing Fabric
Cutting and preparing the fabric is a crucial step in making your couple cat plush toys. This stage sets the foundation for how well your pieces will fit together during sewing. Taking your time here ensures cleaner seams and a more polished final product.
Creating Patterns
Start by drafting simple patterns on paper. Use basic shapes like ovals and circles to represent the cat’s body, head, and ears. You can adjust the size to match the scale you want for your plush toys.
Keep your patterns clear and easy to trace. I find that using cardstock or heavier paper helps prevent the patterns from bending while cutting fabric. Have you ever tried freehand cutting without patterns? It often leads to uneven pieces that don’t align well.
Cutting Fabric Pieces
Lay your fabric flat on a clean surface and pin the paper patterns securely on top. Use sharp fabric scissors for precise cuts. Dull scissors can fray the edges and make sewing difficult.
Cut slowly around the patterns, following the outlines exactly. If your plush cats have separate parts like paws or tails, cut those as individual pieces. This step demands patience—it’s tempting to rush, but accuracy here saves frustration later.
Marking Sewing Lines
Once cut, mark sewing lines on the fabric using tailor’s chalk or a washable fabric pen. These lines guide your stitches and ensure consistent seam allowances. A typical allowance is about ¼ inch from the edge.
Don’t forget to mark any special points like where the ears attach or where to leave gaps for stuffing. I learned that marking these details upfront prevents guesswork and makes sewing smoother. What’s your go-to method for marking fabric?

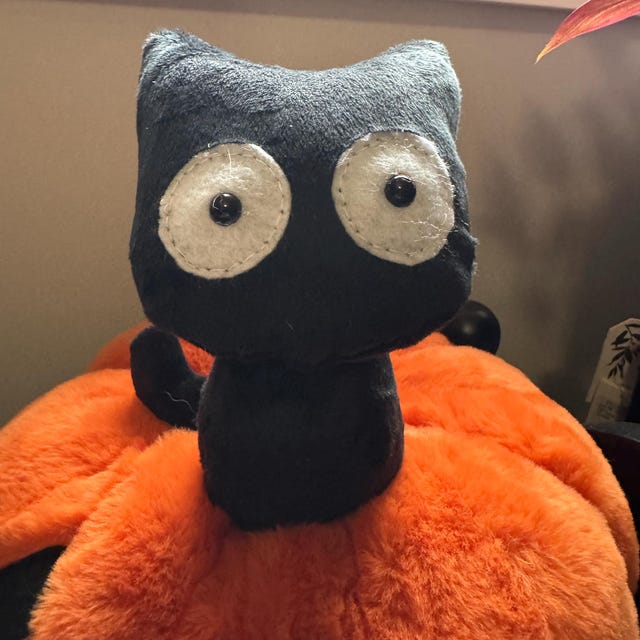
Credit: m.youtube.com
Sewing Steps
Creating couple cat plush toys is a rewarding DIY project. Follow these sewing steps to bring your plush felines to life. With a few simple materials and a little patience, you can craft adorable cat companions.
Assembling Cat Bodies
Start by cutting out fabric pieces for the cat bodies. Use your chosen pattern to ensure each piece is uniform. Align the fabric pieces, right sides together, and pin them in place. Sew along the edges, leaving a small gap at the bottom. This gap will be used to turn the fabric inside out. Once sewn, carefully turn the fabric, revealing the cat’s body shape. Stuff the body with soft filling until it feels plump and cuddly. Finally, sew the gap closed with a neat hand stitch.
Attaching Ears And Tails
Cut out ear and tail shapes from your fabric. Fold each ear piece in half, stitching along the curved edge. Turn the ears right side out and attach them to the head section. Position them symmetrically for a balanced look. For the tail, sew the fabric pieces together, leaving one end open. Turn the tail inside out and stuff lightly. Attach the tail to the back of the cat’s body, securing it with a few sturdy stitches.
Sewing Facial Features
Use embroidery thread to create the cat’s facial features. Start with the eyes, using small, tight stitches to form circles. Add a nose with a simple triangle stitch. For the mouth, a gentle curve beneath the nose gives a friendly expression. Whiskers can be added with long, straight stitches. These small details bring personality to your plush toy. Ensure each feature is symmetrical for a harmonious appearance.
Stuffing And Shaping
Stuffing and shaping your couple cat plush toys bring them to life. This stage transforms flat fabric pieces into cuddly companions. It’s where your careful sewing meets the tactile joy of plush making.
Filling The Plush Toys
Choose a soft, hypoallergenic polyester fiberfill for a smooth and fluffy feel. Start by pushing small amounts into the limbs, ears, and tail to avoid lumps. Use a chopstick or the blunt end of a pencil to reach tight spots and spread the stuffing evenly.
Don’t overfill; too much stuffing makes the toy stiff and hard to cuddle. Underfill, and your cat plush will look floppy and lose its shape quickly. Find a balance that feels soft yet firm to the touch.
Adjusting Shape And Firmness
After stuffing, gently squeeze and shape the plush toy with your hands. Check for any uneven areas or lumps and redistribute the stuffing as needed. Pay attention to the head and body proportions to keep your couple cats looking charming and balanced.
Ask yourself: does the plush toy hold its shape without being too hard? If it feels too firm, remove a bit of stuffing. If it’s too soft, add more in small amounts. This fine-tuning ensures your plush cats have the perfect cuddle factor.
Closing The Seams
Once you’re satisfied with the shape, it’s time to close the seams. Use a ladder stitch for an invisible finish that keeps the stuffing secure. Take your time sewing; neat stitches make your plush toys look professional and durable.
If you’re new to hand sewing, practice the ladder stitch on scrap fabric first. Remember, a well-closed seam protects your plush cats from losing stuffing after lots of hugs. How would you like your plush companions to last for years?
Finishing Touches
The finishing touches bring your couple cat plush toys to life. They add character and charm. This final stage lets your creativity shine. Small details make a big difference. Focus on making each toy unique and lovable.
Adding Eyes And Nose
Choose eyes and nose that match your plush’s style. Use safety eyes for a polished look. Sew on buttons or felt pieces for a softer feel. Attach each piece securely with strong thread. Position eyes evenly for a balanced face. The nose should sit just below the eyes. Use small stitches to avoid loose parts. These features give your plush its personality.
Decorating With Accessories
Accessories add fun and personality to your cats. Try tiny scarves, bows, or collars. Use ribbon, lace, or fabric scraps for decoration. Sew or glue accessories carefully to avoid damage. Keep accessories small and lightweight. Avoid sharp or rough materials. Think about matching colors for a cute couple look. Accessories tell a story and create charm.
Final Quality Check
Inspect your plush toys closely. Check all seams for loose threads or holes. Ensure eyes and nose are firmly attached. Test accessories for secure placement. Gently squeeze the plush to confirm stuffing is even. Fix any weak points with extra stitching. Smooth out fabric wrinkles and fluff the toy. This step ensures durability and a neat finish.
Tips For Customization
Customizing your couple cat plush toys makes each one truly special. It lets you add your own style and personality. Small details can change the look and feel of the toys. Focus on textures, colors, and small decorative touches. These tips help you create unique plushies that match your vision perfectly.
Mixing Fabrics And Textures
Try using different fabrics for various parts of the plush toys. Soft fleece works well for the body. Velvet or corduroy can add texture to the ears or tail. Mixing smooth and rough materials gives the toy more depth. It also makes the plush more interesting to touch. Choose colors that complement each other for a balanced look.
Personalizing With Embroidery
Embroidery adds a personal touch to your plush toys. You can sew names, initials, or cute patterns on the fabric. Use simple stitches like backstitch or satin stitch for clean lines. Embroider small details like whiskers, eyes, or little hearts. Pick thread colors that stand out but still match the plush. This technique makes each toy one of a kind.
Creating Matching Outfits
Design outfits that fit the couple theme perfectly. Use the same fabric or color palette for both cats’ clothes. Simple shirts, scarves, or hats work great. Add small accessories like buttons or ribbons to match. Keep the outfits easy to put on and take off. Matching clothes bring the couple plush toys closer together visually and emotionally.
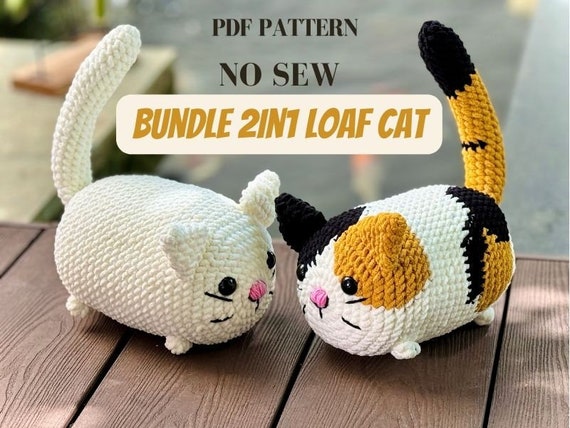
Credit: www.etsy.com
Care And Maintenance
Taking good care of your couple cat plush toys keeps them soft and lovely. Regular care helps your handmade toys last longer. Simple steps protect the fabric and colors. Avoid rough handling to keep their shape intact. Follow the tips below to maintain your plush friends.
Cleaning Your Plush Toys
Remove dust with a soft brush or cloth. Spot clean stains using mild soap and water. Use a damp cloth to gently rub the area. Avoid soaking the plush to prevent damage. Air dry completely before use to stop mold growth.
Repairing Small Damages
Fix loose threads by sewing with a needle and matching thread. Patch small holes with fabric glue or a tiny fabric piece. Replace missing eyes or noses with craft buttons or beads. Check seams often to catch damage early and repair it fast.
Storage Suggestions
Store your plush toys in a dry, cool place. Keep them away from direct sunlight to avoid fading. Use breathable fabric bags for protection against dust. Avoid plastic bags that trap moisture and cause mildew. Arrange toys neatly to keep their shape and avoid squashing.
Credit: www.etsy.com
Frequently Asked Questions
What Materials Do I Need For Couple Cat Plush Toys?
You need fabric, stuffing, thread, needles, scissors, and fabric markers. Choose soft fabric like fleece or felt for easy sewing and a cozy feel.
How Long Does Making Couple Cat Plush Toys Take?
It typically takes 2 to 4 hours. Time depends on your sewing skills and the complexity of the design.
Can Beginners Make Couple Cat Plush Toys Easily?
Yes, beginners can follow simple patterns and step-by-step instructions. Start with basic stitches and gradually add details.
How Do I Customize Couple Cat Plush Toys?
Use fabric markers, different fabrics, and add accessories like buttons or ribbons. Personalize colors and facial expressions for uniqueness.
Conclusion
Making couple cat plush toys is fun and rewarding. You create something unique with your own hands. Each step brings you closer to a cute, soft toy. Use simple materials and follow easy instructions. Enjoy the process, and don’t rush.
These plush toys can be great gifts or decorations. Keep practicing to improve your skills. Crafting brings joy and a sense of pride. Try different colors and styles next time. Happy sewing and enjoy your handmade couple cat plush toys!