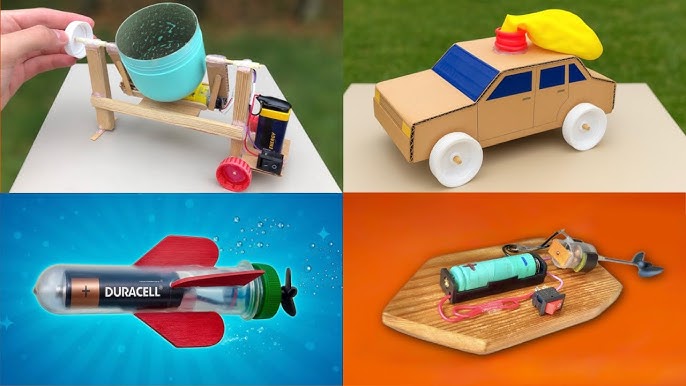
Are you looking for a fun and creative way to keep your kids entertained? Making a DIY toy is easier than you think, and it can turn into a memorable experience for you and your little ones.
Imagine turning simple materials around your home into something exciting that sparks joy and imagination. You’ll discover easy steps to create your own toy, saving money while adding a personal touch. Ready to bring out your creativity and make something special?
Let’s dive in and start crafting!
Choosing The Right Materials
Choosing the right materials is a crucial step when making a DIY toy. The materials you pick affect not only the toy’s look and feel but also its safety and durability. Think about who will use the toy and how it will be played with to guide your selection process.
Safe And Non-toxic Options
Your priority should be safety. Kids often put toys in their mouths, so avoid materials with harmful chemicals. Look for labels that say “non-toxic” or “child-safe” to be sure.
Natural materials like untreated wood, organic cotton fabric, and food-grade silicone are excellent choices. They feel good to touch and won’t cause allergic reactions.
Have you checked if your glue or paint contains any toxic substances? Opt for water-based, non-toxic adhesives and paints to keep playtime safe.
Affordable And Accessible Supplies
Making toys doesn’t have to break the bank. You can find many affordable supplies at local craft stores or online. Items like felt sheets, buttons, and yarn are budget-friendly and easy to work with.
Keep it simple with materials you already have at home. Sometimes, a plain cardboard box and some markers can spark endless creativity.
Do you have a stash of unused craft supplies? These can be perfect for DIY projects and save you money.
Recycled And Upcycled Ideas
Using recycled materials is both eco-friendly and creative. Old t-shirts can become soft doll clothes, and bottle caps can turn into colorful game pieces.
Look around your home for items that are about to be thrown away but still have potential. This approach gives your toy a unique story and reduces waste.
Have you ever transformed something old into a new favorite toy? It’s a rewarding experience that adds meaning to your project.

Credit: www.youtube.com
Simple Toy Ideas For Beginners
Starting with simple toy ideas is the best way to build confidence in DIY projects. You don’t need fancy materials or advanced skills to create toys that spark joy. The key is to use everyday items and add your personal touch, making the process fun and rewarding.
Paper And Cardboard Creations
Paper and cardboard are incredibly versatile and easy to work with. You can craft everything from colorful paper airplanes to intricate cardboard castles.
Try making a pop-up greeting card or a miniature dollhouse using recycled boxes. These projects teach you cutting, folding, and assembling skills while letting your creativity shine.
Have you ever thought about how simple shapes can turn into exciting toys? Start with basic designs and gradually add more details as you improve.
Sock Puppets And Plush Toys
Sock puppets are a fantastic entry point into soft toy making. All you need is a clean sock, some buttons or felt for eyes, and a little glue or stitching.
Turn mismatched socks into quirky characters by adding yarn hair and fabric scraps for clothes. This activity helps you practice hand-eye coordination and introduces basic sewing.
Imagine the joy of bringing a puppet to life with your own voice and stories. It’s a simple way to make playtime interactive and personal.
Diy Puzzle And Games
Creating your own puzzles and games can be surprisingly easy and fun. Cut pictures from magazines or print simple patterns to form puzzle pieces.
Board games can be made using cardboard for the base and paper for cards or tokens. You can even invent your own rules to suit your style.
Do you enjoy solving puzzles? Making one yourself gives you insight into design and problem-solving, adding a new layer of fun to play.
Step-by-step Making Process
Creating a DIY toy is a fun and rewarding project. Following a clear process helps you build a toy with ease. Each stage is important to make the toy safe and enjoyable.
This step-by-step guide shows how to gather tools, cut materials, and assemble your toy. Simple instructions make the process easy to follow.
Gathering Tools And Workspace Setup
Start by collecting all the tools you need. Common tools include scissors, glue, paint, and a ruler. Choose safe, child-friendly materials.
Next, set up a clean workspace with good lighting. Use a flat surface to work on. Keep all tools within reach to avoid interruptions.
Cutting And Shaping Materials
Use scissors or a craft knife to cut the materials. Follow your design carefully. Take your time to make smooth edges.
Shape the pieces as needed. Sandpaper can help smooth rough areas. This step ensures the toy is safe and looks neat.
Assembling And Decorating
Start assembling the parts using glue or small fasteners. Hold pieces together until the glue dries. Make sure all parts fit well.
Decorate the toy with paint, stickers, or markers. Choose bright colors and fun patterns. Let the decorations dry completely before play.

Credit: www.youtube.com
Encouraging Creativity And Customization
Making a DIY toy is more than just a fun activity—it’s a chance to unleash your creativity and make something truly unique. When you encourage creativity and customization, each toy becomes a work of art that reflects the builder’s personality. It’s an opportunity to teach kids, and even adults, that toys don’t have to come from a store to be special.
Adding Colors And Patterns
The simplest way to start customizing your DIY toy is by adding colors and patterns. You can use paint, markers, or even colored tape to create vibrant designs. Think about what colors make you happy and use them to bring your toy to life.
Involve kids in choosing their favorite patterns, whether it’s stripes, polka dots, or something abstract. This decision-making process stimulates their creative thinking. Plus, the joy of seeing their ideas come to life is unmatched.
Incorporating Personal Touches
Adding personal touches makes a DIY toy truly special. Consider adding initials, a favorite number, or even a small drawing. These small details make the toy meaningful and unique.
You can also include elements that reflect your hobbies or interests. If you love nature, add leaves or small twigs. Maybe a button from an old shirt brings back fond memories. What little detail can make your toy a cherished keepsake?
Using Mixed Media Techniques
Mixing different materials can elevate the design of your DIY toy. Combine paper, fabric, and even small metal pieces for a textured look. The contrast between materials adds depth and interest.
Think about using recycled materials to add an eco-friendly twist. For instance, old magazines can be cut into shapes and glued onto the toy. This not only reduces waste but also encourages thinking outside the box.
What unique combination of materials can you explore to make your toy stand out? Let your imagination guide you as you transform simple supplies into a masterpiece.
Safety Tips For Diy Toys
Creating DIY toys is a fun way to engage with children and spark their creativity. Safety must always be a top priority during the process. Careful planning and attention prevent accidents and ensure toys remain safe for play. Follow these essential safety tips to keep DIY toys child-friendly and secure.
Avoiding Small Parts For Young Kids
Small parts pose a choking hazard for young children. Avoid using beads, buttons, or tiny pieces that can easily detach. Choose larger components that cannot fit into a child’s mouth. Inspect toys regularly to ensure no parts have come loose. This simple step lowers the risk of accidental swallowing.
Non-toxic Paints And Adhesives
Use only non-toxic paints and glues designed for children’s toys. These materials reduce exposure to harmful chemicals. Check labels carefully before buying any craft supplies. Water-based paints and natural adhesives are safe choices. Allow all painted or glued surfaces to dry completely before giving toys to kids.
Supervision And Age Appropriateness
Supervise children during both toy-making and playtime. Match the toy’s complexity to the child’s age and abilities. Younger children need simpler, sturdier toys without loose parts. Older kids can handle projects with more detail and small pieces. Supervision helps prevent unsafe use and encourages safe play habits.
Benefits Of Making Your Own Toys
Making your own toys offers many benefits beyond just saving money. It gives children a chance to learn and grow in fun ways. Creating toys at home also helps families spend quality time together. These benefits make DIY toys a wonderful choice for parents and kids alike.
Enhancing Motor Skills And Imagination
Building toys by hand helps improve fine motor skills. Children practice using their hands carefully and with control. This kind of activity boosts hand-eye coordination. It also encourages creativity as kids imagine new ways to play. DIY toys let children explore their ideas freely and inventively.
Promoting Sustainable Practices
Making toys at home reduces waste and plastic use. Parents can use recycled or natural materials easily found around the house. This lowers the impact on the environment. Teaching children about recycling and reusing shows them how to care for nature. Sustainable toy making supports a cleaner, greener future.
Strengthening Family Bonds
Creating toys together builds strong family connections. Parents and children share fun moments and learn from each other. Working on projects side by side creates lasting memories. These experiences improve communication and teamwork within the family. DIY toy making turns playtime into quality family time.

Credit: www.youtube.com
Frequently Asked Questions
What Materials Are Needed For A Diy Toy?
Common materials include cardboard, fabric, glue, scissors, and paint. Use safe, non-toxic supplies suitable for children’s use and easy to handle.
How Can I Make A Safe Diy Toy For Kids?
Ensure all parts are securely attached. Avoid small pieces that pose choking hazards. Use non-toxic materials and smooth edges.
What Are Simple Diy Toys For Beginners?
Start with easy projects like paper puppets, sock puppets, or cardboard cars. These require minimal materials and basic crafting skills.
How Long Does It Take To Make A Diy Toy?
Most DIY toys can be completed within 30 minutes to 2 hours, depending on complexity and materials used.
Conclusion
Making a DIY toy is fun and simple. It saves money and sparks creativity. Kids enjoy playing with toys they helped create. Use safe materials and keep instructions clear. Try different ideas to find what works best. Sharing this activity brings family and friends closer.
Start your DIY toy project today and enjoy the process!


