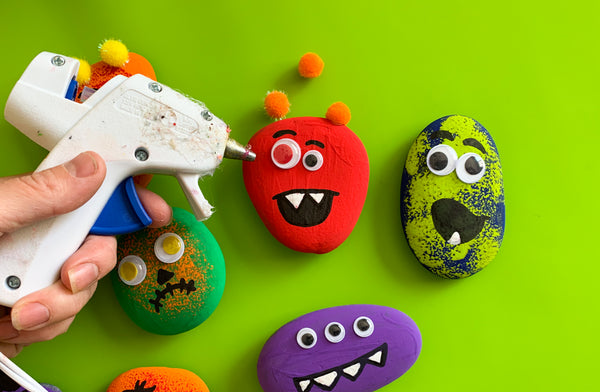
Are you tired of losing your little toys or struggling to keep them organized? Imagine a clever way to hide those tiny treasures right in plain sight.
By using DIY rocks, you can create secret spots that only you know about. This simple trick not only keeps your toys safe but also adds a fun twist to your space. Keep reading, and you’ll discover easy steps to make your own hidden toy rocks that blend perfectly with your surroundings.
You won’t believe how quick and effective this idea is!
Choosing The Right Rocks
Choosing the right rocks plays a key role in hiding little toys successfully. The rocks must look natural and blend well with the surroundings. They should also provide enough space to hide toys inside or beneath them. Picking the right rock type, size, and shape makes the project easier and more fun.
Types Of Rocks To Use
Look for rocks that are common in your area. Smooth river rocks and flat stones work well. They are easy to paint and hide toys under. Avoid very rough or sharp rocks. They might damage the toys or be hard to work with.
- River rocks: smooth and round, perfect for hiding small toys
- Flat stones: easy to stack and cover toys underneath
- Slate rocks: thin and flat, good for creating secret compartments
- Lightweight rocks: easier to move and handle during the project
Selecting Size And Shape
The rock size depends on the toy you want to hide. Bigger toys need larger rocks or groups of rocks. Choose shapes that can create natural hiding spots. Look for rocks with hollow spaces or crevices.
Flat and wide rocks work well as covers. Round rocks are good for camouflaging toys inside. Match the rocks to the outdoor area to keep the hiding spot secret.

Credit: www.amazon.com
Preparing Rocks For Hiding Toys
Preparing rocks for hiding little toys is a crucial part of your DIY project. It ensures that the toys stay safe and the rocks look natural. Taking time with this step makes the final result both fun and functional.
Cleaning And Drying
Start by selecting smooth, solid rocks that are large enough to hold your toys. Clean them thoroughly to remove dirt, dust, and loose debris. Use a brush and warm soapy water to scrub the surface well.
Rinse the rocks completely and let them dry in the sun or a warm, airy spot. Moisture inside the rock could cause mold or damage your toys later. Have you noticed how much cleaner rocks look after a good wash? It really makes a difference.
Creating Hollow Spaces
Next, create a hollow space inside the rock where you can hide the toy. You can carefully break the rock into two halves using a hammer and chisel, or find naturally hollow rocks.
If breaking the rock is tricky, try using softer stones like pumice or sandstone. Carve out a cavity large enough for your toy with a small chisel or rotary tool. Make sure the edges fit back together snugly.
Think about the size and shape of your toy before hollowing. Does the space allow you to hide it without forcing or damaging the rock? Proper hollowing makes your DIY rocks not just clever but also durable.
Diy Techniques To Hide Toys
Hiding little toys inside DIY rocks can be a fun and creative way to surprise friends or add a playful touch to your garden or home decor. The key is to make the toys blend seamlessly with the rock’s natural look while keeping them easy to find for those in the know. Here are some practical techniques to help you master this craft.
Using Clay Or Putty
Start by molding air-dry clay or epoxy putty around the toy. This material is easy to shape and hardens to a sturdy finish that mimics natural rock textures. Press the toy gently into the clay, then cover it completely, leaving no visible edges.
You can carve or texture the clay surface to match the roughness or smoothness of real rocks. The clay also gives you control over the size and shape of the final piece. Have you tried blending different clay colors to match your garden stones?
Painting And Camouflaging
Once your clay or putty is dry, use acrylic paints to make your DIY rock look authentic. Use a mix of grays, browns, and greens to replicate moss, dirt, or lichen. Layer your colors with a sponge or dry brush to create depth and natural variations.
Don’t forget to seal your work with a matte varnish to protect the paint from weather damage if you plan to place it outside. Think about the environment where the rock will sit—what colors and textures will help it blend perfectly?
Adding Decorative Elements
Incorporate small pebbles, sand, or tiny twigs onto the surface before the clay or putty fully dries. These details add realism and help disguise the toy further. You can even glue dried moss or fake plants to enhance the natural look.
These elements not only improve camouflage but also make each rock unique. What small touches can you add that reflect your local environment and make your hidden toys truly invisible?
Safe And Durable Sealing Methods
Sealing little toys inside DIY rocks requires strong, safe methods to keep them hidden and protected. Use waterproof glue or epoxy for a durable, long-lasting seal. This prevents moisture and dirt from damaging the toys while maintaining the rock’s natural look.
Safe and durable sealing methods ensure little toys remain secure inside DIY rocks. By using effective techniques, toys stay safe from moisture and accidental spills. These methods also extend the life of the DIY rocks, making them ideal for play and display.Using Waterproof Sealants
Waterproof sealants keep moisture out effectively. Choose non-toxic options for child safety. Apply a thin layer around the toy inside the rock. Let it dry completely before handling. This creates a barrier that protects the toy from water. Always follow the product instructions for best results.Ensuring Secure Closures
Secure closures are key to keeping toys safe. Use strong adhesive to join rock halves. Epoxy glue works well for a tight bond. Apply it evenly on the edges. Press the halves together firmly. Allow sufficient time for the glue to cure. Check the closure by gently pulling the halves apart. A secure closure will not give way easily.Creative Toy Hiding Ideas
Creative toy hiding ideas make DIY rocks fun and surprising. These ideas keep little toys safe and hidden. Kids love finding toys inside these rock creations. Use different toy types to keep the excitement alive. Each toy fits differently into the rock design. This section explores smart ways to hide toys inside rocks.
Miniature Animal Figures
Miniature animal figures fit perfectly inside DIY rocks. Their small size allows easy hiding in crevices. Choose animals like tiny frogs, birds, or insects. Paint the rock to match natural colors. This helps the figures blend in well. Kids enjoy spotting these hidden creatures during play. Use lightweight figures to avoid breaking the rock.
Tiny Cars And Vehicles
Tiny cars and vehicles add a playful twist to DIY rocks. Pick small cars or trucks that fit inside hollow rocks. Create a small opening to slide them in safely. Decorate the rock to look like a road or garage. This makes finding the toy more exciting. Use smooth plastic cars for easy placement and removal. It sparks imagination for car races and adventures.
Small Puzzle Pieces
Small puzzle pieces create a unique hiding challenge in DIY rocks. Choose pieces that are colorful and interesting. Hide them in hollow sections or cavities inside the rock. Kids can search and collect these pieces for puzzle fun. Paint the outside of the rock to hide the puzzle clues. This idea combines play and discovery in one activity. It encourages problem-solving and creativity.

Credit: rhythmsofplay.com
Tips For Making It Kid-friendly
Making DIY rocks that hide little toys can be a fun project for kids, but safety and ease of use must come first. You want your creations to spark joy without causing frustration or harm. These tips will help you create kid-friendly hiding spots that children can enjoy and explore safely.
Non-toxic Materials
Always choose non-toxic materials to keep your kids safe. Look for paint, glue, and sealants labeled as child-safe or non-toxic. Avoid harsh chemicals that can cause allergic reactions or irritate skin.
Natural clay or homemade salt dough are great options for crafting the rocks themselves. They’re easy to shape, safe to handle, and you can bake or air-dry them at home. Have you checked the labels on your craft supplies lately to ensure they’re safe for little hands?
Easy Access Designs
Design your rocks so kids can easily open and close them to find the hidden toys. Consider creating simple hinged lids or removable tops that don’t require force or tools. This keeps the fun going without frustration.
Try using magnets or Velcro strips to secure the opening. These options are easy for small hands to manage and prevent pieces from getting lost. You could even involve your child in deciding how the rock opens—this makes the project even more exciting and interactive.
Displaying And Using Diy Toy Rocks
Displaying and using DIY toy rocks opens up fun and creative ways to keep little toys organized and part of everyday play. These rocks can blend into your home or yard while hiding surprises that kids will love discovering. You don’t just keep toys out of sight—you turn them into part of the game and the decor.
Organizing In Play Areas
Use DIY toy rocks to tidy up play spaces without making cleanup a chore. Arrange the rocks on shelves or in baskets where kids can easily find and return their hidden toys.
Try grouping rocks by color or size to create a simple sorting system that helps kids learn while they play. This makes it easier to spot missing toys and keeps the area looking neat.
Have you noticed how kids are more likely to put things away when it feels like a game? Turning organization into a treasure hunt with these rocks can boost their participation and responsibility.
Incorporating In Outdoor Games
Bring your DIY toy rocks outside for exciting backyard adventures. Hide the rocks around your garden or yard and challenge kids to find the toys inside.
You can create themed hunts, like a pirate treasure search or a nature explorer quest, using the rocks as secret stashes. This adds an extra layer of excitement to outdoor play.
Think about adding small rewards or clues inside the rocks to keep the hunt engaging. What new game could you invent with these hidden surprises waiting to be found?

Credit: www.reddit.com
Frequently Asked Questions
How Do I Make Diy Rocks For Hiding Toys?
To make DIY rocks, use air-dry clay or papier-mâché. Shape them like natural rocks, then paint with earthy colors. Once dry, place small toys inside hollow sections before sealing.
What Types Of Little Toys Work Best Inside Diy Rocks?
Small, lightweight toys like miniature figures, plastic animals, or tiny cars work best. Avoid heavy or bulky items that may break the rock’s shape or be visible.
How Can I Ensure Toys Stay Hidden In Diy Rocks?
Create a hollow cavity inside the rock to place toys. Seal the opening with matching paint or clay. Camouflage the surface with natural textures to blend in.
Are Diy Rocks Safe For Children To Play With?
Yes, if made from non-toxic materials and sealed properly. Ensure no sharp edges or small parts can detach. Supervise young children during play for added safety.
Conclusion
Hiding little toys in DIY rocks adds fun and surprise to playtime. You can create unique rocks with simple materials at home. This project lets kids explore creativity and nature together. Small toys stay safe and hidden inside the rocks.
Try different shapes and colors for variety. This idea also makes great gifts or decorations. Keep practicing to improve your crafting skills. Enjoy making and hiding toys in your own DIY rocks. It’s a simple, fun way to bring joy and mystery outdoors.


