
Are you ready to turn your plain vinyl toy into a unique masterpiece? Painting your own DIY vinyl toy is a fun and creative way to express yourself.
Whether you want to add vibrant colors, cool designs, or personal touches, this guide will show you simple steps to get the perfect result. You don’t need to be an expert to make your toy stand out. Keep reading, and you’ll learn easy tips that will help your vinyl toy look amazing and truly one of a kind.
Let’s bring your creativity to life!
Choosing The Right Vinyl Toy
Choosing the right vinyl toy is a key step before painting. It affects how your final design looks and lasts. Picking the best toy can make painting easier and more fun. Consider the material, size, and shape for a smooth painting experience.
Types Of Vinyl Toys
Vinyl toys come in many forms. Some are soft and flexible, while others are hard and solid. Soft vinyl is easier to paint but may need special paints. Hard vinyl holds paint well and shows details clearly. Popular types include blank DIY toys, collectible figures, and designer art toys. Choose one that fits your painting style and skill level.
Selecting A Quality Base
Look for toys made with smooth surfaces. Avoid toys with rough or sticky finishes. A clean, even surface helps paint stick better. Check for any defects like bubbles or cracks. These can ruin your work. Quality vinyl toys give a better result and last longer after painting.
Considering Toy Size And Shape
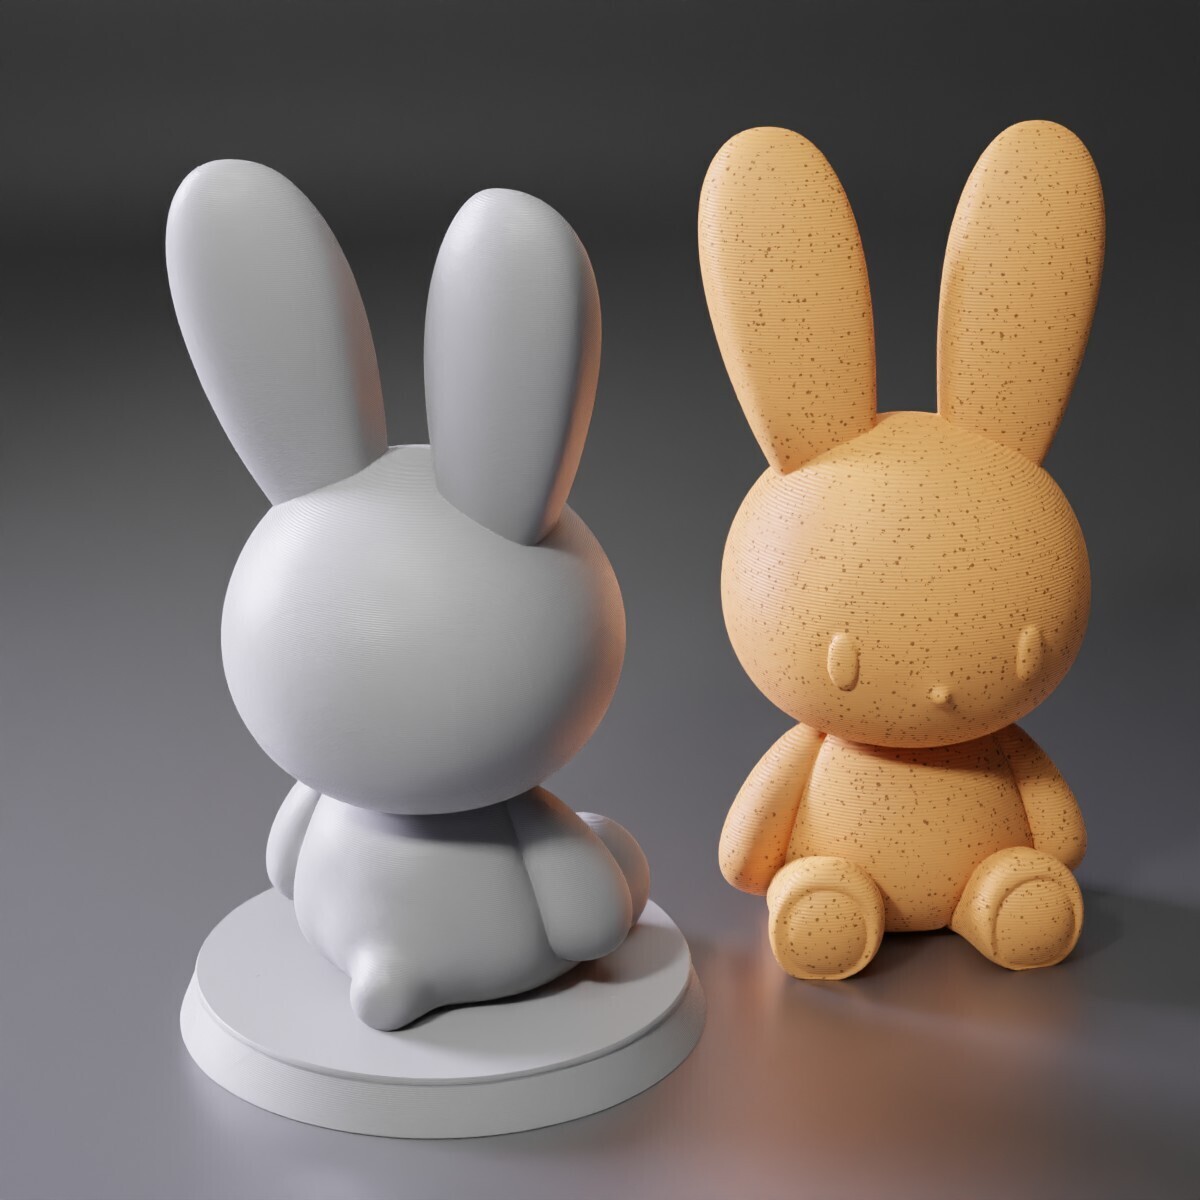
Size matters for painting details. Small toys need fine brushes and steady hands. Larger toys allow more room for creativity. Shape affects how easy it is to reach all areas. Simple shapes are easier for beginners. Complex shapes need more time and skill. Pick a size and shape that matches your comfort level.
Credit: cults3d.com
Essential Tools And Materials
Painting a DIY vinyl toy requires the right tools and materials. Using quality supplies helps achieve smooth, vibrant results. It also makes the painting process easier and more enjoyable.
Gathering essential items before starting saves time and prevents frustration. Prepare your workspace with good lighting and ventilation for the best experience.
Paint Types And Brands
Choose paints made for vinyl or plastic surfaces. Acrylic paints work well because they dry fast and stick firmly. Look for brands known for quality and color variety.
- Vallejo Model Color – popular for miniatures and toys
- Liquitex Basics Acrylic – affordable and reliable
- Angelus Leather Paint – flexible and durable on vinyl
- Citadel Paints – vibrant colors and smooth coverage
Brushes And Airbrush Equipment
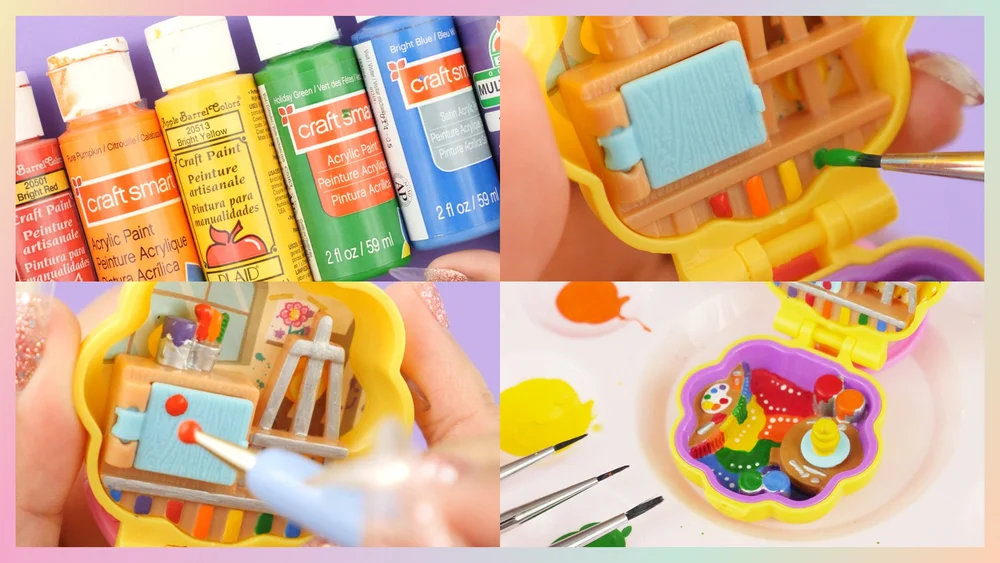
Brushes come in many sizes and shapes. Use small, fine brushes for details and medium ones for larger areas. Synthetic brushes hold acrylic paint well.
An airbrush offers smooth, even layers. It works great for base coats and gradients. Invest in a basic airbrush kit if you want professional finishes.
- Round detail brushes (sizes 0 to 2)
- Flat brushes for broader strokes
- Airbrush with compressor and cleaning tools
Primers And Sealants
Apply primer to help paint stick better and last longer. Use spray primers designed for vinyl. They create a smooth, even surface.
Sealants protect your paint from scratches and fading. Choose matte, satin, or gloss finishes depending on your desired look. Spray sealants give an even coat without brush marks.
- Tamiya Surface Primer – fine and smooth
- Rust-Oleum Painter’s Touch Primer – widely available
- Testors Dullcote or Gloss Coat for sealing
- Mr. Hobby Top Coat – clear and durable
Preparing The Toy For Painting
Getting your vinyl toy ready for painting is a crucial step that can make or break your project. Skipping prep work often leads to paint peeling or uneven finishes, which is frustrating after all your effort. Taking time to properly clean, sand, and prime your toy sets a strong foundation for vibrant and lasting results.
Cleaning And Removing Residue
Start by thoroughly cleaning your vinyl toy to remove dust, oils, and factory residues. Use warm water with a mild soap and a soft cloth or toothbrush to reach all the crevices. Avoid harsh chemicals that might damage the vinyl surface.
After washing, rinse well and let the toy dry completely. Have you noticed how even a tiny bit of grease can cause paint to peel? That’s why this step is non-negotiable.
Sanding And Surface Prep
Once your toy is clean and dry, gently sand the surface with fine-grit sandpaper (around 400-600 grit). This creates tiny scratches that help the paint stick better. Focus on glossy areas and smooth spots that may resist paint adhesion.
Be careful not to over-sand; you just want to roughen the surface, not damage the toy’s details. Feel the texture with your fingertips—does it feel slightly rough but not scratched deep? That’s the perfect sanding.
Applying Primer
Applying a primer designed for vinyl is a game-changer. It seals the surface and enhances paint adhesion, ensuring your colors stay vibrant and don’t chip easily. Spray primers offer an even coat and are easier to apply on complex shapes.
Make sure to apply thin, even layers and let each coat dry fully before adding the next. Have you ever rushed this step and ended up with uneven paint? Taking your time here saves headaches later.

Credit: makezine.com
Techniques For Painting Vinyl Toys
Painting vinyl toys requires specific techniques to achieve a smooth and vibrant finish. Each step builds on the last, ensuring durability and visual appeal. Understanding these techniques helps bring your DIY vinyl toy to life with color and detail.
Base Coating Tips
Start with a clean, dry surface to help paint stick well. Use a primer made for vinyl to create a smooth base. Apply thin, even layers to avoid drips. Let each layer dry completely before adding the next. Use spray primers for quick coverage or brush-on primers for more control.
Layering And Blending Colors
Apply colors in thin layers for better control and depth. Allow each layer to dry to prevent smudging. Blend colors by lightly brushing wet paint edges together. Use soft brushes or sponges for smooth transitions. Build colors gradually to achieve the desired shade and effect.
Detailing And Fine Lines
Use fine-tipped brushes for small details and sharp lines. Steady your hand by resting it on a surface. Paint slowly to keep lines clean and precise. For tiny dots or accents, use toothpicks or fine markers made for vinyl. Seal detailed areas with a clear coat to protect your work.
Using Airbrush For Smooth Finish
Using an airbrush to paint your DIY vinyl toy can give you a smooth, professional-looking finish that brush strokes simply can’t match. The airbrush sprays a fine mist of paint, allowing you to build up even layers and achieve subtle shading effects. It might seem tricky at first, but mastering a few key techniques will have you creating flawless custom toys in no time.
Setting Up Airbrush Equipment
Start by assembling your airbrush and compressor carefully. Connect the air hose to both the airbrush and the compressor, and make sure all fittings are tight to avoid leaks. Choose a nozzle size that fits your project—smaller nozzles (0.2-0.3mm) work great for fine details, while larger ones cover bigger areas quickly.
Use a clean cup or jar to mix your paint with the right thinner—too thick paint clogs the airbrush; too thin makes it runny. Test your setup on a scrap surface to get comfortable with the spray pattern before working on your toy.
Controlling Paint Flow
Controlling paint flow is crucial for a smooth finish. Hold the airbrush about 6-8 inches from the toy’s surface and use gentle, sweeping motions. Start with light, thin coats and gradually build up the color—this prevents drips and uneven patches.
Adjust the trigger pressure and paint volume as you spray. Pressing the trigger halfway releases air, and pulling it back lets paint flow. Practice this movement to find a rhythm that gives you consistent coverage without overloading any spot.
Avoiding Common Airbrush Mistakes
One common mistake is holding the airbrush too close, which can cause paint to pool and run. Keep your distance steady and move smoothly to avoid this. Another issue is using paint that’s not thinned enough—this clogs the nozzle and interrupts your work.
Clean your airbrush regularly during and after painting to prevent buildup. Ignoring this step can lead to sputtering or uneven sprays. Have you ever stopped mid-paint because your airbrush suddenly spat out a blob? Regular cleaning can save you that frustration.
Adding Special Effects
Adding special effects to your DIY vinyl toy can transform a simple figure into a unique masterpiece. These effects bring depth, texture, and eye-catching details that make your creation stand out. Whether you want a vintage look or a sparkling finish, the right techniques can elevate your project.
Weathering And Shading
Weathering adds a sense of age or wear to your vinyl toy, making it look more realistic or battle-worn. You can achieve this by lightly brushing darker paint into crevices or sanding edges to reveal the base layer. Shading enhances the contours and shapes, giving your toy more dimension.
Try using a dry brush technique with a small amount of paint for subtle shadows. Applying a thin wash of diluted paint helps create depth without overpowering the original colors. Have you noticed how these small touches can completely change the vibe of your figure?
Glitter And Metallic Finishes
Glitter and metallic paints add sparkle and shine, perfect for toys that need a bit of glamour or futuristic flair. Use fine glitter mixed with clear gloss or apply metallic paints with a smooth brush for a sleek look. You can even layer these finishes over matte paint for contrast.
Be careful not to overdo it; a little sparkle goes a long way. Test your glitter or metallics on a scrap piece first to see how they catch the light. What kind of effect do you want—subtle shimmer or bold shine?
Custom Decals And Stickers
Custom decals and stickers offer a quick way to add detailed designs without freehand painting. You can print your own or buy pre-made ones that match your toy’s theme. Applying them smoothly is key—use a damp cloth to position and press out any bubbles.
Seal decals with a clear coat to protect your work and blend them into the paint finish. Have you tried mixing decals with hand-painted elements? This combo can create unique, layered effects that catch the eye.
Sealing And Protecting Your Work
Sealing and protecting your DIY vinyl toy is essential to ensure its longevity and maintain the vibrancy of your colors. Think of it as the final touch to safeguard your artistic efforts from dust, scratches, and fading over time. By investing a little extra time in this step, you’re ensuring that your masterpiece remains just as stunning as the day you finished painting it.
Choosing The Right Sealant
Selecting the appropriate sealant can be a game-changer for your vinyl toy. You want something that won’t alter the colors but adds a robust layer of protection. Consider using a clear acrylic spray or brush-on varnish specifically designed for vinyl surfaces.
Ensure the sealant is compatible with the type of paint you’ve used. Water-based sealants are ideal for acrylic paints, while solvent-based options work better for oil-based paints. Always read the product label for compatibility information.
Applying Protective Coats
Once you’ve chosen your sealant, it’s time to apply it. Start by ensuring the toy is clean and dry. Dust or moisture can cause the sealant to form bubbles or an uneven finish.
Apply thin, even coats of sealant. Multiple light layers are better than one thick layer, as this helps prevent drips and uneven coverage. Allow each coat to dry thoroughly before applying the next.
Curing And Drying Times
Patience is key when waiting for the sealant to cure. Check the sealant instructions for specific drying times, but generally, a 24-hour period is a safe bet for complete drying.
Placing your toy in a dust-free environment during this time is crucial. You wouldn’t want any particles ruining your hard work. Consider using a simple box or a clean container to shield your toy from dust.
Have you ever rushed this step only to find your toy covered in tiny unwanted particles? Taking your time ensures your vinyl toy remains a pristine showcase of your creativity.
Troubleshooting Common Issues
Painting DIY vinyl toys can be a fun and creative activity. Yet, sometimes problems arise. Paint chips, bubbles, or color mistakes may occur. Understanding how to troubleshoot these issues is crucial. This section will guide you in resolving common painting problems.
Fixing Paint Chips And Cracks
Paint chips and cracks can affect your toy’s appearance. Start by gently sanding the affected area. Use fine-grit sandpaper for best results. Clean the surface with a damp cloth to remove dust. Apply a thin coat of primer to the area. Let it dry completely. Reapply your paint in even layers. This method ensures a smooth finish.
Dealing With Paint Bubbles
Paint bubbles can be frustrating. They often occur due to trapped air. Use a small pin to gently pop the bubble. Press the area lightly with a fingertip. This will flatten it. Allow the paint to dry fully. If needed, sand the area lightly. Repaint with a thin coat. Keep your brush strokes even.
Correcting Color Mistakes
Color mistakes can happen during painting. To fix them, wait for the paint to dry. Sand the area lightly with fine sandpaper. Apply a fresh coat of primer. Choose the correct color and repaint. Ensure your brush is clean. Apply the paint slowly and evenly. This will help achieve the desired color.
Maintaining Painted Vinyl Toys
Maintaining painted vinyl toys keeps them looking fresh and vibrant for years. Proper care protects your artwork from damage and fading. Follow simple routines to preserve the paint and the toy’s surface.
Cleaning Tips
- Use a soft, dry cloth to dust regularly.
- For dirt, dampen cloth slightly with water only.
- Avoid harsh chemicals or alcohol-based cleaners.
- Gently wipe painted areas without scrubbing.
- Allow the toy to air dry completely before storing.
Storage Recommendations
- Keep toys out of direct sunlight to prevent fading.
- Store in a cool, dry place away from heat.
- Use display cases or boxes to protect from dust.
- Avoid stacking toys to prevent paint scratches.
- Use acid-free tissue paper for extra protection.
Handling Painted Surfaces
- Always handle with clean, dry hands.
- Avoid touching painted areas too often.
- Hold toys by unpainted sections when possible.
- Be gentle to prevent chipping or peeling paint.
- Keep away from rough surfaces that may cause damage.
Credit: www.kerchie.com
Frequently Asked Questions
What Materials Do I Need To Paint Diy Vinyl Toys?
You need acrylic paints, paintbrushes, primer, sealant, and a clean workspace. Use water-based acrylics for best results. Proper materials ensure smooth and durable paint on your vinyl toy surface.
How Do I Prepare Vinyl Toys Before Painting?
Clean the toy with mild soap and water. Dry completely. Apply a primer to help paint adhere better. Proper prep prevents peeling and ensures a smooth finish.
What Painting Techniques Work Best On Vinyl Toys?
Use thin, even coats and let each layer dry fully. Detail work benefits from fine brushes. Avoid thick paint to prevent cracking and achieve a polished look.
How Long Does It Take For Paint To Dry On Vinyl Toys?
Acrylic paint typically dries in 20-30 minutes per layer. Full curing takes 24-48 hours. Drying time varies by paint type, thickness, and environment.
Conclusion
Painting a DIY vinyl toy is fun and rewarding. Choose the right paint and brushes for best results. Take your time and work in thin layers. Let each layer dry before adding the next. Protect your toy with a clear sealant at the end.
Enjoy your unique creation and show it off proudly. Keep practicing, and your skills will improve quickly. Painting vinyl toys can become a relaxing hobby. Try new designs and colors to stay creative.


