Are you looking for fun and easy ways to keep your kids entertained without spending a lot of money? Making simple DIY toys can be the perfect solution.
Not only do these toys spark creativity, but they also bring a special joy when you create them yourself. In this guide, you’ll discover easy steps to craft toys using everyday items you already have at home. Ready to turn ordinary things into exciting playtime treasures?
Keep reading, and you’ll be surprised at how simple and rewarding it can be!
Materials Needed
Gathering the right materials is the first step to making simple DIY toys. You can use items found around the house or buy affordable craft supplies. Picking safe materials ensures fun and worry-free play for kids.
Keep the list short and easy. Use things that are easy to handle and won’t break easily. This makes the toy-making process smooth and enjoyable for everyone.
Common Household Items
- Empty cardboard boxes
- Old socks
- Plastic bottle caps
- Paper tubes (from toilet paper or paper towels)
- Fabric scraps
- Buttons and beads
- String or yarn
- Egg cartons
- Plastic containers
- Used paper or newspapers
Affordable Craft Supplies
- Colored paper or cardstock
- Non-toxic glue sticks or liquid glue
- Child-safe scissors
- Washable markers and crayons
- Pipe cleaners
- Foam sheets
- Googly eyes
- Stickers
- Pom-poms
- Craft sticks (popsicle sticks)
Safety Tips For Kids
- Use non-toxic and child-safe materials only
- Choose rounded scissors with blunt tips
- Avoid small parts that can cause choking
- Supervise children during all craft activities
- Keep sharp tools out of reach
- Test materials for allergies beforehand
- Work in a clean, well-lit area
- Explain safe handling of all tools and supplies
- Store unused materials properly after use
- Encourage gentle handling of finished toys

Credit: www.youtube.com
Diy Toy Ideas
DIY toy ideas spark creativity and save money. Making toys at home is fun for kids and adults alike. These simple projects use everyday items. They help develop skills and keep children entertained. Here are some easy, enjoyable DIY toy ideas to try.
Paper And Cardboard Creations
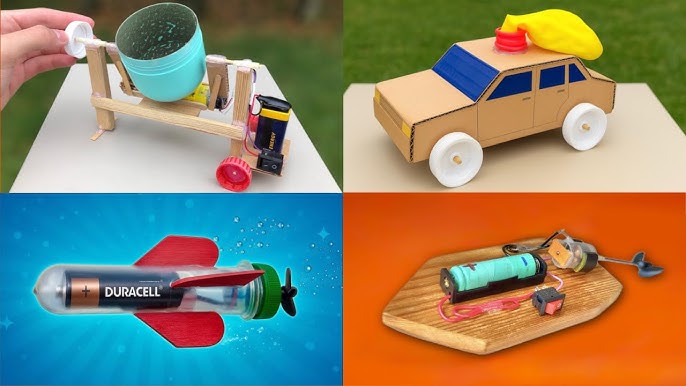
Paper and cardboard are perfect for crafting toys. Use old boxes, sheets of paper, or cereal cartons. Kids can make puzzles by cutting shapes and colors. Create paper airplanes or boats that float in water. Cardboard can become cars, houses, or masks with just scissors and glue. Decorate with markers, stickers, or paint for extra fun.
Recycled Bottle Toys
Empty bottles turn into great toy materials. Use plastic bottles to build bowling pins for indoor games. Fill bottles with rice or beans to make shakers. Cut and decorate bottles to create planters or mini cars. These projects teach recycling and creativity. They are safe and easy to make with adult help.
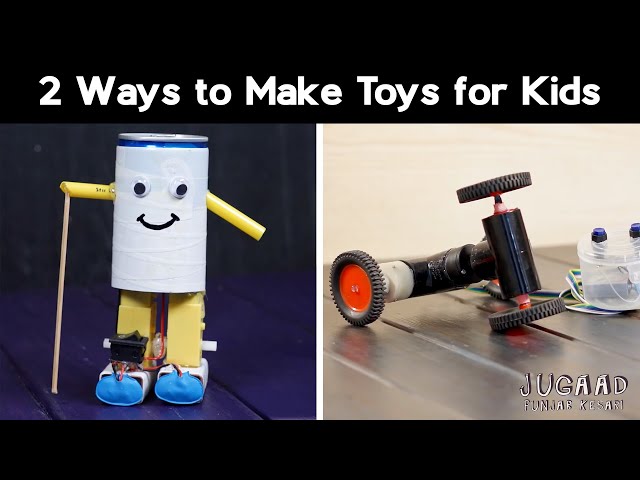
Sock Puppets And Plushies
Old socks can become funny puppets or soft plushies. Add buttons for eyes and yarn for hair. Sew or glue on felt shapes to create faces and clothes. Puppet shows encourage imaginative play and storytelling. Plushies provide comfort and companionship. These toys are simple, quick, and bring lots of joy.
Step-by-step Instructions
Creating simple DIY toys can be a fun and rewarding experience. It allows you to engage with your creativity while making something useful and entertaining. The key is to follow clear, easy-to-understand instructions that guide you through each step without overwhelming you.
Ready to get hands-on? Here are straightforward instructions to make some classic toys using materials you likely have at home. Each project focuses on simplicity but delivers a satisfying result.
Making A Paper Airplane
Start with a plain sheet of paper, ideally A4 size. Fold the paper in half lengthwise to create a center crease, then unfold it back flat. This crease will act as your guide.
Fold the two top corners toward the center crease, forming two triangles that meet in the middle. Then fold the new angled edges again towards the center. This narrows the nose of the plane.
Fold the plane in half along the original center crease, keeping the folds inside. Finally, create wings by folding down each side, about an inch from the bottom edge. Adjust the wings slightly upwards to help it glide better.
Creating A Bottle Rocket
Find an empty plastic bottle, preferably 500ml or 1-liter size. Remove the cap and make sure the bottle is clean and dry. You will use it as the main body of your rocket.
Cut out three equal-sized triangles from stiff cardboard or thick paper. These will serve as fins, helping your rocket stay stable. Attach the fins evenly spaced around the bottom using tape or glue.
For the nose cone, roll a piece of paper into a cone shape and tape it securely to the bottle’s mouth. Add some color or stickers to personalize your rocket. Have you thought about what will launch it? Water and air pressure work great for this simple rocket.
Crafting A Sock Puppet
Pick a clean, colorful sock that fits comfortably on your hand. Turn the sock inside out and decide where the puppet’s mouth will be. You’ll want to mark the spot where your fingers will open and close it.
Use buttons or googly eyes for the puppet’s eyes and glue or sew them near the top of the sock. Add a small piece of fabric or felt for the tongue inside the mouth area. You can also glue on yarn or string for hair to give it character.
Try moving your fingers inside the sock to bring the puppet to life. What kind of personality will your puppet have? Making a story for it can make playtime even more exciting.
Creative Play Benefits
Creating simple DIY toys sparks imagination and improves problem-solving skills in children. Crafting with everyday items encourages creativity and hands-on learning, making playtime both fun and educational.
Diving into the world of DIY toys offers many benefits. Creative play with homemade toys nurtures a child’s growth. It encourages learning in a fun, engaging way. Children develop skills and expand their imagination.Enhancing Imagination
Simple DIY toys can spark endless imagination. A cardboard box becomes a spaceship or a castle. Children invent stories and roles. They create worlds from everyday items. This imaginative play builds creativity. It also helps them express ideas in unique ways.Developing Motor Skills
Crafting DIY toys involves hands-on activities. Cutting, gluing, and assembling improve fine motor skills. These actions strengthen muscles in young hands. Children learn coordination and control. They gain confidence in their physical abilities. Motor skill development is vital for growth.Encouraging Problem Solving
DIY toys often present challenges. Children figure out how pieces fit or how to fix breaks. This trial-and-error process boosts problem-solving skills. It teaches persistence and patience. Kids learn to approach problems creatively. They discover solutions independently. This fosters a can-do attitude.Tips For Customization
Customizing DIY toys turns simple projects into special keepsakes. It lets children see their personality in each toy. Simple changes make toys unique and more fun to play with.
Small touches show care and creativity. Customization also encourages kids to use their imagination. Here are some easy ways to personalize toys for a special touch.
Adding Colors And Patterns
Colors bring toys to life. Use safe paints or markers to add bright shades. Patterns like stripes, dots, or stars create eye-catching designs. Try mixing colors for a playful look.
Let kids pick their favorite colors. This makes the toy feel more theirs. Use stencils for neat patterns or freehand for a natural look. Remember to let paint dry fully before playing.
Personalizing With Names
Adding names makes toys truly personal. Write the child’s name with permanent markers or paint pens. Use bold, clear letters to stand out. Names can go on the toy’s body or clothes.
Try initials or nicknames for a fun twist. Personal touches like this create a special bond between the child and their toy. It also helps avoid mix-ups with other toys.
Using Stickers And Decorations
Stickers are quick and easy decoration options. Choose fun shapes like animals, stars, or hearts. Stickers add texture and color without mess. Use glue-on gems or buttons for extra sparkle.
Decorations like ribbons or fabric scraps add charm. Attach small pieces securely to avoid choking hazards. Mix and match decorations to create a one-of-a-kind toy.

Credit: www.youtube.com
Storage And Maintenance
Storing and maintaining DIY toys keeps them fun and safe for children. Proper care extends the life of homemade toys. A neat storage system prevents loss and damage. Regular cleaning removes dirt and germs. Fixing small breaks keeps toys usable longer. Safe storage avoids accidents and clutter.
Organizing Diy Toys
Sort toys by type and size for easy access. Use clear bins or labeled boxes to see contents quickly. Keep small pieces in separate containers to avoid mix-ups. Arrange toys on shelves or in baskets to save space. Rotate toys regularly to keep children interested and reduce mess.
Cleaning And Repairing
Wipe down toys with mild soap and water after play. Use a soft cloth to clean delicate parts. Check for loose pieces or cracks before storage. Repair broken parts with glue or tape to prevent hazards. Wash fabric toys in a gentle cycle if the label allows. Let toys dry completely before putting them away.
Safe Toy Storage Ideas
- Use low shelves for easy reach and safe access.
- Store sharp or small parts out of children’s reach.
- Choose bins with lids to keep dust and pests away.
- Keep toys away from direct sunlight to avoid fading.
- Place heavier toys on lower shelves to prevent falls.

Credit: www.youtube.com
Frequently Asked Questions
What Materials Are Best For Simple Diy Toys?
Use common household items like cardboard, fabric, popsicle sticks, and recycled containers. These materials are safe, affordable, and easy to work with for creating simple DIY toys.
How Can I Make Safe Diy Toys For Kids?
Ensure all materials are non-toxic and free of sharp edges. Supervise children during crafting and avoid small parts that pose choking hazards.
What Are Easy Diy Toy Ideas For Beginners?
Start with paper airplanes, sock puppets, or cardboard cars. These projects require minimal supplies and basic crafting skills, making them perfect for beginners.
How Do Diy Toys Benefit Children’s Development?
DIY toys encourage creativity, problem-solving, and fine motor skills. They also promote hands-on learning and provide a fun way for kids to explore their imagination.
Conclusion
Making simple DIY toys brings joy and creativity to kids and adults. These toys use easy materials found at home. Crafting together builds strong bonds and happy memories. Kids learn new skills while having fun. Keep safety in mind and choose non-toxic supplies.
Try different ideas and enjoy the process. Homemade toys can last longer and feel special. Simple steps lead to great results every time. Start small, be patient, and watch the fun grow. DIY toys make playtime more meaningful and exciting.