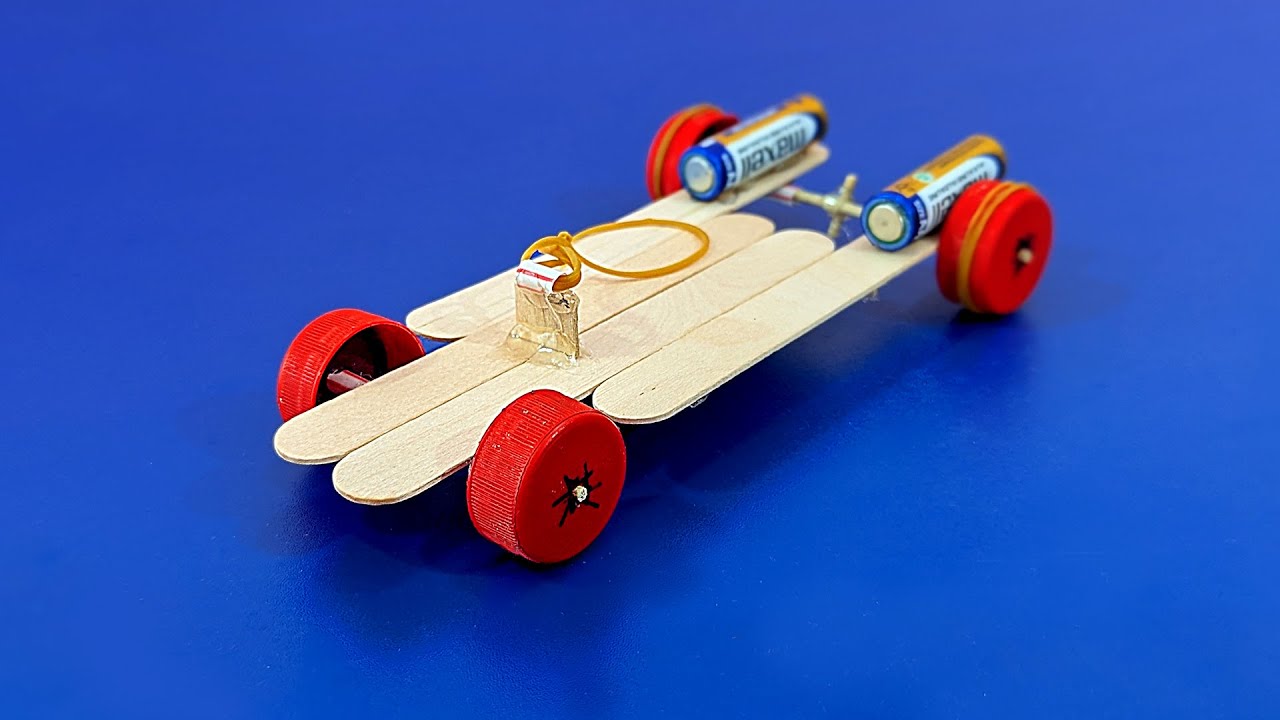
Have you ever wondered how to create a fun, moving toy with just a few simple materials? Making a rubber band powered car is easier than you think, and it’s a great way to bring your creativity to life.
Imagine building your own toy car that zooms across the floor, powered only by a rubber band. In this guide, you’ll learn step-by-step how to make your very own DIY rubber band car. Whether you’re looking for a cool project to do alone or with friends, this simple and exciting activity will keep you hooked until your car is ready to race.
Ready to see your creation come to life? Let’s get started!

Credit: www.youtube.com
Materials Needed
Gathering the right materials is the first step to building your rubber band powered car. The parts you choose will directly affect how well your car runs and how fun the project becomes. Ready to see what you need to bring your toy car to life?
Basic Building Supplies
- Rubber bands:These will power your car by storing and releasing energy.
- Plastic bottle caps or small wheels:Used for the wheels, they need to spin freely.
- Wooden sticks or skewers:These act as axles to hold the wheels.
- Cardboard or lightweight plastic:This serves as the body of your car.
Choose wheels that roll smoothly to avoid any frustrating stops. I once used heavy bottle caps that made my car sluggish, so lighter wheels are better.
Tools And Fasteners
- Glue or tape:To secure parts together firmly.
- Scissors or craft knife:For cutting cardboard and rubber bands to size.
- Push pins or small nails:To attach wheels to axles if needed.
- Marker or pencil:Useful for marking measurements.
Having sharp scissors makes cutting precise and safer. If you don’t have push pins, try twisting wire to hold the axles in place.
Optional Enhancements
- Straws:Can be used as a smooth sleeve for axles to reduce friction.
- Rubber grips or erasers:For better traction on wheels.
- Decorative materials:Stickers, markers, or paint to customize your car’s look.
Adding straws to your axles helped my car run faster by reducing rubbing between parts. What small tweaks could you add to make your car unique?
Choosing The Right Rubber Band
Choosing the right rubber band is key to building a rubber band powered car that runs smoothly and far. The rubber band acts as the engine, storing and releasing energy to move your car forward. Picking one that fits your car’s size and weight can make a big difference in performance.
Size And Thickness Matter
Rubber bands come in many sizes and thicknesses, and these features affect how much power they provide. Thicker rubber bands store more energy but can be harder to stretch, which might slow down your car’s start. Thinner bands stretch easily but may snap quickly or not provide enough force.
Try different sizes to find the balance. I once used a very thick band that made my car move slowly but steadily, while a thinner one zipped faster but broke after a short run. Which would you prefer for your car’s speed and durability?
Material Quality And Elasticity
Not all rubber bands are made equal. High-quality rubber bands stretch more without breaking and return to their original shape better. Look for bands labeled as “natural rubber” or “latex” for better elasticity.
Stretch a band a few times before using it. If it loses shape or feels brittle, it won’t perform well. A good rubber band should snap back quickly and feel strong in your hand.
Length And Stretch Capacity
The length of your rubber band determines how far you can wind it to store energy. Longer bands let you twist more times, which can boost your car’s distance. However, if the band is too long, it might tangle or slip off the axle.
Measure your car’s axle and try to pick a band that stretches about three to four times its resting length without breaking. How far can you stretch your band before it feels like it might snap?
Testing Rubber Bands For Best Performance
Before finalizing your choice, test several rubber bands on your car. Wind each band the same number of turns and record how far your car travels. This simple test helps identify which band suits your car’s build.
Keep notes on durability too—does the band last for multiple runs or break quickly? Your best rubber band balances power, stretch, and endurance.
Designing The Car Body
Designing the car body is an important step in building a rubber band powered car. The body affects the car’s speed, balance, and overall look. A well-designed body keeps the car light and strong. It also helps the car move smoothly and fast.
Selecting Lightweight Materials
Choose materials that are light but sturdy. Common options include balsa wood, foam board, or plastic sheets. These materials reduce the car’s weight, making it faster. Avoid heavy materials like metal or thick wood. Lightweight materials help the rubber band pull the car easily.
Consider materials that are easy to cut and shape. Look for something safe and easy to handle, especially for kids. Strong glue or tape works well to hold parts together.
Cutting And Shaping
Cut the car body carefully to keep it smooth and balanced. Use scissors or a craft knife for precise cuts. Shape the body to be aerodynamic. Rounded edges and a narrow front reduce air resistance. A flat, wide base helps with stability.
Make sure the car body fits well with the wheels and rubber band. Check that nothing blocks the wheels from turning freely. Take your time to get clean cuts and smooth surfaces. Sand rough edges to avoid splinters or tears in the rubber band.
Constructing The Axles And Wheels
Axles and wheels form the base of your rubber band car. Secure the axles tightly to ensure smooth wheel rotation. Choose lightweight wheels to help the car move faster and farther.
Constructing the axles and wheels is a crucial step in creating a rubber band powered car. This part of the process determines how well your car will roll. Proper assembly ensures smooth movement and maximizes the car’s potential speed. Let’s dive into the essential steps for crafting these components.Attaching Wheels To Axles
Use strong materials for your wheels. Bottle caps or small plastic lids work well. Ensure they are the same size for balance. Drill a hole in the center of each wheel. The hole should be slightly smaller than the axle diameter. This tight fit prevents the wheels from slipping. Next, take a sturdy stick or skewer for the axle. Insert it through the wheel holes. Attach the wheels to both ends of the axle. Secure them tightly with glue or tape. This prevents wobbling during movement.Ensuring Smooth Rotation
Smooth rotation is vital for your car’s performance. Apply a small amount of lubricant to the axle ends. This reduces friction and allows easy turning. You can use oil or a lubricant spray. Make sure the axles are straight. Bent axles can cause the car to veer off course. Test the wheels by spinning them. They should rotate freely without resistance. Check the wheel alignment. All wheels should touch the ground evenly. Uneven wheels can cause the car to tip over. Adjust them if necessary for stability. By following these steps, your DIY toy car will run smoothly and efficiently. Enjoy the process and watch your creation come to life!Assembling The Car Frame
Assembling the car frame is where your DIY rubber band powered car truly begins to take shape. This step requires attention to detail to ensure the car runs smoothly and efficiently. Building a sturdy frame sets a strong foundation for the rest of your project.
Fixing The Axles To The Body
Start by securely attaching the axles to the car’s body. Use lightweight but strong materials like wooden sticks or thin metal rods for the axles.
Make sure the axles are parallel and aligned properly. Misaligned axles can cause the wheels to wobble, slowing down your car or making it veer off track.
Try using small clips or glue to hold the axles firmly in place. I once overlooked tightening one axle, and the wheel kept slipping off—don’t make the same mistake!
Balancing The Structure
Balance is crucial for smooth movement. Check if the car frame sits evenly on a flat surface. If one side is heavier or tilted, your car won’t roll straight.
Adjust the placement of components like the rubber band and wheels until the frame feels stable. You might have to shift the axles or add small weights to the lighter side.
Ask yourself: Does your car look like it could tip over if pushed? A well-balanced frame improves speed and control, so take the time to get it right.

Credit: www.youtube.com
Attaching The Rubber Band Motor
Attaching the rubber band motor is a key part of building your DIY toy car. This step makes your car move using the energy stored in the stretched rubber band. Proper attachment ensures smooth rotation and good speed. Take care to connect the rubber band correctly to the axle and secure it tightly for maximum power.
Connecting The Rubber Band To The Axle
Start by looping one end of the rubber band around the car’s axle. The axle is the rod that holds the wheels. Stretch the rubber band gently but firmly so it grips the axle without slipping. You can twist the rubber band once or twice around the axle to hold it better. Make sure it can still spin freely when wound up. Avoid making the band too tight at this point.
Securing The Band For Power
Next, attach the other end of the rubber band to a fixed point on the car’s body. This point holds the band in place while the axle turns. Use a small hook or notch on the car frame to anchor the band. Ensure the band is stretched enough to store energy but not so much that it breaks. Check the band’s position so it stays secure as the axle spins. Proper tension and secure attachment create a strong motor effect.
Testing And Adjusting
Testing and adjusting your rubber band powered car is where the fun really begins. This stage lets you see if your design works as expected and gives you a chance to make it faster or smoother. Paying close attention now can save you frustration later and make your car a true standout on any track.
Winding The Rubber Band
Start by winding the rubber band carefully around the axle or designated spool. Don’t overwind it—too much tension can snap the band or cause the car to jerk uncontrollably. Aim for a firm but smooth tension; this balance helps the car move steadily and cover more distance.
Try winding it in small increments and testing the car after each adjustment. Notice how the speed and distance change. How does the car behave if you wind it tighter or looser? This hands-on approach lets you find the sweet spot for your car’s performance.
Troubleshooting Common Issues
If your car isn’t moving well, start by checking the rubber band for twists or damage. A worn-out band won’t deliver enough power. Also, make sure the wheels spin freely—friction can slow down or stop your car entirely.
Another common problem is uneven winding, which can cause the car to veer off course. If your car is pulling to one side, try adjusting the wheels or realigning the chassis. Have you noticed any parts rubbing against each other? Even small contact points can steal energy from your car’s movement.
Keep a simple checklist to track what you’ve tested:
| Issue | Check | Fix |
|---|---|---|
| Car not moving | Rubber band condition and winding tension | Replace band or rewind carefully |
| Wheels stuck or slow | Wheel alignment and axle lubrication | Adjust wheels or add light oil |
| Car veering to one side | Wheel alignment and chassis balance | Realign wheels and check frame |
What small tweak could make your car go farther or straighter? Testing and adjusting is your chance to experiment and learn exactly how each part affects performance.
Decorating Your Toy Car
Decorating your rubber band powered toy car makes it unique and fun. This step lets creativity shine. A well-decorated car looks great and feels special to the maker. Choose colors, patterns, and accessories that reflect your style. This process is simple and enjoyable for all ages.
Painting Ideas
Start with bright, bold colors to make your car stand out. Use acrylic paints for smooth, lasting coverage. Try these painting techniques:
- Solid colors for a clean, classic look
- Stripes or dots for a sporty design
- Camouflage or patterns for a unique style
Use painter’s tape to create sharp lines and shapes. Let each layer dry before adding another. Add a clear coat to protect your paint job.
Adding Stickers And Accessories
Stickers add personality and detail quickly. Choose racing decals, flames, or cartoon characters. Place stickers on the car body or windows.
Accessories make your car more interesting. Try small items like:
- Plastic spoilers
- Miniature headlights
- Colored wheels or rims
Attach accessories with glue or tape. Avoid heavy items that can slow the car down. Personal touches make your toy car truly yours.
Safety Tips For Kids
Keep small parts and rubber bands away from young children to avoid choking hazards. Always supervise kids during the project to ensure safe handling of tools and materials. Encourage gentle use of the toy car to prevent injuries.
Building a rubber band powered car is an exciting DIY project for kids. However, ensuring safety during this creative journey is crucial. Kids can learn and have fun, but they need guidance to avoid accidents. Here are some essential safety tips to keep their exploration both safe and enjoyable.Use Child-friendly Tools
When selecting tools for this project, opt for those designed with kids in mind. Child-friendly scissors and non-toxic glue are great choices. These tools help prevent injuries and keep the workspace safe.Supervise The Building Process
Always have an adult present while kids work on their toy car. Supervision ensures that any potential hazards are quickly addressed. Plus, it provides an opportunity to bond and share in the creative process.Set Up A Safe Workspace
Choose a well-lit area with a clean, flat surface for the project. Remove any clutter to minimize risks of tripping or knocking over materials. A safe workspace encourages focus and creativity.Educate About Rubber Band Safety
Teach kids how to handle rubber bands properly. Stretching them too much can cause them to snap back and hurt someone. Demonstrating the correct usage can prevent unnecessary accidents.Monitor Small Parts
Keep an eye on small components that could be a choking hazard. Ensure they are used under supervision and stored safely when not in use. This caution is particularly important for younger children involved in the project.Encourage Proper Cleanup
After the project, involve kids in cleaning up the workspace. This practice not only keeps the area tidy but also reinforces the importance of responsibility. Plus, it ensures no stray items pose a future risk. By following these safety tips, you can create a safe environment for kids to explore their creativity. What other precautions do you think are essential for DIY projects? Share your thoughts!
Credit: www.youtube.com
Frequently Asked Questions
How Do You Make A Rubber Band Powered Car?
To make a rubber band powered car, gather materials like rubber bands, wheels, and a lightweight chassis. Assemble the chassis, attach wheels, and connect the rubber band to the axle. Wind the band to store energy, then release to propel the car forward.
What Materials Are Needed For A Diy Toy Car?
You need rubber bands, plastic or wooden wheels, a lightweight chassis, axles, and glue or tape. These simple materials help create a functional and fun rubber band powered car. Using recycled or household items can also work well.
How Does A Rubber Band Car Work?
A rubber band car works by storing energy when you twist the band. When released, the band unwinds, turning the wheels and propelling the car forward. This converts elastic potential energy into kinetic energy, making the car move without batteries or motors.
Can Children Safely Build A Rubber Band Powered Car?
Yes, children can safely build this car with adult supervision. The project uses simple materials and encourages learning about physics and mechanics. Ensure safe handling of small parts and rubber bands to prevent injuries or choking hazards.
Conclusion
Building a rubber band powered car is a fun and simple project. It teaches basic physics and creativity. You can see how energy moves and makes the car go. This DIY toy helps develop your skills step by step. Try different designs to see what works best.
Enjoy the process and learn as you build. This small project can bring big smiles and great learning moments. Keep experimenting and have fun with your rubber band car!


