
Are you looking for a fun and creative way to spend your time? Making DIY paper toys is an easy and exciting activity that anyone can enjoy.
With just some simple materials and a little bit of patience, you can create amazing toys that bring joy and spark your imagination. In this guide, you’ll discover step-by-step instructions that make the process simple and rewarding. Ready to turn ordinary paper into something extraordinary?
Let’s dive in and unlock your creative potential!

Credit: www.youtube.com
Materials Needed
Gathering the right materials is the first step in crafting your own DIY paper toys. Having quality supplies not only makes the process smoother but also improves the final look and durability of your creations. Let’s break down what you’ll need to get started.
Paper Types
The choice of paper affects how your toy folds, holds shape, and even how it feels. Cardstock is a popular choice because it’s thicker and sturdier, perfect for toys that need to stand up or be handled often.
Regular printer paper works well for simpler designs or prototypes. If you want vibrant colors or patterns, consider using scrapbook paper or colored construction paper to add flair right from the start.
Basic Tools
Sharp scissors or a craft knife are essential for clean, precise cuts. A cutting mat protects your surfaces and helps you cut safely, especially when using a knife.
You’ll also want a ruler for straight lines and a pencil for marking folds or cutting guides. Don’t overlook glue or double-sided tape to hold pieces together firmly without mess.
Optional Decorations
Once your toy is assembled, you might want to personalize it. Markers, colored pencils, or paints can add details like eyes, patterns, or textures.
Stickers, googly eyes, or glitter can bring your paper toy to life and make it uniquely yours. Have you ever added a small accessory that completely changed the look of your craft? Small touches can make a big difference.
Choosing Your Design
Choosing the right design is a crucial first step in making your DIY paper toys. Your choice will set the tone for the entire project and influence how much fun you have while creating. Think about your skill level and the time you want to invest before picking a design.
Simple Shapes For Beginners
Starting with simple shapes makes the process less intimidating. Look for designs featuring basic forms like cubes, pyramids, or animals made from a few parts. These shapes help you practice cutting, folding, and gluing without getting overwhelmed.
For example, a paper cube with a face drawn on it can turn into a playful character quickly. Have you noticed how easy shapes boost your confidence and encourage you to try more complex designs?
Advanced Patterns
If you’ve tried simple shapes and want a challenge, advanced patterns offer more detail and complexity. These often include multiple pieces that fit together or intricate folding techniques. Expect to spend more time cutting and assembling, but the result can be impressive and satisfying.
Complex animal figures or vehicles with moving parts are great choices here. Are you ready to push your skills and create something unique that stands out?
Finding Templates Online
The internet offers a treasure trove of paper toy templates you can download and print. Many sites provide free designs, ranging from simple to advanced. This makes it easy to find something that matches your skill and interests.
Look for templates with clear instructions and illustrations to guide you step-by-step. Have you explored different websites yet to see which styles catch your eye the most?
Cutting Techniques
Cutting is a key skill for making DIY paper toys. It shapes the parts and affects the final look. Good cutting techniques help create clean, neat pieces. These tips improve your accuracy and safety during the cutting process.
Safe Cutting Tips
- Use a sharp blade to reduce force and slips.
- Cut on a stable surface, like a cutting mat.
- Keep fingers away from the cutting line.
- Hold the paper firmly but don’t crumple it.
- Work slowly to avoid mistakes and accidents.
Using Scissors Vs Craft Knives
Scissors are easy for beginners and quick cuts. They work well for curves and simple shapes. Craft knives offer more control and precision. They are great for small details and straight lines. Choose scissors for rough cuts and knives for fine edges.
Creating Precise Edges
- Score fold lines lightly before cutting.
- Use a ruler to guide straight cuts.
- Cut outside the lines slightly for safety.
- Trim excess paper after assembly for a clean look.

Credit: www.youtube.com
Folding Methods
Folding paper precisely shapes your DIY paper toys. Crease edges sharply to create clean lines and strong forms. Simple folds build the base, while detailed folds add character and style.
Folding paper toys is an art that brings joy and creativity. This section explores various folding methods to craft stunning DIY paper toys. Each fold has its unique charm, enhancing your paper creations. Let’s dive into the art of paper folding.Basic Folds
Basic folds are the foundation of paper toys. They are simple yet essential. The valley fold is a common starting point. Fold the paper in half, creating a ‘V’ shape. Another basic fold is the mountain fold. Fold the paper backward, forming a peak. These folds are easy for beginners. They are the building blocks of more complex designs.Complex Folding Tricks
Complex folds add depth to paper toys. They involve more steps and precision. The reverse fold is a popular trick. Push the paper’s edge inward, then flatten. It’s great for creating beaks or tails. The squash fold is another advanced technique. Open a flap, then press it flat. It gives your toy a dynamic look. Mastering these folds takes practice. But the results are worth the effort.Scoring For Clean Folds
Scoring ensures neat and crisp folds. It involves lightly marking the paper. Use a blunt tool or the back of a knife. Gently run it along where you want to fold. This weakens the paper slightly. It guides the fold and prevents tearing. Scoring is crucial for thicker papers. It provides precision and clean lines. Your paper toys will look more professional.Assembling Your Toy
Assembling your DIY paper toy is where your creation truly comes to life. This stage requires patience and attention to detail to ensure each piece fits perfectly. How you join the parts will affect both the look and durability of your toy, so it’s important to choose the right techniques.
Using Glue And Tape
Glue is the most common adhesive for paper toys because it creates a strong, clean bond. Use a glue stick for lightweight pieces or liquid glue for parts that need extra hold. Remember to apply glue sparingly to avoid wrinkles or soggy paper.
Tape can be handy for quick fixes or parts that might need future adjustments. Clear tape works best since it’s less visible, but double-sided tape gives a neater finish. Have both glue and tape nearby so you can pick the best option as you assemble.
Joining Parts Securely
To make sure your toy holds together firmly, align edges carefully before pressing parts together. Waiting a few seconds for glue to set before moving on can prevent pieces from slipping out of place. If your design includes tabs, fold them sharply to create strong connections that won’t easily come apart.
Consider reinforcing joints with extra layers of paper or small strips glued over seams. This simple trick worked wonders when I built a paper robot that needed to withstand lots of handling. What parts of your toy will need the most support?
Adding Movable Elements
Movable parts add fun and personality to your paper toy. Use small brads or paper fasteners to connect pieces that should rotate or wiggle. Punch holes carefully to avoid tearing and make sure the fastener is tight enough to hold but loose enough for movement.
Another way to create motion is by designing slots where parts can slide back and forth. Experiment with different movable joints and test them often during assembly. How could adding movement change how you interact with your paper toy?
Decorating Ideas
Decorating your DIY paper toys is where creativity truly comes alive. It’s the chance to transform a simple paper shape into a vibrant character or a unique piece of art. How you choose to decorate can express your personality and make your toy stand out on any shelf or play area.
Coloring Techniques
Coloring your paper toy can be as simple or detailed as you want. You might use colored pencils for soft shading or markers for bold, bright colors. Watercolors add a gentle, artistic touch but need careful handling to avoid warping the paper.
Try layering colors to create depth or use patterns like stripes and dots to give your toy more character. Have you experimented with blending two colors directly on paper to see what shades you can create? It can add an unexpected flair to your design.
Adding Stickers And Accessories
Stickers are a quick and fun way to add personality to your paper toy. Whether it’s eyes, hats, or tiny decorations, stickers bring instant charm without much effort. Look for themed sticker packs that match your toy’s style or mood.
Accessories like small buttons, ribbons, or bits of fabric can be glued on for a tactile element. When I added a tiny paper hat to a figure, it instantly felt more alive. What small accessory could make your toy more special?
Personalizing Your Toy
Adding your name or a special message turns your paper toy into a keepsake. Use fine-tip pens or metallic markers for writing to keep it neat and eye-catching. You can also draw unique features like freckles, scars, or tattoos to tell a story.
Consider creating a background scene on a base platform to showcase your toy’s personality. Giving your creation a “home” invites you to build a whole world around it. What story will your paper toy tell?
Creative Variations
Creative variations bring fun and uniqueness to DIY paper toys. They let you explore different designs and styles. Experimenting with these ideas can make your paper toys more exciting and personal. Below are some interesting ways to add variety to your paper toy projects.
Combining Multiple Toys
Try joining two or more paper toys into one model. You can connect parts like heads, arms, or legs. This creates new characters or creatures. Mixing shapes and sizes makes the toy more interesting to play with. It also encourages imagination and storytelling.
Making Themed Sets
Create a group of paper toys based on a theme. Themes can be animals, robots, or fairy tale characters. Making sets allows you to build stories and scenes. It also makes your collection feel complete and organized. Use colors and styles that match the theme for better effect.
Incorporating Recycled Materials
Use old magazines, newspapers, or scrap paper for your toys. This saves money and helps the environment. Recycled paper often has unique textures and colors. It adds a special look to your toys. Try mixing recycled materials with plain paper for contrast.
Troubleshooting Common Issues
Making paper toys is fun, but small problems can slow you down. Tears, wrinkles, and balance issues often happen. Fixing these quickly helps keep your toy neat and playable. Knowing how to solve common troubles improves your crafting experience.
Fixing Tears And Wrinkles
Tears happen when the paper rips or bends too much. Use clear tape to cover small tears from the back. For wrinkles, place a clean cloth over the paper. Gently press with a warm iron to smooth the surface. Avoid high heat to prevent damage.
Adjusting Fit And Balance
Loose parts cause the toy to fall apart. Trim edges carefully for a tighter fit. Slightly fold tabs inward to hold pieces firmly. Balance issues make toys tip over. Add small paper weights inside the base to keep it steady. Test the toy’s stand before final glue.
Improving Durability
Paper toys can be fragile. Strengthen joints with extra layers of paper or tape. Use thicker paper or cardstock for main parts. Coat finished toys with a thin layer of clear glue or varnish. This protects against moisture and wear. Store toys in a dry place for long life.
Displaying And Playing
Display your paper toys on a shelf or table to show their details clearly. Play with them gently to keep their shape and enjoy creative fun.
Displaying and playing with DIY paper toys is an adventure in creativity and imagination. After pouring your heart into crafting these playful wonders, it’s time to showcase them with pride and enjoy countless hours of fun. Whether you’re setting them up as decorations or diving into imaginative play, how you handle and display your creations can make all the difference.Storage Tips
Keeping your paper toys in pristine condition requires thoughtful storage solutions. Use clear plastic containers to protect them from dust while still showcasing their vibrant colors. Consider organizing them by theme or size, making it easy to find the perfect toy for playtime or display. For larger collections, a dedicated shelf can turn your toys into an eye-catching display. Rotate toys periodically to keep the display fresh and exciting.Safe Play Ideas
Ensuring safe play is crucial for both kids and the delicate paper creations. Encourage gentle handling, emphasizing that paper toys, while fun, require care. Create a designated play area to minimize the risk of accidental damage, and avoid playing in areas with high foot traffic. Consider using props like blocks or toy furniture to enhance the play experience. This encourages creativity without putting undue stress on the paper toys.Sharing Your Creations
Sharing your paper toys can be a rewarding experience, sparking joy and inspiration in others. Host a craft day with friends or family, exchanging ideas and techniques. Share photos of your creations on social media, inviting others to join the fun and share their own projects. You could even start a blog or YouTube channel dedicated to your paper toy adventures. Sharing your passion can connect you with a community of like-minded creators, offering endless inspiration and support. How will you display and share your paper toy creations? Your choices can inspire others and breathe new life into your craft.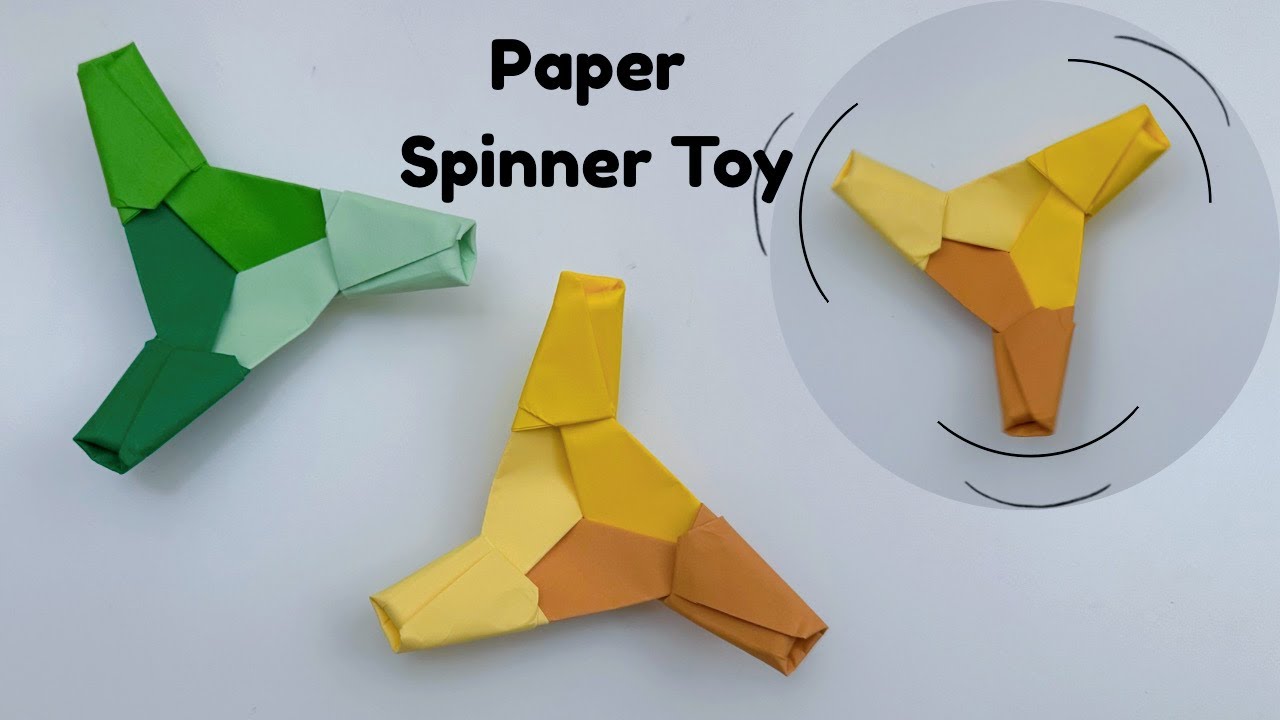
Credit: www.youtube.com
Frequently Asked Questions
What Materials Do I Need For Diy Paper Toys?
You need paper, scissors, glue, and coloring tools. Cardstock works best for durability. Optional items include markers and stickers for decoration.
How Do I Fold Paper For Making Toys?
Start with clean, crisp folds using your fingers or a bone folder. Follow step-by-step instructions for precise shapes and strong creases.
Can Kids Safely Make Diy Paper Toys?
Yes, kids can safely create paper toys with adult supervision. Use child-friendly scissors and non-toxic glue to ensure safety.
What Are Easy Paper Toy Designs For Beginners?
Start with simple shapes like paper boats, airplanes, or animals. These require basic folding and cutting skills suitable for beginners.
Conclusion
Making DIY paper toys is fun and simple. You only need paper, scissors, and glue. Follow each step carefully for best results. These toys can keep you busy for hours. They also help you learn and be creative. Share your paper toys with friends and family.
Try new designs and colors to make it exciting. Enjoy the process, not just the final toy. Keep practicing to improve your skills. Paper toys bring joy without spending much money. Start today and see how fun crafting can be!


