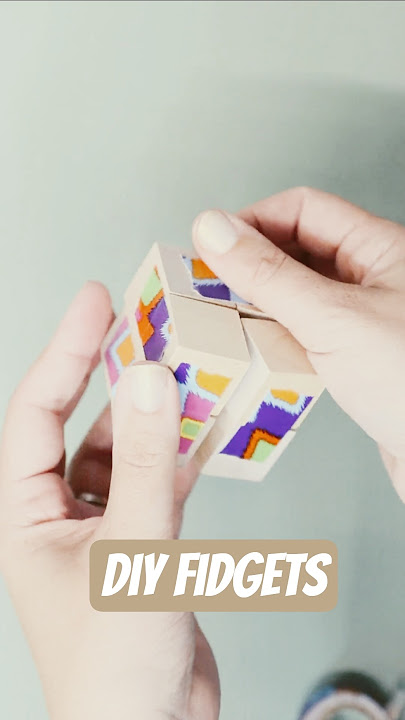
Are you looking for a fun and simple way to keep your hands busy and your mind focused? Making your own DIY homemade infinity cube fidget toy is easier than you think.
This small, foldable gadget can help reduce stress, improve concentration, and provide endless satisfaction as you twist and turn it. In this guide, you’ll learn step-by-step how to create your very own infinity cube using everyday materials. Ready to boost your focus and creativity with a toy you made yourself?
Let’s get started!

Credit: www.reddit.com
Materials Needed
Gathering the right materials is the foundation of making your own DIY homemade infinity cube fidget toy. Having everything prepared in advance saves time and makes the crafting process smooth and enjoyable. You don’t need fancy tools or expensive supplies—just simple items you can find around your home or at a local store.
Basic Materials For The Infinity Cube
- Small Wooden or Plastic Cubes:You’ll need 8 small cubes of the same size. These can be wooden blocks, foam cubes, or even plastic dice. The size you choose will affect the final size of your fidget toy.
- Strong Tape or Glue:Durable double-sided tape or a strong adhesive helps keep the cubes connected firmly. I found that using double-sided tape gives more flexibility and a cleaner look.
- Thin Hinges or Connectors:Small hinges or flexible tape strips allow the cubes to fold and unfold smoothly. You can use fabric tape if you want a quieter cube or small metal hinges for durability.
Tools You’ll Need
- Scissors or Craft Knife:For cutting tape or trimming edges precisely. Sharp scissors make the process easier and safer.
- Ruler or Measuring Tape:To ensure your cubes and tape strips are aligned correctly. Measuring accurately helps avoid uneven folding later.
- Pencil or Marker:Use it to mark where you’ll place the tape or hinges, so everything stays symmetrical.
Optional Decorative Materials
- Paint or Stickers:Personalize your infinity cube with colors or fun designs. I enjoyed adding bright colors to mine—it made the toy more inviting and easier to spot on my desk.
- Clear Varnish or Sealant:To protect painted surfaces and add a glossy finish. This is great if you want your cube to last longer and resist wear.
Do you already have some of these materials at home? Sometimes, the challenge lies in improvising with what you find. That’s part of the fun—turning everyday objects into a handy fidget toy that’s truly yours.
Preparing The Paper Strips
Preparing the paper strips is a key part of making your DIY infinity cube fidget toy. The quality and size of the strips affect the toy’s look and how smoothly it moves. Taking time to prepare the strips carefully will improve your final product.
Start by selecting the best paper for durability and ease of folding. Then, cut the strips evenly to ensure the cube fits together perfectly. Proper preparation saves time and frustration during assembly.
Choosing The Right Paper
Pick paper that is sturdy but flexible. Cardstock or thick craft paper works well. Avoid paper that is too thin or easily tears. Colored paper can add a fun, personal touch to your cube.
Consider paper weight between 160-200 gsm for best results. It holds shape without being too stiff. Plain or patterned paper both work fine, depending on your style.
Cutting Uniform Strips
Use a ruler and a sharp craft knife or scissors for clean edges. Measure the width carefully to keep all strips the same size. Standard strip size is about 1 inch wide and 6 inches long.
Cutting uniform strips helps the cube fold evenly. Keep the edges straight to avoid gaps or uneven joints. A cutting mat can protect your work surface and improve precision.
Folding The Strips
Creating your own DIY homemade infinity cube fidget toy can be a fun and rewarding project. One key step in this process is folding the strips. This step is crucial to ensure your infinity cube functions smoothly. Let’s explore the techniques required to fold the strips properly.
Basic Fold Techniques
Start by preparing your strips of paper or material. Ensure they are the same size for uniformity. Fold each strip in half to create a strong crease. This fold acts as a guide for further folding. Next, unfold the strip and fold each end towards the center crease. This creates a neat, accordion-style fold.
Repeat this process for each strip to maintain consistency. Consistent folds are important for the structural integrity of your infinity cube. Keep your folds sharp and precise. Use a ruler or a flat edge for crisp lines.
Creating The Base Units
Once your strips are folded, it’s time to form the base units. Take four strips and connect them to form a square. Use tape or glue to secure the joints. Make sure the edges align perfectly to form a stable unit.
Create multiple square units using this method. Each unit will interlock to form the infinity cube. Ensure each square is identical in size. This ensures smooth movement when the cube is assembled.
Once you have enough units, you can start assembling the infinity cube. Properly folded strips are essential for a functional and enjoyable fidget toy.
Assembling The Cube
Assembling the infinity cube is a fun and careful process. It needs patience and focus. Each small unit connects to form a larger cube. The goal is a smooth, foldable toy that fits in your hand.
Follow the steps with care to get the perfect movement. The units must align correctly for the cube to work well. Pay attention to the joints and how they fit together.
Connecting The Units
Start by placing two small cubes side by side. Use strong tape or glue on the edges where they meet. Attach the next cube to this pair, forming a chain of four cubes.
Each cube should be able to fold around the others. Connect the cubes so the corners line up perfectly. Test the folding motion often to ensure smooth movement.
- Use double-sided tape for a cleaner look.
- Leave a small gap at the hinges for easier folding.
- Check that the cubes rotate without sticking.
Securing The Structure
Once all cubes are connected, reinforce the joints. Add extra tape or glue on the inner edges. This keeps the cube strong and prevents it from falling apart.
Press firmly on each joint and let the glue dry completely. Avoid using too much glue; it can block movement. Finally, fold the cube multiple times to test durability.
Testing The Fidget Toy
After assembling your DIY homemade infinity cube fidget toy, testing it is crucial to ensure it works smoothly and feels satisfying in your hands. This stage helps you spot any tight spots or loose hinges that could affect the toy’s performance. Taking the time to test and adjust your cube will make your fidget experience much more enjoyable.
Checking The Movement
Begin by holding the cube and slowly folding it along all its joints. Notice if the cube folds easily or if any part feels stuck or too loose. Pay attention to how the pieces rotate around the hinges—each segment should move fluidly without forcing it.
Try different folding patterns to mimic real fidgeting motions. Does it click pleasantly? Does it return to its original shape smoothly? If any section feels rough or stiff, make a note of it.
Adjusting For Smoothness
If the movement isn’t quite right, small tweaks can make a big difference. Tighten any loose screws or connectors, but don’t overtighten as this could restrict movement. On the other hand, if some parts are too tight, gently loosen them or sand down edges that cause friction.
Lubricating the joints with a tiny amount of silicone spray or even a bit of wax can help the cube glide better. Test again after each adjustment to see the impact. How does your cube feel now—more satisfying to play with or still a bit clunky?

Credit: www.youtube.com
Customizing Your Cube
Customizing your DIY homemade infinity cube fidget toy lets you create a unique item. It reflects your style and makes the toy more fun to use. Personal touches can improve its look and feel. You can easily change colors, patterns, or materials to suit your taste.
Adding Colors And Patterns
Use colorful paper or tape to brighten your cube. Choose solid colors or mix patterns for a lively effect. Markers and paint work well on wooden or plain surfaces. Try these ideas:
- Striped or polka dot designs with colored tape
- Draw geometric shapes with markers
- Use watercolor paint for soft, blended colors
- Apply stickers or decals for quick decoration
These simple additions make your cube eye-catching. They also help you find it quickly when it’s inside your bag or desk.
Using Different Materials
The material you choose changes how the cube feels and looks. Paper, cardboard, wood, or plastic all work well. Each offers a unique texture and durability level.
- Paper:Easy to fold and decorate but less durable
- Cardboard:Stronger and holds shapes better
- Wood:Smooth, sturdy, and perfect for painting
- Plastic:Durable and lightweight, easy to clean
Mix materials for a custom look. For example, use wood for the frame and colored paper for panels. Choose what feels best in your hands and looks best on your desk.
Tips For Durability
Durability matters in making a DIY homemade infinity cube fidget toy. A strong toy lasts longer and stays fun. Small details can make a big difference. Focus on key areas to keep the cube sturdy. Care and upkeep also help maintain its shape and function. Follow these tips to build a toy that withstands daily use.
Reinforcing Weak Points
Weak points often appear at joints and folds. Use extra glue or tape to strengthen these areas. Choose a strong adhesive that dries clear. Apply it carefully to avoid lumps. Adding small strips of fabric or paper tape inside corners improves strength. Check hinges for tightness and fix any loose parts. Reinforce edges with thin plastic or cardboard strips. These steps help the cube hold up under pressure.
Proper Maintenance
Keep your infinity cube clean and dry. Wipe it with a soft cloth regularly. Avoid water or harsh chemicals that damage materials. Store the cube in a safe place away from sharp objects. Do not force the cube to bend in unnatural ways. Inspect the toy often for signs of wear. Repair minor damages quickly to prevent bigger problems. Good care extends the life of your handmade toy.

Credit: www.youtube.com
Frequently Asked Questions
What Materials Are Needed For A Diy Infinity Cube?
You need six small cubes, strong glue, sandpaper, and paint. Use lightweight, sturdy materials like wood or plastic for durability. Gather these before starting to make your infinity cube fidget toy.
How Long Does It Take To Make An Infinity Cube?
Making an infinity cube usually takes about 1 to 2 hours. Time varies based on your crafting skills and drying time for glue. Plan accordingly to ensure a smooth assembly process.
Can Children Safely Make A Homemade Infinity Cube?
Yes, children can make an infinity cube with adult supervision. Ensure safe use of glue and tools to avoid accidents. This activity helps develop fine motor skills and creativity.
How Do You Assemble The Cubes For The Infinity Toy?
Glue the six cubes in pairs to form three connected units. Attach these units using hinges or tape to allow folding. Proper alignment ensures smooth, endless flipping motion.
Conclusion
Making your own infinity cube fidget toy is fun and simple. It helps keep your hands busy and your mind calm. You only need a few materials to start. Follow the steps carefully and take your time. You can customize the cube with colors or designs.
This DIY project is great for creativity and focus. Try making one today and enjoy the calming effect it brings. A homemade fidget toy can be a perfect little stress buster. Give it a go and see how it feels in your hands.


