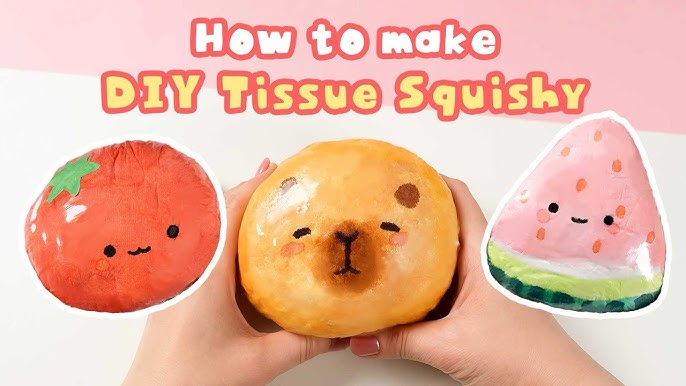
Have you ever wanted a fun, soft toy that you can squeeze and squish whenever you want? Making your own squishy toy DIY is easier than you think.
Imagine creating a toy that’s just the way you like it—soft, colorful, and totally unique. In this guide, you’ll discover simple steps to craft your very own squishy toy at home. Ready to turn your creativity into something you can hold and enjoy?
Keep reading, and let’s get started!

Credit: www.youtube.com
Materials Needed
Gathering the right materials is key to making a squishy toy that feels satisfying and lasts long. The choices you make here will affect the softness, durability, and overall look of your creation. Let’s break down what you’ll need to get started.
Choosing The Right Foam
Foam is the heart of any squishy toy. You want a foam that is soft but holds its shape well after squeezing.
- Memory foam:Offers excellent softness and slow recovery, perfect for a luxurious squish.
- Polyurethane foam:Commonly used for DIY squishies, it’s affordable and easy to work with.
- Craft foam sheets:Useful if you want to layer or add texture, but less squishy on their own.
Think about how you want your squishy to feel in your hand—do you prefer a gentle bounce back or a slow, melting sensation?
Essential Craft Supplies
Besides foam, you’ll need some basic tools to shape and decorate your squishy.
- Sharp scissors or a craft knife:For cutting your foam into the desired shape.
- Fabric glue or hot glue gun:To attach different foam pieces or add layers securely.
- Acrylic paint or fabric markers:These help you add color and details that won’t easily rub off.
- Sandpaper (optional):To smooth out rough edges for a professional finish.
Having these supplies ready will save you frustration and keep your project moving smoothly.
Optional Decorative Items
If you want your squishy toy to stand out, consider adding some fun decorations.
- Glitter or sequins:Add sparkle that catches the light and brings your toy to life.
- Small beads or googly eyes:Great for creating cute faces or textured effects.
- Ribbon or fabric scraps:Use these for bows or accents that give your squishy personality.
Ask yourself what makes your squishy unique. How can little extras turn it from simple to special?
Preparing Your Workspace
Preparing your workspace is the first step to making a squishy toy DIY. A neat and organized area helps you work faster and avoid mistakes. It also keeps your materials safe and clean. Taking time to set up will make the whole process more fun and less stressful.
Setting Up A Clean Area
Choose a flat surface with good lighting. Wipe it down to remove dust and dirt. Clear away anything that might get in the way. Use a table or desk that is easy to clean if spills happen. Lay down newspaper or a plastic sheet to protect the surface.
Organizing Tools And Materials
Gather all tools and materials before starting. Arrange them within arm’s reach to save time. Group similar items like scissors, glue, and paint together. Use small containers or trays to hold tiny parts. Check that everything is ready to use and easy to find.
Basic Foam Cutting Techniques
Cutting foam is the foundation of creating a squishy toy DIY. Mastering basic foam cutting techniques will help you shape your toy perfectly and avoid frustration. You’ll find that precise cuts make your squishy look professional and last longer during play.
Safe Cutting Tips
Always use a sharp blade to cut foam smoothly. Dull knives cause uneven edges and can slip, which is dangerous. Keep your fingers away from the cutting path and work on a stable surface to stay safe.
Consider using a cutting mat underneath your foam. This protects your table and helps keep the blade steady. If kids are helping, supervise closely and provide kid-safe scissors or foam cutters designed for young hands.
Shaping Your Foam Pieces
After cutting, shaping your foam is key to getting that perfect squishy feel. Use sandpaper or a fine file to smooth edges and round corners gently. This prevents sharp points and adds a soft, squishy texture.
Think about your design’s details and cut small shapes to layer on top of your main foam piece. This adds dimension and makes your squishy more interesting. Have you tried trimming foam into unusual shapes to make your squishy unique?
Creating The Squishy Base
Creating the squishy base is the foundation of your DIY squishy toy. This step determines how soft and satisfying your final product will feel. It’s important to choose the right materials and assemble them carefully to get that perfect squish.
Layering Foam For Softness
Start by selecting soft foam sheets—memory foam works well because it compresses easily and bounces back slowly. Cut several pieces into the shape you want your squishy toy to have.
Stack the foam layers evenly. The more layers you add, the thicker and softer your squishy base becomes. Think about how dense you want your toy: too few layers might make it too firm, and too many could make it bulky.
Have you tried mixing different foam types? Combining a softer foam with a slightly firmer layer can give your squishy a unique feel that stands out.
Gluing And Assembling
Use a flexible adhesive designed for foam to glue your layers together. Apply the glue thinly and evenly to avoid lumps that can affect the squishiness.
Press the layers firmly and hold them in place until the glue sets. Clamps or heavy books work well here. This step ensures your squishy base stays intact through lots of squeezing.
Be patient during this process. Rushing can cause the layers to shift or not bond properly. Have you noticed how a well-glued base holds up better over time? That’s why this step matters as much as the foam choice itself.
Adding Texture And Design
Enhance your squishy toy by adding unique textures and designs. Use colorful paints or markers to create vibrant patterns. Incorporate glitter or stickers for extra flair, making each toy a personalized masterpiece.
Adding texture and design to your DIY squishy toy elevates its appeal. Personal touches make each squishy unique. You can use different methods to achieve this. Let’s explore some creative ways to add life and character to your squishy toy.Painting Your Squishy
Acrylic paints are perfect for this task. They dry quickly and adhere well. Use a small brush for detailed designs. Apply paint in thin layers to avoid cracks. Allow each layer to dry before adding another. Mix colors to create gradients and depth.Using Markers And Stickers
Permanent markers work wonders for adding intricate details. Fine-tip markers are best for small patterns. Create faces, patterns, or doodles on your squishy. Stickers offer an easy way to add fun elements. Choose stickers that match your theme. Press them firmly to ensure they stick well.
Credit: www.youtube.com
Sealing And Finishing
Sealing and finishing your DIY squishy toy protects it and gives a smooth look. This step helps keep the colors bright and prevents damage from handling. Proper sealing also makes your toy last longer and feel better to squeeze.
Applying Protective Coats
Use a clear, non-toxic sealant to cover your squishy toy. Choose water-based sealants for easy cleaning and safe use. Apply thin layers evenly with a soft brush or sponge. Let each coat dry fully before adding another. Two or three coats work best to protect the surface well.
Drying And Setting Time
Allow your squishy toy to dry in a dust-free area. Drying time depends on the sealant and room temperature. Usually, it takes 1 to 3 hours per coat. After the final coat, wait 24 hours before using the toy. This ensures the sealant sets fully and the surface feels smooth.
Troubleshooting Common Issues
Troubleshooting common issues helps keep your DIY squishy toy looking great. Small problems can happen during making or playing. Fixing these quickly saves time and frustration. Here are simple solutions for paint smudges and foam tears.
Fixing Paint Smudges
Paint smudges can ruin the smooth look of your squishy. Act fast before the paint dries completely.
- Use a damp cotton swab to gently wipe the smudge.
- Try a small amount of rubbing alcohol on a cotton swab to remove stubborn spots.
- Allow the squishy to dry fully before handling it again.
- Apply a thin clear sealant to protect the paint after it dries.
Repairing Foam Tears
Foam tears reduce the squishy’s softness and shape. Fix them carefully to keep the toy intact.
- Use craft glue designed for foam to bond the torn edges.
- Press the torn parts together and hold for a few minutes.
- Let the glue dry completely before squeezing the toy.
- For larger tears, consider adding a thin foam patch inside for strength.

Credit: www.youtube.com
Creative Variations
Creative variations make squishy toy DIY projects more fun and unique. They allow you to personalize your squishies beyond the basic shapes and colors. Trying new themes and materials can inspire fresh ideas and improve your crafting skills. Explore different styles and textures to find what excites you the most.
Making Themed Squishies
Themed squishies bring characters and ideas to life. Choose themes from nature, food, animals, or fantasy. Use colors and shapes that match your theme perfectly. For example, a fruit theme might include squishies shaped like strawberries, bananas, or watermelons.
Adding small details like eyes, smiles, or patterns makes each toy special. Use markers or paint to create faces and textures. Combine different colors to highlight parts of your design. Themed squishies work well as gifts or decorations.
Using Alternative Materials
Try using different materials to change how your squishy feels and looks. Instead of regular foam, use memory foam for a softer touch. Craft clay or silicone can add a smooth and flexible surface. You can also mix in small beads or glitter for extra texture and sparkle.
Experiment with fabric covers to create squishies that look like plush toys. Stretchy socks or old gloves work well as covers. Fill them with soft stuffing or foam pieces for a squishy effect. These material swaps keep your DIY project exciting and unique every time.
Frequently Asked Questions
What Materials Are Needed To Make A Diy Squishy Toy?
To make a DIY squishy toy, you need foam clay, glue, paint, and a mold. These materials are easy to find and safe to use. Foam clay creates the soft texture essential for squishy toys. Glue helps hold the shape firmly.
Paint adds color and design.
How Long Does It Take To Make A Squishy Toy?
Making a squishy toy takes about 1 to 2 hours. This includes mixing materials, shaping, and drying time. Drying may take longer depending on the air humidity. Be patient to ensure the toy is fully set before use.
Can I Customize The Shape Of My Squishy Toy?
Yes, you can customize any shape using molds or freehand shaping. Foam clay is flexible and easy to mold into various designs. You can create animals, food, or abstract shapes. Personalizing adds a fun and unique touch to your squishy toy.
Is It Safe To Make Squishy Toys At Home?
Making squishy toys at home is safe with non-toxic materials. Always use child-friendly glue and foam clay. Work in a well-ventilated area to avoid inhaling fumes. Supervise children during the process to ensure safety.
Conclusion
Making a squishy toy DIY is fun and simple. You only need a few easy materials. Follow each step carefully for the best results. You can create different shapes and colors. It’s a great way to relax and be creative.
Kids and adults will enjoy this hands-on activity. Try making one today and feel proud of your work. Squishy toys also make nice gifts for friends and family. Keep practicing to improve your skills and have more fun. Enjoy the process and share your creations with others.


