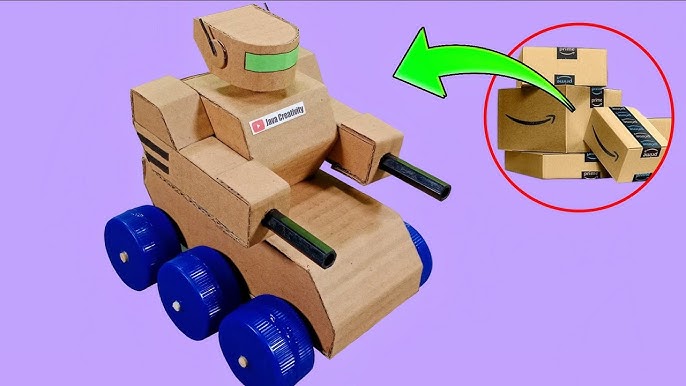
Have you ever wanted to build your very own toy robot? It’s easier than you think, and the best part is you can do it yourself!
Imagine the excitement of creating a fun, moving robot with your own hands. This DIY project is perfect for anyone who loves gadgets, creativity, or just wants a cool toy to show off. Keep reading, and you’ll discover simple steps and tips that make building your toy robot both fun and rewarding.
Ready to bring your robot to life? Let’s get started!

Credit: www.youtube.com
Materials Needed
Gathering the right materials is the first step to build your DIY toy robot. Choosing quality parts makes the project easier and the robot better. This list breaks down what you need into three main groups. Each group covers important items for different parts of the robot.
Basic Tools
- Screwdriver set for small screws
- Soldering iron for connecting wires
- Wire cutters and strippers
- Hot glue gun for quick assembly
- Small pliers for gripping parts
- Measuring tape or ruler
- Multimeter to test electrical connections
Electronic Components
- Microcontroller board (e.g., Arduino or Raspberry Pi)
- Motors for movement (servo or DC motors)
- Battery pack to power the robot
- Wires and jumper cables
- Switches or buttons for control
- LED lights for indicators
- Resistors and capacitors as needed
- Ultrasonic sensor for obstacle detection
Body And Frame Supplies
- Plastic or wooden sheets for the frame
- Small screws and nuts
- Double-sided tape or Velcro strips
- Craft foam for decoration
- Paints or markers for customization
- Recycled materials like bottle caps or boxes
- Zip ties to hold parts together

Credit: www.youtube.com
Designing Your Robot
Designing your toy robot is where creativity meets functionality. It sets the foundation for how your robot will look and operate. Taking the time to plan your design carefully can save you frustration later and make the building process more enjoyable.
Sketching Ideas
Start by grabbing a pencil and paper. Sketching your robot helps you visualize its shape and parts before you start building. Don’t worry about making perfect drawings; simple outlines can guide your construction.
Try different designs and compare them side by side. You might want a robot with arms, wheels, or even a light-up head. What features excite you the most? Sketching lets you experiment without any cost or waste.
Think about the size of your robot and how detailed you want it to be. Will it be small enough to hold in your hand, or larger to display on a shelf? These choices affect the materials and tools you’ll need.
Choosing A Robot Type
Decide what kind of robot you want to create. Do you prefer a walking robot, one that rolls on wheels, or maybe a stationary robot that can light up or make sounds? Each type has different building challenges and rewards.
Consider your skill level and the tools you have available. For example, a simple wheeled robot might be easier if you’re new to DIY projects. On the other hand, a walking robot might require motors and more complex parts.
Ask yourself what your robot’s purpose will be. Will it be a fun toy to play with, a decoration, or a learning tool? Knowing this helps you focus on the important design features and avoid unnecessary complications.
Building The Frame
Building the frame is the first big step in making a DIY toy robot. The frame acts as the robot’s skeleton. It supports all parts and gives the robot shape. A strong frame makes the robot sturdy and ready for action.
Use simple materials like cardboard, wood, or plastic sheets. These are easy to cut and join. Keep measurements accurate to ensure all parts fit well. A neat frame helps the robot look good and work smoothly.
Cutting And Shaping
Start by cutting the frame pieces carefully. Use a ruler and pencil to mark shapes. Cut with scissors or a craft knife, depending on material. Smooth rough edges with sandpaper for safety and fit.
- Cut body panels to size.
- Shape arms and legs evenly.
- Make openings for wires or joints.
Shaping pieces right helps the robot parts move freely. Rounded edges prevent damage and improve the robot’s look.
Assembling Parts
Join the cut pieces to form the robot’s frame. Use glue, tape, or small screws based on material. Hold parts firmly while the glue dries. Check the frame’s balance and adjust if needed.
- Attach arms and legs securely.
- Fix the head and body tightly.
- Leave space for motors and circuits.
Ensure all parts fit well without gaps. A solid frame sets the base for adding electronics and decoration.
Wiring And Electronics
Building a DIY toy robot involves basic wiring and electronics skills. Gather simple materials like wires, batteries, and motors. Follow easy steps to assemble and connect components, creating a fun, moving toy robot.
Wiring and electronics bring your toy robot to life. These components make it move, sense, and react. Proper wiring ensures all parts function together seamlessly. Let’s explore how to connect motors, set up a power source, and add sensors.Connecting Motors
Motors are the heart of your robot’s movement. Start by identifying the motor terminals. Connect wires to the motor terminals. Use a soldering iron for secure connections. Ensure wires are not crossed or tangled. Attach the other ends to your control board. Check polarity to ensure correct rotation direction. Test each motor with a power source briefly. Make sure it spins as intended.Setting Up Power Source
A reliable power source is crucial. Choose batteries that match your robot’s voltage needs. Connect the battery holder wires to the control board. Use clips or soldering for firm connections. Avoid short circuits by ensuring no exposed wires touch. Secure the battery holder inside the robot casing. This prevents movement during operation. Test the power flow with a multimeter. Ensure the right voltage reaches the control board.Adding Sensors
Sensors help the robot interact with its surroundings. Select sensors based on the desired function. Common types include ultrasonic and infrared. Connect sensor wires to the control board. Follow the board’s manual for correct pin placement. Use jumper wires for easy connections. Secure each sensor in the desired position on the robot. Test the sensors using simple scripts. Verify they detect objects or changes accurately.Programming Basics
Programming is the heart of any DIY toy robot. It tells the robot how to move, react, and perform tasks. Understanding basic programming concepts makes the process simple and fun. Anyone can create commands to bring their robot to life.
Start by choosing the right microcontroller. Then, learn to write simple codes. Finally, test the robot’s functions to ensure everything works smoothly.
Selecting A Microcontroller
The microcontroller is the robot’s brain. It controls all actions based on your code. Popular options include Arduino, Raspberry Pi, and ESP32. Arduino is beginner-friendly and has many tutorials. Choose one that fits your project needs and skill level.
Look for these features:
- Number of input/output pins
- Memory size
- Compatibility with sensors and motors
- Community support and resources
Writing Simple Codes
Start coding by learning basic commands. Use easy programming languages like Arduino C or Python. Write code to move motors, read sensors, or blink LEDs. Keep the code short and clear.
Example tasks:
- Turn the robot’s wheels on and off
- Make the robot respond to light or touch
- Control speed or direction
Test small pieces of code before combining them. This helps find mistakes early.
Testing Functions
Testing is key to a working robot. Upload your code to the microcontroller. Watch the robot perform each task. Check if motors move correctly or sensors react as expected.
Fix errors by adjusting the code or wiring. Repeat tests until the robot runs smoothly. Testing ensures your robot behaves as you want it to.
Finishing Touches
Finishing touches bring your DIY toy robot to life. These steps add personality and fun. Simple details make a big difference. Your robot will look complete and ready to play.
Painting And Decorating
Choose bright colors for your robot’s body. Use acrylic paint for smooth, even coverage. Let each coat dry fully before applying another. Add details like eyes, buttons, or patterns. Stickers or small craft pieces work well for decoration. Seal the paint with a clear coat to protect it. This step makes your robot stand out.
Adding Moving Features
Attach parts that can move to make play more fun. Use small hinges or split pins for joints. Wheels or simple gears add motion to legs or arms. Rubber bands or springs can create a bouncing effect. Test each moving part to ensure smooth action. Moving features make your robot interactive and exciting.
Troubleshooting Tips
Troubleshooting your DIY toy robot can feel frustrating, but it’s part of the learning process. Knowing what to look for and how to fix common problems saves time and keeps the fun alive. Let’s dive into some practical tips that will help you get your robot moving smoothly again.
Common Issues
Sometimes your robot won’t respond or moves erratically. This can happen because of loose wires, weak batteries, or faulty connections. Another common problem is the motors not spinning properly, which could be due to debris or motor wear.
Have you noticed your robot acting strangely after a bump or drop? That’s often when connections come loose or sensors get misaligned. Identifying these issues early keeps your project on track and prevents bigger headaches later.
Quick Fixes
- Check all wires and connections:Make sure each wire is firmly attached and there are no breaks or frays. A simple wiggle test can reveal loose spots.
- Replace or recharge batteries:Weak power supply can cause sluggish movement or no response at all. Always use fresh batteries or fully charged ones.
- Clean the motors:Remove dust and debris gently with a soft brush. This helps motors run smoothly and prevents overheating.
- Reset your robot’s programming:Sometimes the code might glitch. Restarting or re-uploading the program often fixes unexpected behavior.
If your robot still won’t cooperate, try isolating each part to find the culprit. Testing components one by one can reveal hidden problems you might otherwise miss. What small change could get your robot back to life today?

Credit: www.youtube.com
Creative Variations
Creative variations let you customize your DIY toy robot to fit your style. This makes the project more fun and personal. You can change the look, add new parts, or improve how it works. Small changes can make your robot unique and exciting to build and play with.
Upgrading Designs
Change the robot’s shape to make it more interesting. Use different materials like cardboard, plastic, or metal pieces. Paint your robot in bright colors or patterns. Add stickers or small lights for a cool effect. Try new shapes for the arms, legs, or head. These upgrades make your toy robot stand out.
Incorporating New Features
Add simple functions to make your robot more fun. Install small motors to move the arms or wheels. Use batteries to power lights or sounds. Attach sensors that react to touch or light. Include switches to turn parts on and off. These features bring your toy robot to life and keep it exciting to use.
Frequently Asked Questions
What Materials Are Needed To Make A Diy Toy Robot?
To make a DIY toy robot, you’ll need basic materials like cardboard, motors, batteries, wires, and sensors. Additionally, tools such as glue, scissors, and a screwdriver are essential for assembly and customization.
How Long Does It Take To Build A Diy Toy Robot?
Building a DIY toy robot typically takes 2 to 4 hours. The time varies based on complexity and your experience with electronics and crafting.
Can Beginners Make A Simple Toy Robot At Home?
Yes, beginners can make simple toy robots using easy-to-follow guides. Start with basic kits or simple designs to build confidence and skills.
What Skills Are Required To Build A Toy Robot?
Basic skills in electronics, wiring, and crafting help build a toy robot. Understanding simple circuits and mechanical assembly is beneficial but not mandatory.
Conclusion
Building a DIY toy robot can be fun and rewarding. You learn new skills step by step. It’s a great way to spend time and be creative. Kids and adults both enjoy making their own robot. Experiment with different parts and ideas to personalize your toy.
This project helps you understand basic mechanics and electronics. Keep practicing, and your robots will get better each time. Enjoy the process and share your creation with friends and family. Simple projects like this bring joy and learning together. Give it a try—you might surprise yourself!


