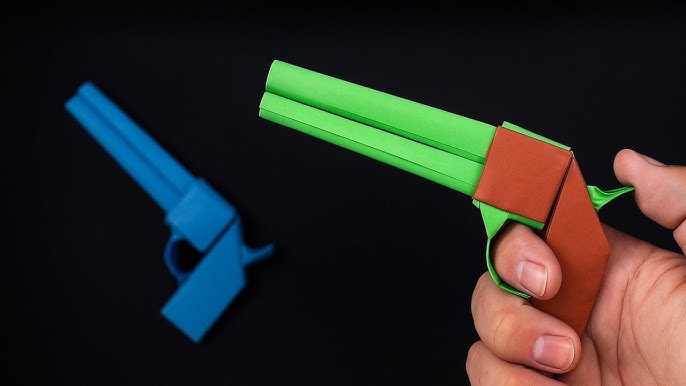
Are you ready to create something fun and exciting with your own hands? Making a DIY toy gun is easier than you think, and it can turn a simple afternoon into an unforgettable experience.
Imagine the pride you’ll feel holding a toy gun you built yourself—customized just the way you want it. Whether you want a cool prop for playtime, a creative project to share with friends, or a unique gift, this guide will walk you through every step.
Keep reading, and you’ll discover simple materials, clear instructions, and handy tips to bring your DIY toy gun to life quickly and safely. Let’s get started!

Credit: www.youtube.com
Materials Needed
Gathering the right materials is the first step to making a DIY toy gun that’s safe, fun, and durable. You don’t need fancy tools or expensive items, just a few basics that you can find around your home or at a local store. Knowing exactly what you’ll need helps you stay organized and makes the crafting process smoother.
Basic Supplies
- Cardboard or Foam Board:These make a sturdy base for your toy gun body.
- Scissors or Craft Knife:Sharp enough to cut precise shapes but handle with care.
- Glue or Tape:Use strong adhesive to hold parts together firmly.
- Rubber Bands:Great for creating a simple firing mechanism.
- Markers or Pens:For marking cut lines and adding details.
- Ruler:Helps you measure accurately and keep your design balanced.
- Straws or Small Tubes:These can act as barrels or trigger parts.
Think about what you already have at home before heading out to buy supplies. It’s surprising how many materials can double up for different parts of your toy gun. Do you have old packaging or craft leftovers? They can be perfect for this project.
Optional Decorations
- Paints or Colored Markers:Add personality and style to your toy gun.
- Stickers or Decals:Customize with fun designs or symbols.
- Foam Sheets:Useful for adding texture and extra layers.
- Buttons or Beads:Can serve as decorative triggers or sights.
- Glitter or Washi Tape:For a unique sparkle or pattern.
How much detail do you want on your toy gun? Sometimes, simple decorations can make a big difference in how much you enjoy your creation. Personal touches turn a basic model into something you’re proud to show off.

Credit: www.youtube.com
Choosing A Design
Choosing the right design for your DIY toy gun sets the tone for the entire project. It affects how complex the build will be, the materials you need, and the final look of your creation. Think about who will use the toy and what style fits your skill level and available time.
Simple Models
Simple designs are perfect if you want a quick and fun project. These models usually require basic materials like cardboard, popsicle sticks, or plastic bottles. You can easily cut, glue, and assemble them without special tools.
Consider a classic shape, like a basic pistol or a small rifle outline. These often use a few parts and focus on easy assembly.
- Use bright colors or stickers to make your toy stand out.
- Try adding a rubber band for a simple firing mechanism.
- Focus on smooth edges to keep the toy safe to handle.
Have you ever noticed how a simple design can still be impressive with the right finishing touches? Sometimes, less really is more when crafting your first toy gun.
Advanced Styles
If you enjoy challenges and want a more realistic or detailed toy gun, advanced styles are your go-to. These designs often use wood, metal parts, or intricate plastic components. You might need tools like a small saw, drill, or hot glue gun.
Think about adding moving parts such as triggers, sliding bolts, or even spring-loaded mechanisms. These features bring your toy to life and make it interactive.
- Plan your design carefully, sketching each part before building.
- Use reference images to capture authentic details.
- Test moving parts frequently to ensure they work smoothly and safely.
Have you considered how building something complex can boost your problem-solving skills? Taking on a detailed design pushes you to learn and experiment, making the finished toy even more rewarding.
Cutting And Shaping
Cutting and shaping are key steps in making a DIY toy gun. These steps give the toy its form and ensure all parts fit well. Careful cutting and shaping help create a neat and safe toy. Taking time here improves the final look and feel.
Safe Cutting Techniques
Always use a sharp blade or saw for clean cuts. Dull tools can slip and cause injury. Cut on a stable surface to avoid accidents. Wear safety glasses to protect your eyes from debris. Keep your fingers away from the cutting path. Use clamps to hold pieces steady while cutting. Take slow and steady strokes to control the tool. Never rush through the cutting process.
Shaping The Parts
After cutting, shape the parts to fit and look right. Sand edges smooth to avoid splinters or sharp spots. Use files or sandpaper to round corners softly. Check each piece against the design before final shaping. Carve small details carefully with a craft knife. Test fit the parts often to ensure proper alignment. Keep shapes simple for easier assembly and safer play.
Assembling The Toy Gun
Assembling your DIY toy gun is where your project starts to take shape. This stage requires patience and attention to detail to ensure every piece fits perfectly. Getting this right will make your toy gun sturdy and safe to handle.
Joining Components
Start by aligning the main parts of the toy gun carefully. You want to make sure each component matches the design plan exactly before connecting them.
Use clamps or hold pieces firmly in place to avoid shifting. This keeps your build precise and prevents loose parts later on.
Think about the order of assembly. For example, connecting the barrel to the body first often makes attaching smaller parts easier.
Securing Connections
Once parts are joined, reinforce each connection point. Screws or strong glue work well, but choose what fits your materials best.
Double-check every joint after securing. Wiggle the pieces gently to test if they hold firm—if anything moves, it needs extra support.
Have you considered adding small brackets or supports inside hidden areas? They can add strength without changing the look of your toy gun.
Painting And Decorating
Create a DIY toy gun using simple materials like cardboard and paint. Decorating it with bright colors makes it look fun and real. This project combines painting and crafting for a playful, handmade toy.
Painting and decorating your DIY toy gun is a fun part of the process. This is where your creativity shines. It’s not just about making it look good; it’s also about personalizing it. Choose colors and details that reflect your style. This step transforms a basic toy gun into something unique and exciting.Color Choices
Selecting the right colors can make your toy gun stand out. Bright colors like red, blue, or green are popular choices. They make the toy eye-catching and lively. You can also use metallic shades for a sleek look. Consider using a base color, then add contrasting highlights. This creates depth and interest.Adding Details
Details bring your toy gun to life. Use paint brushes or markers for precision. Add stripes, spots, or other patterns for a dynamic look. Stickers or decals can add character without much effort. For a realistic feel, consider adding faux wood or metal textures. This adds an element of sophistication.Safety Tips
Safety is the top priority when making a DIY toy gun. A safe toy gun protects children and ensures fun without accidents. Follow simple safety tips to keep playtime secure and enjoyable.
Using Non-toxic Materials
Choose materials that are safe and free from harmful chemicals. Non-toxic glue, paint, and plastic help avoid skin irritation and health risks. Avoid sharp edges and small parts that can cause injury or choking. Always check labels to confirm materials are child-safe.
Supervision And Usage Guidelines
Adult supervision is important during both making and playing. Teach children how to use the toy gun properly. Set clear rules, such as never aiming at faces or animals. Store the toy gun safely when not in use to prevent misuse.
Playing Safely
Playing with a DIY toy gun can be a lot of fun, but safety should always come first. Making sure you and your friends enjoy the game without accidents or misunderstandings is key. Let’s look at how you can keep playtime safe and respectful for everyone involved.
Safe Play Areas
Choose a place where you won’t disturb others or risk damage. Open outdoor spaces like a backyard or park are great options. Avoid playing near streets, busy sidewalks, or places with fragile objects.
Make sure the area is free from hazards like sharp objects, slippery surfaces, or uneven ground. This reduces the chance of trips or falls. If indoors, pick a room with enough space and soft surfaces to prevent injuries.
Have you thought about how your surroundings affect the game? Setting boundaries helps everyone know where they can safely move and shoot. Clear markers like cones or ropes make this easy.
Respecting Others
Always ask permission before playing in a shared space. Not everyone is comfortable around toy guns, so respect their feelings and concerns. This helps avoid conflicts and keeps the atmosphere friendly.
Set clear rules with your friends about aiming only at safe targets, never at faces or animals. This habit prevents accidents and builds trust. If someone asks to stop, listen immediately without argument.
Remember, playing is about fun, not causing fear. How can you make sure your play doesn’t upset others around you? Keeping respect at the center of your game makes it enjoyable for everyone.

Credit: www.youtube.com
Frequently Asked Questions
What Materials Do I Need To Make A Diy Toy Gun?
You need basic materials like cardboard, glue, rubber bands, and scissors. These are safe, affordable, and easy to find. Optional items include paint for decoration and tape for extra strength.
How Can I Make A Safe Diy Toy Gun?
Use non-toxic materials and avoid sharp edges. Ensure parts are securely glued. Avoid small parts that pose choking hazards. Always supervise children during play.
How Long Does It Take To Build A Diy Toy Gun?
It typically takes 30 to 60 minutes. Time depends on complexity and drying time for glue. Simple designs can be completed quickly by beginners.
Can I Customize My Diy Toy Gun Design?
Yes, customize with colors, shapes, and sizes. Use paint, markers, or stickers for personalization. Custom designs make the toy unique and fun.
Conclusion
Making a DIY toy gun is fun and simple. You only need basic materials and tools. Follow the steps carefully for a safe build. This project helps you learn and create at the same time. Enjoy playing with your new toy and share it with friends.
Always remember to use it safely and responsibly. Try different ideas to make your toy unique. Keep practicing and have fun with your creations.


