
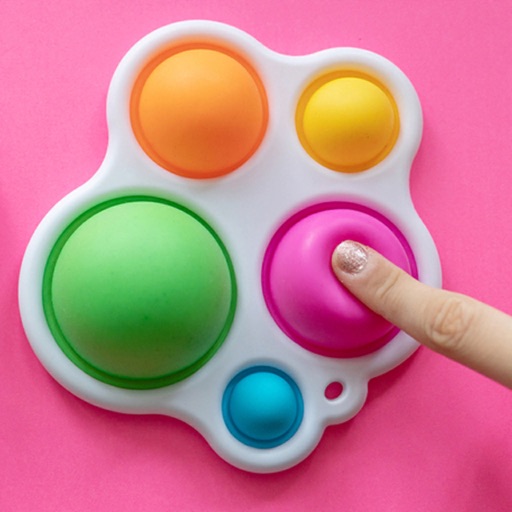
Do you love fidget toys but don’t want to spend money on them? Imagine making your very own simple dimple fidget toy right at home.
It’s easy, fun, and perfect for keeping your hands busy whenever you need. In this guide, you’ll discover step-by-step how to create a DIY simple dimple toy with materials you probably already have. Ready to learn a cool trick that will boost your focus and relieve stress?
Keep reading, because this could be your next favorite handmade gadget!
Credit: appadvice.com
Materials Needed
Gathering the right materials is key to making a DIY simple dimple fidget toy that feels good to use and lasts long. The quality of your supplies directly affects the final product’s texture and durability. Before you start, make sure you have everything ready to make the process smooth and enjoyable.
Choosing The Right Silicone
Silicone is the main material for a simple dimple fidget toy. Look for soft, flexible silicone sheets or molds designed for crafting. Food-grade or skin-safe silicone works best since you’ll be touching it often.
Thickness matters too. Too thin, and the toy won’t pop well; too thick, and it might feel stiff. Try a silicone thickness around 1-2 millimeters for a perfect balance.
Tools And Accessories
You’ll need some basic tools to shape and assemble your fidget toy. Small scissors or a precision craft knife help cut silicone cleanly. A silicone mold or template makes it easier to get the right shape.
Don’t forget a pair of tweezers for placing small parts like the popping bubbles. A strong adhesive safe for silicone can secure any extra pieces. You might also want a cutting mat to protect your workspace.
Optional Decorations
Adding decorations can make your simple dimple toy unique and fun. You can use colorful silicone paints or markers to add patterns or designs. Small stickers or glitter can add personality but make sure they won’t peel off during use.
Consider adding beads or charms around the edges for extra sensory stimulation. Just remember, decorations should not interfere with the popping function or safety of the toy.
Preparing The Workspace
Getting your workspace ready is key to a smooth DIY project, especially when making a simple dimple fidget toy. A tidy and safe area helps you focus, prevents mistakes, and keeps all your materials within easy reach. Let’s look at how you can prepare your space effectively.
Clean And Organize Area
Start by clearing off your table or desk completely. Remove anything not related to your project to avoid clutter and distractions.
Wipe the surface with a damp cloth to get rid of dust and dirt. This ensures your materials don’t get dirty and your fidget toy stays clean.
Arrange your supplies neatly. Group similar items like silicone sheets, buttons, and glue together. This saves time and helps you spot if anything is missing.
- Use small containers or trays to hold tiny parts.
- Keep tools like scissors and tweezers close by.
- Leave some free space to comfortably work on your toy.
Have you ever lost a small component mid-project? Keeping things organized prevents that frustration and keeps your momentum going.
Safety Tips
Safety should never be an afterthought. Even simple projects can have risks if you’re not careful.
Make sure your workspace has good lighting so you can see what you’re doing clearly. Poor visibility can cause mistakes or injuries.
If you’re using glue or paint, work near an open window or use a fan. Fumes can build up quickly and make you dizzy.
Keep a small first aid kit nearby just in case of minor cuts or scrapes. It’s better to be prepared than caught off guard.
- Wear old clothes or an apron to protect your outfit.
- Use scissors and sharp tools carefully—always cut away from your body.
- Wash your hands after handling materials, especially adhesives.
Have you noticed how a safe and clean workspace changes your confidence in tackling projects? It’s not just about avoiding accidents—it’s about creating an environment where your creativity can flow freely.
Creating The Mold
Creating the mold is a key step in making a DIY simple dimple fidget toy. The mold shapes the toy’s bubbles and gives it its fun popping feel. Choosing the right mold affects the toy’s size, shape, and ease of use. You can buy molds or use household items for a quick start. This section helps you pick or create a mold that fits your project perfectly.
Selecting A Mold Shape
Choose a mold shape that fits your hand comfortably. Round or oval shapes work well for easy popping. Small shapes make the toy more portable. Large shapes create bigger bubbles and a different feel. Think about the number of bubbles you want on your toy. Simple shapes with smooth edges are safer and easier to use. Avoid sharp or complex shapes that might break the toy.
Using Household Items As Molds
Household items can serve as quick and free molds. Look for silicone cupcake liners or ice cube trays. These have soft edges and small cavities perfect for bubbles. Bottle caps or small plastic containers also work well. Clean the items before use. Test the shape by pressing soft clay or dough into them. This helps check if bubbles will pop easily. Using household items saves money and adds a creative touch to your toy.
Mixing The Silicone
Mix the silicone thoroughly until the color is even and there are no streaks. Stir slowly to avoid bubbles and ensure a smooth texture. This helps the silicone set properly for your DIY simple dimple fidget toy.
Mixing the silicone for your DIY Simple Dimple Fidget Toy is a crucial step that determines the final texture and durability of your creation. It’s a simple yet fascinating process that you can master with a bit of patience and precision. Let’s dive into how to get it just right.Measuring Ingredients
The foundation of a perfect mix starts with accurate measurements. For this project, you’ll need to gather liquid silicone and a catalyst. Think about using a small digital scale to measure your ingredients precisely. A small miscalculation can impact the flexibility and feel of the final product. Make sure to follow the recommended ratio provided by the silicone manufacturer. This usually involves a mix of about 10 parts silicone to 1 part catalyst. Double-checking your measurements might seem tedious but it’s worth it for a satisfying result.Mixing Techniques
Once your ingredients are measured, it’s time to combine them. Use a disposable cup and a wooden stick for mixing. Stir the mixture thoroughly for about 3-5 minutes. Ensure that you reach the bottom and sides of the cup to avoid any unmixed silicone. You might notice some bubbles forming, but don’t worry—this is normal. To minimize these bubbles, tap the cup gently on a hard surface. This helps any trapped air to rise and pop. Have you ever noticed how a slight oversight in mixing can affect the texture of your silicone? Consistent stirring and patience will reward you with a smooth mix. Remember, practice makes perfect. Your first attempt might not be flawless, but with each try, you’ll get better at achieving the ideal consistency. What are your favorite tips for mixing silicone? Share your thoughts in the comments below!Pouring And Setting
Pouring and setting your DIY Simple Dimple fidget toy is where your project really starts to take shape. This stage demands patience and precision to ensure the toy is both functional and visually appealing. The way you fill your mold and manage curing time can make all the difference between a smooth finish and a sticky mess.
Filling The Mold
Start by preparing your mold on a flat surface to avoid uneven filling. Pour the resin slowly and steadily to minimize air bubbles, which can weaken the structure and spoil the look.
Keep a close eye on the amount you pour; overfilling can cause spillage, while underfilling may result in incomplete toy parts. If you notice bubbles, gently tap the mold or use a toothpick to pop them before the resin begins to set.
Curing Time And Conditions
Resin needs a stable environment to cure properly. Ideally, keep the mold in a dust-free area with a consistent temperature, usually between 70-75°F (21-24°C).
Don’t rush the curing process. Most resins take 24 to 48 hours to fully harden, but check your product’s instructions for exact times. Interrupting curing early can lead to a sticky or misshapen toy.
Have you thought about how temperature variations might affect your curing time? A warmer room speeds curing but can cause cracks, while a cooler one slows it down, risking incomplete hardening.
Adding Dimples
Adding dimples to your DIY simple dimple fidget toy is where the fun really begins. These small, poppable bubbles give the toy its satisfying tactile feel. Getting the dimples just right takes a bit of patience and attention, but the result is totally worth it.
Shaping Dimples While Soft
Work with the material when it’s soft and pliable to shape the dimples easily. Use your fingers or a small rounded tool to press gently into the surface. This helps create the perfect concave shape that pops back up smoothly.
Don’t rush this step. If you try to add dimples after the material hardens, you risk cracking or uneven shapes. Keep the dimples evenly spaced for a balanced look and feel.
Ensuring Durability
After shaping, let the dimples fully set to avoid any deformation during use. Choose a flexible but sturdy material that withstands repeated pressing. If you want to add extra strength, consider sealing the dimples with a thin layer of clear drying glue or resin.
Have you ever had a fidget toy where the bubbles wore out too fast? Taking time to ensure durability means your DIY toy lasts through countless satisfying clicks and pops. Think about how you use your toy and test it gently before finalizing.
Finishing Touches
Finishing touches bring your DIY simple dimple fidget toy to life. They refine the look and improve the feel. These steps make your toy more fun and durable. Small details create a polished, attractive toy ready for use.
Trimming Edges
Start by checking all edges of your fidget toy. Use fine scissors or a craft knife to trim any rough or uneven parts. Smooth edges prevent discomfort during play. Take care to cut slowly and evenly. A clean finish helps your toy last longer and feel better in hand.
Adding Color Or Paint
Choose bright or soft colors to decorate your fidget toy. Use acrylic paint or markers for easy application. Paint each section carefully and let it dry fully. Adding color makes your toy unique and appealing. You can also use stickers or washi tape for decoration. Keep the design simple and fun to keep the toy playful and inviting.

Credit: www.youtube.com
Testing Your Fidget Toy
Testing your DIY simple dimple fidget toy is a crucial step before you start enjoying it or giving it away as a gift. It ensures that the toy functions smoothly and is safe to use, especially if it’s for kids. Taking the time to check its flexibility and safety can save you from frustration or accidents later on.
Checking Flexibility
Start by pressing each bubble gently with your finger. Does it pop in and out easily without sticking? If a bubble feels too tight or too loose, the toy won’t provide the satisfying tactile feedback you want.
Try pressing the bubbles multiple times in a row. Does the material return to its original shape every time? If the bubbles don’t bounce back, your toy might need some adjustments in the materials or thickness.
Ask yourself: Is the popping sound clear and not muffled? The sound is a big part of the fidget toy’s appeal, so don’t overlook it.
Ensuring Safety For Use
Look closely for any sharp edges or small parts that could come loose. A good fidget toy should be safe to handle without any risk of cuts or choking hazards.
If you used glue or paint, check if it’s completely dry and non-toxic. Smells or residues might mean the toy isn’t ready yet.
Consider who will use the toy. For children, make sure all pieces are firmly attached and the materials are non-toxic and hypoallergenic. Would you trust this toy in a child’s hands?
Finally, test the durability by giving the toy a few drops or gentle shakes. Does it hold up without breaking? This simple test helps confirm that your creation can handle everyday use.
Tips For Customization
Choose bright colors and fun shapes to make your fidget toy more personal. Use different materials like foam or silicone for a unique feel. Small decorations can add charm without making it hard to use.
Creating a DIY Simple Dimple Fidget Toy can be a fun and creative process. One of the most exciting aspects is the opportunity to customize your toy to make it uniquely yours. With a little imagination, you can transform a simple project into a personalized masterpiece. Let’s explore some tips for customization that will help your fidget toy stand out.Using Different Colors
Colors can significantly affect the look and feel of your fidget toy. By using a variety of colors, you can create a vibrant and eye-catching design. Consider using your favorite colors or even a rainbow pattern to make it visually appealing. Don’t shy away from experimenting with different shades and hues. You might be surprised by how a small change in color can make your Simple Dimple more exciting and fun to use.Incorporating Unique Patterns
Patterns add an extra layer of fun and creativity to your fidget toy. Try using stripes, polka dots, or even a checkerboard design to give it a unique twist. You can draw inspiration from your surroundings or your favorite art styles. Consider adding a pattern that reflects your personality or interests. This could be an abstract design or a shape that holds personal significance to you. What pattern will you choose to make your fidget toy truly one-of-a-kind? With these tips, your DIY Simple Dimple Fidget Toy will not only be a tool for relaxation but also a reflection of your creativity and personal style.
Credit: www.youtube.com
Frequently Asked Questions
What Materials Are Needed For A Diy Simple Dimple Fidget Toy?
You need silicone bubble poppers, a keychain ring, strong glue, and scissors. These materials are easy to find and affordable for making the toy.
How Long Does It Take To Make A Simple Dimple Toy?
It usually takes about 10 to 15 minutes. The process is quick and straightforward, perfect for beginners or kids.
Can I Customize The Colors Of My Dimple Fidget Toy?
Yes, you can choose silicone poppers in different colors. Mixing colors adds a personal and fun touch to your toy.
Is The Diy Simple Dimple Toy Safe For Children?
Yes, if you use non-toxic materials and supervise young kids. The toy is generally safe and helps with focus and stress relief.
Conclusion
Making a DIY simple dimple fidget toy is fun and easy. You only need a few materials and some patience. This toy helps you focus and relax during busy days. Kids and adults both enjoy using it. Crafting your own also saves money and adds a personal touch.
Try making different colors or shapes for variety. Small projects like this bring joy and calm. Give it a try, and see how satisfying it feels to create your own fidget toy.


