Are you looking for a fun and simple way to keep your hands busy and your mind focused? Making your own DIY bike chain fidget toy is easier than you think.
This cool, tactile gadget not only helps reduce stress but also gives you a sense of satisfaction as you build it yourself. Stick with me, and I’ll show you step-by-step how to turn an old bike chain into a unique fidget toy that fits right in your pocket.
Ready to create something both practical and fun? Let’s get started!

Credit: www.youtube.com
Materials Needed
Gathering the right materials sets the foundation for your DIY bike chain fidget toy. Having everything ready before you start makes the process smoother and more enjoyable. You’ll see how simple items can transform into a fun, tactile gadget.
Bike Chain
The main ingredient is a bike chain. You can use an old or spare one from a bike shop or your own bike. Look for a chain that’s flexible but sturdy enough to handle constant movement.
Small Metal Rings
Small metal rings, often called jump rings, connect the chain segments. These rings should be strong but easy to open and close. They hold everything together while allowing smooth rotation.
Needle Nose Pliers
Needle nose pliers are essential for opening and closing the metal rings. They give you precision and control, especially when working with small parts. If you don’t have a pair, they’re inexpensive and worth adding to your toolkit.
Sandpaper Or File
Use sandpaper or a metal file to smooth rough edges on the bike chain and rings. This step prevents scratches or cuts while you fidget with your toy. It’s a small detail that enhances comfort and safety.
Optional: Paint Or Clear Coat
If you want to customize your fidget toy’s look, consider paint or a clear coat. Spray paint can add color, while a clear coat protects the metal from rust and wear. This isn’t necessary but gives your project a personal touch.
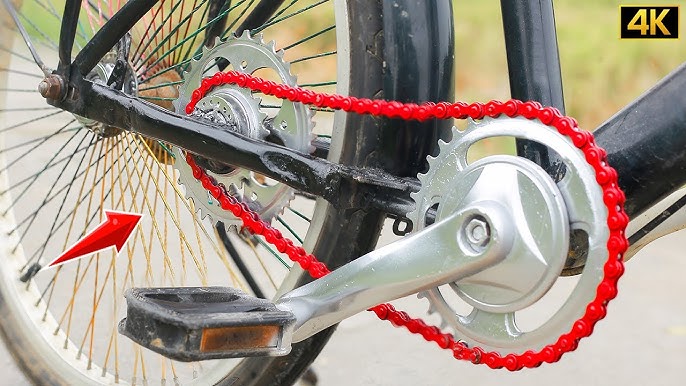
Choosing The Right Bike Chain
Choosing the right bike chain is important for making a DIY bike chain fidget toy. The chain affects how smooth the toy will feel and how long it will last. Not all bike chains work well for this project. Some are too stiff or too heavy. Others may be too small or too large to handle easily. Picking a chain with the right size and flexibility makes the toy enjoyable to use.
Consider the chain’s material and condition. Old, rusty chains may break or feel rough. Newer chains move better and last longer. A clean, well-lubricated chain also spins smoothly. This helps create a satisfying fidget experience.
Understanding Bike Chain Sizes
Bike chains come in different widths and lengths. The width depends on the number of gears the bike has. Single-speed chains are wider than multi-speed ones. Measure the chain width to make sure it fits your design. A chain that is too wide or narrow can be hard to handle or uncomfortable to spin.
Choosing Material And Durability
Most bike chains are made from steel. Steel chains are strong and last a long time. Some chains have coatings like nickel or rust-resistant finishes. These coatings protect the chain and keep it looking good. Avoid chains that are rusty or worn out. They can break easily and ruin your fidget toy.
Checking Flexibility And Movement
The best chains for fidget toys move smoothly between links. Test the chain by bending and twisting it gently. It should flex easily without feeling stuck. Chains that are too stiff make the toy hard to spin. Chains that move well give a better fidgeting experience.
Sources For Bike Chains
- Old or unused bike chains from local repair shops
- Secondhand stores or online marketplaces
- New chains from bike stores or online retailers
Pick a source that offers clean, good-quality chains. Clean the chain thoroughly before using it in your fidget toy.
Preparing The Chain
Preparing the chain is a key part of making a DIY bike chain fidget toy. The chain must be clean and the right size for smooth fidgeting. Proper preparation helps the toy last longer and feel better in your hands.
Cleaning The Chain
Start by removing dirt and grease from the chain. Use a small brush or old toothbrush to scrub the links. Warm soapy water works well to break down grime. Rinse the chain with clean water and dry it completely. A clean chain moves smoothly and looks better.
Removing Excess Links
Check the chain length to fit your hand comfortably. Too long or too short can make the toy hard to use. Use a chain tool or pliers to push out the pins and remove extra links. Keep the chain flexible but not loose. Reconnect the chain by reinserting the pin securely.
Assembling The Fidget Toy
Creating a DIY bike chain fidget toy is simple and fun. Gather a small bike chain and a few rubber rings. Connect the chain into a loop, secure with the rings, and enjoy your new fidget toy.
Assembling your DIY bike chain fidget toy is an exciting part of the process. This is where your creativity and resourcefulness come into play. With a few simple steps, you’ll have a fun and functional gadget that can keep your hands busy and your mind relaxed.Connecting The Chain Ends
Begin by selecting the right length of chain. Typically, a piece measuring about 5-7 links is ideal for a comfortable grip. Use a chain tool to remove any extra links and connect the ends. Ensure the chain forms a loop, allowing it to rotate smoothly. If you don’t have a chain tool, a screwdriver can sometimes work for loosening links.Securing With Fasteners
Fasteners are essential for ensuring stability and longevity. Small nuts and bolts work perfectly for this task. Insert the bolts through the chain links and fasten them securely with nuts. Double-check each fastener to ensure a tight and secure fit. Loose fasteners can make the toy difficult to use. Have you ever tried using colorful washers to add a personal touch? They not only secure the chain but also enhance its appearance. Taking the time to assemble your fidget toy correctly can make a world of difference. Are you ready to show off your creation and enjoy the calming effects of your new DIY gadget?Customizing Your Toy
Customizing your DIY bike chain fidget toy makes it truly yours. It adds personality and uniqueness. Small changes can transform a simple toy into a creative expression. This section guides you on how to add style and finish your toy perfectly.
Adding Decorative Elements
Decorative elements bring life and color to your fidget toy. Use small charms, beads, or stickers to personalize it. Attach lightweight items that won’t affect the toy’s movement. Try these ideas:
- Thread colorful beads through bike chain links.
- Glue tiny stickers on flat surfaces.
- Attach small metal charms with jump rings.
- Use washi tape to wrap parts of the chain.
Choose decorations that reflect your style. Keep them secure for long-lasting use.
Painting And Finishing
Painting adds a fresh look and protects your toy. Use spray paint or acrylics for easy coverage. Follow these tips for best results:
- Clean the chain thoroughly before painting.
- Apply a primer to help paint stick better.
- Use thin, even coats to avoid clumps.
- Let each coat dry completely before adding another.
- Seal with clear varnish for extra durability.
Choose colors that match your style or mood. A smooth finish makes your toy feel great to touch.

Credit: www.youtube.com
Testing Durability And Function
Testing the durability and function of your DIY bike chain fidget toy is essential. It ensures the toy lasts long and works smoothly. This step helps you find weak points early. Fixing these issues improves the overall experience.
Durability testing checks how well the toy handles daily use. Function testing confirms the toy moves as expected. Both tests give confidence in your creation’s quality.
Checking For Smooth Movement
Move the fidget toy through all its motions. Twist, spin, and fold the chain links several times. Notice any stiffness or resistance during movement. Smooth movement means the toy functions well.
If you find rough spots, apply a small amount of lubricant. Test again to see if the motion improves.
Stress Testing The Chain Links
Apply gentle pressure on the chain links. Pull and bend them slightly to simulate use. Watch for any signs of bending or breaking. Strong links will resist damage under normal use.
Repeat this test multiple times. This helps identify any weak links before regular use.
Evaluating Wear Over Time
Use the toy repeatedly for several days. Check for wear on the metal or plastic parts. Look for loose links or missing pieces. Minimal wear means your toy is durable and reliable.
Regular inspection helps catch issues early. Replace parts if you notice any damage to keep the toy safe.
Tips For Safe Use
Using a DIY bike chain fidget toy can be fun and relaxing. Safety is important to avoid injuries or damage. Follow these simple tips to keep your fidget toy safe for everyday use.
Inspect The Bike Chain Regularly
Check the chain for sharp edges or rust. Clean any dirt or grease buildup. Replace damaged parts immediately. A smooth chain prevents cuts and skin irritation.
Keep Fingers Away From Moving Parts
Avoid putting fingers inside the links when spinning the toy. This reduces the risk of pinching or trapping skin. Use the toy with gentle movements only.
Store The Toy Safely
Keep the fidget toy out of reach of small children. Store it in a dry place to avoid rust. Proper storage helps the toy last longer and stay safe.
Use The Toy In A Comfortable Space
Hold the toy firmly but not too tight. Use it while seated or standing still. Avoid using it near sharp objects or fragile items.
Limit Usage Time
Take breaks to avoid hand fatigue. Overuse can cause soreness or strain. Short, frequent sessions work best for comfort and safety.

Credit: www.youtube.com
Troubleshooting Common Issues
Building a DIY bike chain fidget toy can be fun and satisfying. Still, a few common issues might appear during or after assembly. Knowing how to fix these problems helps keep your toy smooth and enjoyable to use.
Some problems come from loose parts, stiffness, or noise. Others might relate to the chain’s movement or fitting. Troubleshooting these issues early saves time and effort.
Loose Or Falling Apart Chain Links
Check each link carefully for secure joining. Use pliers to tighten any loose pins gently. Avoid forcing parts that seem stuck; this can cause damage.
Using the right size pins and connectors is key. Replace any weak or bent links with new ones. Keep your chain clean to avoid wear and tear.
Chain Feels Stiff Or Hard To Move
Stiffness often comes from dirt or lack of lubrication. Clean the chain with a soft brush and mild soap. Dry it completely before applying a small amount of oil.
Work the chain back and forth after oiling. This spreads lubrication evenly and frees up movement. Avoid over-oiling, as excess can attract dust.
Chain Makes Unwanted Noise
Noise usually means friction or misalignment. Inspect the chain for bent or damaged links. Straighten or replace them to reduce sound.
Proper lubrication cuts down noise significantly. Check if the chain fits well within the toy’s frame. Adjust the fit if parts rub against each other.
Chain Does Not Spin Smoothly
Look for debris caught between the links. Remove dirt and small objects that block rotation. Ensure all parts connect firmly without gaps.
Check the tension of the chain. Too tight or too loose tension affects spinning. Adjust it to allow smooth, free movement.
Frequently Asked Questions
What Materials Do I Need For A Diy Bike Chain Fidget Toy?
You need a used bike chain, two keyring loops, pliers, and a small screwdriver. These materials are easy to find and affordable. Reusing an old bike chain makes the toy durable and eco-friendly.
How Do I Assemble A Bike Chain Fidget Toy?
Start by cleaning the bike chain thoroughly. Attach keyrings to both chain ends using pliers. Ensure the keyrings are secure to allow smooth movement. This simple assembly creates a fun, tactile fidget toy.
Can I Customize The Bike Chain Fidget Toy?
Yes, you can customize it by painting the chain or adding beads. Use waterproof paint for durability. Personalizing your toy makes it unique and more enjoyable to use.
Is A Diy Bike Chain Fidget Toy Safe For Kids?
Yes, if assembled properly with no sharp edges. Always check for loose links or sharp ends. Supervise young children during use to ensure safety. This toy promotes focus and reduces anxiety effectively.
Conclusion
Making a DIY bike chain fidget toy is simple and fun. You only need a few tools and bike parts. This project helps reduce stress and keeps your hands busy. It also saves money compared to store-bought toys. Try different designs to find what feels best.
Enjoy creating something useful with your own hands. Start today and see how calming a small toy can be. Keep it close for moments when you need focus or relaxation.