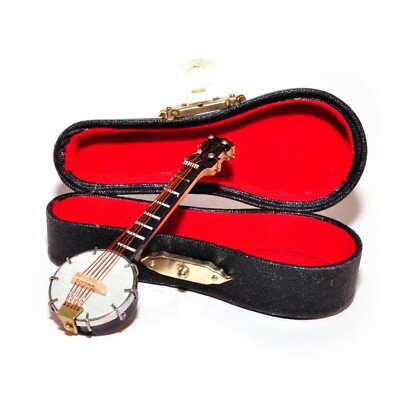
Do you want to add a charming touch to your doll’s collection? Imagine your doll holding a tiny banjo that you made yourself.
It’s not just a toy—it’s a special creation that shows your creativity and care. Making a miniature toy banjo for your doll is easier than you think. In this guide, you’ll discover simple steps and handy tips to craft a beautiful, detailed banjo that fits perfectly in your doll’s hands.
Ready to impress yourself and anyone who sees your doll’s new accessory? Let’s get started!

Credit: www.amazon.co.uk
Materials Needed
Gathering the right materials is key to crafting a perfect miniature toy banjo. The quality of wood and tools affects the final look and durability. Choosing simple, accessible supplies helps beginners enjoy the project without hassle.
Choosing The Right Wood
Softwoods like basswood or balsa are easy to carve and shape. These woods have fine grains that give smooth surfaces. They are light, making the banjo easy to handle for dolls. Avoid hardwoods, which can be tough to cut with basic tools.
Tools Required
- Small craft knife for detailed cuts
- Fine sandpaper to smooth edges
- Miniature saw for precise wood cutting
- Small drill or pin vise to make holes
- Tweezers for handling tiny parts
Additional Supplies
- Wood glue for assembling parts
- Thin wire or thread for banjo strings
- Clear varnish or paint to finish
- Small paintbrush for details
- Ruler and pencil for measurements

Credit: www.amazon.co.uk
Preparing The Base
Preparing the base for your miniature toy banjo is a crucial part of the crafting process. This step sets the foundation for the entire instrument, so precision and care here will pay off in the final look and feel. You’ll want to focus on shaping and smoothing the body carefully to make sure it looks authentic and fits well with the rest of your doll’s accessories.
Cutting The Body Shape
Start by choosing a thin piece of wood or sturdy cardboard for the banjo’s body. Use a pencil to draw the outline, which should resemble a small rounded rectangle or oval with a slight curve—think about the shape of a real banjo but scaled down.
Cut the shape slowly with a craft knife or small saw, depending on your material. Precision is key here; jagged edges will make sanding harder and affect the final appearance. Don’t rush—cutting carefully ensures the next steps go smoothly.
Sanding And Smoothing
Once the shape is cut, grab some fine-grit sandpaper to smooth out the edges and surface. Sand gently to avoid removing too much material, but make sure all rough spots and splinters are gone.
Try running your fingers over the edges; if it feels sharp or uneven, keep sanding. This step not only improves the look but also makes painting or decorating easier later on. Have you noticed how small adjustments here can make your miniature banjo look surprisingly realistic?
Crafting The Neck
Crafting the neck of a miniature toy banjo is a key part of the project. The neck gives the banjo its unique look and supports the strings. It needs to be straight, smooth, and the right size for the doll. Paying close attention to these details makes the banjo look more real and lasts longer.
Measuring And Cutting
Start by measuring the length of the neck. It should fit the size of the doll and the banjo body. Use a small ruler or measuring tape for accuracy. Mark the wood or plastic piece where you need to cut.
Cut the neck carefully with a craft knife or small saw. Make sure the edges are smooth and straight. Sand the neck lightly to remove any rough spots. Check the length again before moving on.
Attaching The Neck To The Body
Align the neck with the body of the banjo. The joint must be secure and stable. Use a small amount of wood glue or strong craft glue at the connection point.
Press the neck firmly to the body and hold it in place. Let the glue dry completely. Avoid moving the pieces until the glue sets. This keeps the neck straight and strong.
Once dry, check that the neck does not wobble. Sand any rough glue spots for a clean finish. The neck is now ready for the next steps of the project.
Adding The Details
Adding the details to your miniature toy banjo brings it to life. This stage shapes the instrument’s character and charm. Small touches create a realistic and appealing look. Focus on crafting the banjo head and decorating it carefully. These parts highlight the banjo’s unique style. Take your time and enjoy the process of fine-tuning.
Creating The Banjo Head
The banjo head is the round part that makes the sound. Use a thin, stiff material like cardstock or thin plastic. Cut a perfect circle slightly larger than the banjo body. Secure it with glue around the edges. Add a tiny hole in the center for the bridge. Use a small dot of black paint or a marker to mark the hole. This step gives the banjo a realistic shape and function.
Painting And Decorating
Choose colors that match a real banjo or your own design. Use acrylic paints for smooth, bright colors. Paint the body and neck carefully with a small brush. Add tiny details like strings, tuning pegs, and wood grain. Use thin lines for strings and dots for tuning pegs. Let each layer dry before adding the next. Finish with a clear matte sealer to protect the paint. These details make your miniature banjo look authentic and charming.
Stringing The Banjo
Stringing the miniature banjo requires patience and a steady hand to place tiny threads evenly. Use thin thread or fine wire to mimic real strings, ensuring they are tight but not too tight. This step brings your doll’s banjo to life with realistic detail.
Stringing the banjo is where your miniature toy banjo truly comes to life. This step not only enhances the visual appeal but also adds functionality, allowing your doll to “play” music. The process might seem intricate, but with the right guidance, it becomes an enjoyable task that adds a personal touch to your creation. Let’s dive into the essential steps for stringing your miniature banjo.Choosing Suitable Strings
Selecting the right strings is crucial for authenticity and appearance. Thin fishing line or fine embroidery thread are excellent choices. They mimic the look of real banjo strings and are easy to handle. Consider the scale of your toy banjo when choosing string thickness. If your banjo is exceptionally small, opt for the thinnest string available to maintain proportion. The color also plays a role; clear or metallic shades often work best for a realistic effect.Attaching The Strings
To attach the strings, start by securing one end at the base of the banjo. Use a strong adhesive or tie a small knot, depending on the material of your banjo. Next, gently stretch the string over the bridge and towards the headstock. Ensure even spacing between each string for a neat and tidy appearance. Finally, secure the other end of the string at the tuning pegs. You might need to trim any excess string, so keep a small pair of scissors handy. With a little patience, your miniature banjo will be ready for your doll’s next jam session! Have you ever noticed how much satisfaction comes from creating something with your own hands? Each step, though small, contributes to a masterpiece that you can cherish.Final Touches
The final touches bring your miniature toy banjo to life. This stage protects your work and makes sure the banjo fits perfectly with your doll. Careful finishing adds charm and durability. Small details here make a big difference.
Sealing And Protecting
Use a clear sealant to protect paint and wood. Choose a matte or glossy finish based on your preference. Apply thin, even coats with a small brush. Let each layer dry completely before adding another. This prevents chipping and keeps colors bright. Avoid thick layers to keep details sharp.
Fitting The Banjo To The Doll
Check the banjo’s size against your doll’s hands. Adjust the strap or handle length for a natural hold. Use tiny glue dots or fabric strips to secure the banjo. Make sure it stays stable but can be removed if needed. Position the banjo so it looks balanced and realistic. This step completes the miniature look perfectly.
Tips For Customization
Customizing your miniature toy banjo makes it truly one of a kind. Small details add personality and charm. Use simple ideas to create a unique look that fits your doll’s style.
Adding Unique Features
Try adding tiny decorations to your banjo. Use small beads or buttons for tuning pegs. Glue a thin thread across the body to mimic strings. Carve or paint patterns on the banjo’s neck for extra detail. Little touches make a big difference.
Experimenting With Colors
Choose colors that stand out or match your doll’s outfit. Use acrylic paints for bright, lasting shades. Mix different colors on the banjo’s body and neck. Try painting the rim a different color to highlight it. Play with soft pastels or bold primary colors for varied effects.

Credit: www.amazon.co.uk
Frequently Asked Questions
What Materials Are Needed For A Miniature Toy Banjo?
You will need wood sticks, thin wire, glue, paint, and small beads. These materials are easy to find and affordable. Using lightweight materials helps keep the banjo miniature and doll-friendly.
How Long Does It Take To Make A Mini Toy Banjo?
It typically takes about 30 to 60 minutes. Time varies based on crafting skill and drying time for glue and paint. Patience ensures a neat and durable miniature banjo for your doll.
Can I Customize The Miniature Banjo’s Design?
Yes, you can paint it any color and add decorations. Customize strings, body shape, or size to suit your doll’s style. Personalization makes your miniature banjo unique and special.
Is This Miniature Banjo Safe For Children’s Dolls?
Yes, if non-toxic glue and paint are used. Ensure all parts are securely attached to avoid choking hazards. This DIY project is safe and perfect for doll accessories.
Conclusion
Creating a miniature toy banjo for your doll is simple and fun. You only need a few basic materials and some patience. This project brings a unique touch to your doll collection. Enjoy crafting each small part with care. Feel proud showing your handmade mini banjo to friends.
Try different colors and designs to make it special. Keep practicing to improve your crafting skills. Small projects like this spark creativity and joy. Start making your miniature banjo today and have fun!