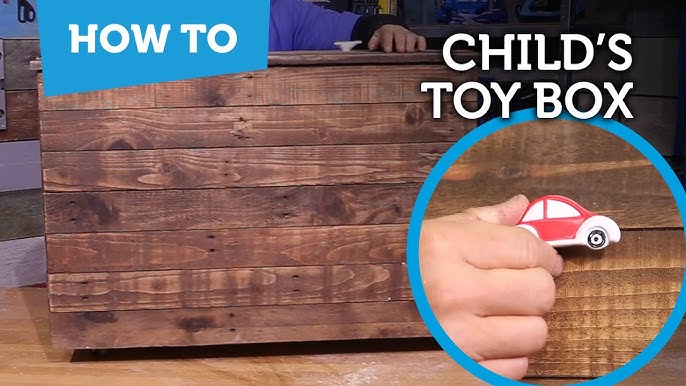
Are you tired of toy clutter taking over your home? Imagine having a sturdy, stylish toy box that fits perfectly in your space and keeps everything organized.
With these easy Do It Yourself (DIY) toy box plans, you can build exactly what you need without spending a fortune. Whether you’re a beginner or just looking for a fun weekend project, this guide will walk you through every step.
Keep reading to discover how you can create a safe, durable, and beautiful toy box that your kids will love—and you’ll feel proud to build yourself.
Benefits Of Diy Toy Boxes
Building your own toy box offers more than just a storage solution—it gives you control, savings, and satisfaction. The benefits of DIY toy boxes go beyond the obvious. You get to craft something that fits perfectly into your home and lifestyle.
Cost Savings Compared To Store-bought
Store-bought toy boxes often come with a hefty price tag. When you build your own, you can choose affordable materials and avoid the markup. You might spend less than half of what a similar ready-made box costs.
Buying wood and supplies from local stores or reclaiming old materials can slash expenses even further. Plus, you won’t pay extra for brand names or shipping fees. Have you considered how much you could save by making just one piece of furniture yourself?
Customization For Any Space
Every home has unique dimensions and style preferences. DIY toy boxes let you tailor the size, color, and design to fit your space perfectly. Whether you need a small box for a corner or a large one for a playroom, you decide.
You can add compartments, wheels, or safety hinges depending on your child’s needs. Custom paint or decals make the box visually appealing and personal. Why settle for a generic design when you can create exactly what your family needs?
Quality Control And Durability
Making your own toy box means you control the quality of every component. You can choose sturdy wood, strong nails, and safe finishes. This often results in a more durable product than cheap, mass-produced boxes.
When I built my child’s toy box, I selected solid pine and non-toxic paint. It has withstood years of rough use without a single repair. How much longer would a store-bought box last under the same conditions?

Credit: www.thecreativetoyshop.com.au
Essential Tools And Materials
Building a DIY toy box requires some essential tools and materials. These help you create a sturdy, safe, and attractive storage solution for toys. Knowing what you need before starting saves time and effort. It also ensures your project goes smoothly from start to finish.
Basic Woodworking Tools Needed
- Measuring tape for accurate dimensions
- Hand saw or circular saw to cut wood pieces
- Hammer or screwdriver for assembling parts
- Drill for making holes and driving screws
- Sanding block or electric sander to smooth edges
- Clamps to hold wood while working
- Square or level to check angles and alignment
Choosing The Right Wood
Select wood that is strong but easy to handle. Pine and plywood are popular choices for toy boxes. Pine is soft, easy to cut, and affordable. Plywood offers good strength and a smooth surface. Avoid woods with knots or cracks to prevent splinters. Make sure the wood is sanded well for safety.
Safety Gear And Tips
- Wear safety glasses to protect your eyes from dust and debris
- Use ear protection if working with loud power tools
- Wear gloves to guard your hands from splinters and cuts
- Work in a well-ventilated area to avoid inhaling dust
- Keep your workspace clean and organized
- Always follow tool instructions and handle equipment carefully
Simple Toy Box Designs
Simple toy box designs make it easy for you to create practical and stylish storage solutions without overwhelming your space or budget. These designs focus on clean lines, functionality, and easy assembly, perfect if you want to build a toy box that fits your home and your child’s needs. Whether you prefer a rustic look or a splash of color, simple designs can be tailored to your style and skill level.
Classic Wooden Crate Style
The wooden crate style is timeless and easy to build, using just a few wooden planks nailed or screwed together. You can customize the size to fit your play area or storage needs. Adding handles on the sides makes it easy for kids to carry their toys around.
Using untreated wood lets you finish the box with natural oils or stains, giving it a warm, inviting look. This style is perfect if you want a sturdy, no-fuss toy box that blends well with most home decors. Have you tried sanding the edges smooth to make it safer for little hands?
Modern Minimalist Box
A modern minimalist toy box uses simple shapes and smooth surfaces for a sleek, clutter-free look. This design often features a flat lid that doubles as a bench or play surface. You can build it with plywood or MDF for smooth edges and easy painting.
Consider adding soft-close hinges to avoid pinched fingers, an important safety feature that feels high-end but is easy to install. Minimalist designs fit well in contemporary spaces and encourage tidiness by making storage feel less like a chore. How might a minimalist box change the way your child interacts with their toys?
Colorful Painted Storage
Bright colors turn a basic toy box into a fun and inviting piece of furniture. Start with a simple wooden box, then add your child’s favorite colors or patterns with non-toxic paint. This approach lets you personalize the toy box and can make cleanup feel more like play.
Using stencils or stickers before painting can add creative details without requiring advanced skills. Plus, repainting is easy when your child’s tastes change. What colors or themes would make your child excited to put their toys away?
Step-by-step Building Guide
Building a toy box is a rewarding DIY project. It provides a place for kids to store their treasures. This step-by-step guide will help you create a sturdy and attractive toy box. Follow these simple steps to craft your toy box masterpiece.
Measuring And Cutting Wood
Begin by gathering all necessary materials. You’ll need plywood, screws, wood glue, and hinges. Use a tape measure to get precise dimensions for your toy box. Mark the wood with a pencil for accuracy. Carefully cut the wood using a saw, following your measurements. Ensure all pieces match and fit together properly.
Assembling The Frame
Lay out the cut pieces to form the box. Use wood glue to secure the joints. Press firmly to ensure a strong bond. Screw the pieces together, reinforcing the corners. Attach the bottom piece to complete the structure. Make sure everything is square and aligned.
Sanding And Finishing Touches
Once assembled, sand the entire box. Focus on smoothing rough edges. This ensures a safe surface for little hands. Wipe away dust with a damp cloth. Consider staining or painting the box for a personalized touch. Apply a clear sealant to protect the finish. Let it dry completely before use.
Creative Decoration Ideas
Creative decoration can transform a simple DIY toy box into a cherished piece of your child’s space. It’s more than just aesthetics—it’s about making the toy box inviting and personal. You might find that adding a few thoughtful touches sparks your child’s excitement about tidying up.
Stencils And Paint Patterns
Using stencils allows you to add fun shapes or characters without needing advanced painting skills. Try geometric patterns or animal shapes for a playful look. Choose bright, non-toxic paint colors that stand out but also match your room’s decor.
Think about your child’s favorite themes—dinosaurs, stars, or even simple polka dots. You can even let your child pick the patterns to make the project a shared experience. Have you ever noticed how a splash of color can completely change the feel of a room?
Adding Cushions Or Seating
Turn the toy box into a cozy spot by adding a cushion on top. A soft, removable cushion invites kids to sit and play or read nearby. Opt for durable, washable fabrics that can handle spills and rough use.
Consider attaching handles or padding the edges for extra comfort and safety. This simple addition can transform your toy box into a dual-purpose piece. How often do you find furniture that combines storage with a comfy seat?
Personalized Name Plates
Adding a personalized name plate makes the toy box uniquely theirs. Use wood, metal, or acrylic plates that you can paint or engrave with your child’s name. This small detail helps teach ownership and pride in their belongings.
You can attach the plate with screws or strong adhesive to ensure it stays put. Sometimes, personal touches like this encourage kids to keep their space tidy. What name or phrase would make your child smile every time they see it?
Tips For Child Safety
Keeping your child safe while using a DIY toy box is essential. Simple design choices can make a big difference in preventing injuries and ensuring peace of mind. Let’s look at some practical tips that help you create a toy box your child can use safely every day.
Smooth Edges And Non-toxic Finishes
Sharp edges pose a real risk for bumps and cuts. Sand every corner and surface until it feels smooth to the touch. Your child will thank you for it, especially when they’re excitedly reaching for their toys.
Choosing non-toxic paint or finishes is equally important. Kids often touch and even taste surfaces, so avoid harmful chemicals. Look for water-based or natural finishes labeled safe for children.
Safe Hinges And Lids
Hinges and lids can trap little fingers if not chosen carefully. Use slow-closing or soft-close hinges to prevent sudden slams. This feature protects tiny hands and reduces the chance of painful pinches.
Consider adding a lid support or stay. It keeps the lid open while your child accesses their toys, so it won’t fall unexpectedly. Have you checked your hardware recently for any sharp points or loose screws? Regular inspection matters.
Stable And Sturdy Construction
A wobbly toy box can tip over, causing accidents. Use strong joints and quality materials to build a box that won’t move when your child leans or climbs on it. Stability is key to safe play.
Adding rubber feet or pads under the toy box can prevent sliding on smooth floors. This small step keeps your child steady and avoids spills. Would you test the toy box by gently pushing it from different angles? It’s a simple way to check its stability before use.
Budget-friendly Hacks
Building a toy box on a budget is easier than it seems. Smart hacks can save money and still create a sturdy, attractive storage solution. Focus on materials and supplies that cut costs without lowering quality. These budget-friendly ideas help keep your project affordable and enjoyable.
Repurposing Old Materials
Old wood from furniture or pallets works well for a toy box. Sand it down to avoid splinters and repaint for a fresh look. Using leftover paint or stain brightens the box without extra expense. Check basements, garages, or neighbors for free materials. This reuse reduces waste and saves money.
Using Affordable Hardware
Choose simple hinges and handles made from basic metals or plastic. These are cheaper but still strong enough for daily use. Bulk packs of screws and nails often cost less per piece. Avoid fancy locks or decorative elements that increase the price. The key is to keep hardware functional yet budget-friendly.
Where To Find Discounted Supplies
- Local thrift stores often have wood and tools at low prices.
- Online marketplaces like Craigslist or Facebook Marketplace offer used materials.
- Big-box store clearance sections sometimes have discounted wood panels and hardware.
- Community recycling centers or building salvage yards provide low-cost supplies.
Buying smart and searching in the right places cuts your total expense significantly.
Credit: www.familyhandyman.com
Maintenance And Longevity
Maintaining a DIY toy box ensures it stays sturdy and looks good for years. Simple care steps help protect the wood and finish. Small repairs stop damage from getting worse. Updating the style keeps the toy box fresh and fun.
Cleaning And Care Tips
- Use a soft cloth to dust regularly.
- Wipe spills immediately with a damp cloth.
- Avoid harsh chemicals that can damage the finish.
- Use mild soap and water for deeper cleaning.
- Keep the toy box away from direct sunlight and moisture.
- Apply wood polish or wax every few months.
Repairing Minor Damage
Check the toy box often for scratches or loose parts. Fix small cracks with wood filler. Sand rough edges gently to prevent splinters. Tighten screws and hinges to keep it safe. Replace broken hardware with matching pieces. Prompt repairs extend the box’s life.
Updating Styles Over Time
Change the look with simple painting or staining. Add new handles or decorative knobs. Use stencils to create fun patterns. Apply colorful decals or stickers for a fresh touch. Consider adding cushions or padding inside. Style updates keep the toy box exciting for kids.

Credit: www.youtube.com
Frequently Asked Questions
What Materials Are Needed For Diy Toy Box Plans?
You need plywood, screws, wood glue, sandpaper, paint, and hinges. Choose durable, child-safe materials to ensure safety and longevity. Basic woodworking tools like a saw and drill are also essential for assembly.
How Long Does It Take To Build A Diy Toy Box?
Building a toy box typically takes 3 to 5 hours, depending on skill level. Preparation and finishing time may add a few more hours. Planning and measuring carefully can speed up the process.
Are Diy Toy Box Plans Suitable For Beginners?
Yes, many DIY toy box plans are designed for beginners. They include step-by-step instructions and simple cuts. Starting with basic designs helps build woodworking confidence and skills effectively.
Can I Customize My Diy Toy Box Design?
Absolutely, you can customize size, color, and features. Add compartments, wheels, or personalized decorations to suit your needs. Customizing makes the toy box unique and functional for your space.
Conclusion
Building your own toy box is fun and rewarding. You save money and get a custom design. Simple tools and clear plans make the job easier. Kids will love having a special place for their toys. It also teaches basic woodworking skills.
Start small, follow steps, and enjoy the process. This DIY project brings joy and order to any room. Give it a try and see the results yourself.


