Are you looking for a fun and simple way to make your own Pop It fidget toy? You’re in the right place.
Creating a DIY Pop It is easier than you might think, and it’s a great way to keep your hands busy and your mind calm. Imagine having a colorful, satisfying toy made by your own hands—something you can pop anytime you need a break or a little stress relief.
Keep reading, and you’ll discover step-by-step how to make a Pop It fidget toy that’s perfect just for you.
Materials Needed
Gathering the right materials is key to making your DIY Pop It fidget toy both fun and functional. You want items that are easy to work with but also durable enough to handle lots of popping. Let’s look at what you’ll need to get started and why each item matters.
Basic Supplies
- Sponge sheet or silicone mat:This forms the base of your Pop It. Silicone mats work great because they’re flexible and hold shape well.
- Bubble wrap or silicone bubble poppers:These create the popping bubbles. Bubble wrap is easy to find, but silicone poppers give a more authentic feel.
- Scissors:You’ll need sharp scissors to cut your materials neatly and accurately.
- Strong glue or hot glue gun:To attach the bubbles securely to the base without them falling off.
Additional Tools And Materials
- Marker or pen:For outlining the shape of your toy before cutting.
- Ruler:Helps keep your design symmetrical and balanced.
- Paint or markers (optional):If you want to add color or personalize your Pop It, these come in handy.
Why Choosing The Right Materials Matters
Using silicone instead of paper or thin plastic makes a huge difference in how your Pop It feels and lasts. I once tried making one with cardboard and it didn’t pop well and wore out quickly. Have you ever bought a toy that just didn’t feel right? That’s often because of poor material choice.
Think about how much you want to use your Pop It. Will it be for quick stress relief or long hours of fidgeting? Picking durable materials upfront saves you time and frustration later. What’s the point of making a toy that falls apart after one use?
Choosing The Right Base
Choosing the right base is key to a fun and durable DIY Pop It fidget toy. The base holds the bubbles and supports the whole structure. Picking the proper material makes popping smooth and enjoyable. It also affects the toy’s lifespan and feel.
Think about the size and shape of your base. It should fit your design and be easy to handle. The base also needs to be strong enough to keep the bubbles in place without bending or breaking.
Material Options For The Base
- Silicone sheets:Flexible and soft, perfect for a real Pop It feel.
- Foam board:Lightweight and easy to cut, but less durable.
- Plastic lids:Sturdy and smooth, great for a solid base.
- Cardboard:Cheap and easy to find, but not water-resistant.
Size And Shape Considerations
Choose a base size that fits your bubble layout. Square or round shapes work well for even bubble placement. Make sure the base is comfortable to hold during use. A larger base means more bubbles, but it might be harder to carry.
Durability And Comfort
The base must resist bending and breaking. Look for materials that feel good in your hand. Smooth edges prevent discomfort during play. A sturdy base keeps bubbles popping longer without damage.
Creating The Bubbles
Creating the bubbles is the heart of your DIY Pop It fidget toy. These bubbles provide the satisfying pop sensation that makes the toy so addictive. Paying attention to the shape, size, and material of the bubbles will ensure your toy feels just right in your hands.
Using Silicone Molds
Silicone molds are a popular choice for making the bubbles because they are flexible and easy to work with. You can find molds designed for small half-spheres or domes, perfect for the bubble shape you want.
Pour liquid silicone or resin into the molds and let it set. The flexibility of silicone molds makes it easy to pop out the bubbles without damage. You can even experiment with different colors by adding dye to the silicone before pouring.
Have you thought about the bubble size? Smaller bubbles can be more challenging to press but offer a sharper pop. Larger ones feel softer and more satisfying to press. Try both to see what suits your style.
Alternative Bubble Options
If silicone molds aren’t available, don’t worry—there are other ways to create bubbles. Balloon pieces stretched over a frame or small rubber caps can mimic the popping effect.
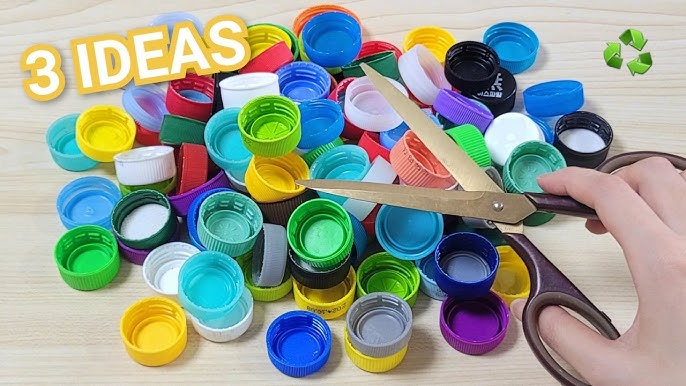
Another option is using bottle caps or buttons glued onto a base, combined with a soft backing like foam or fabric. These won’t pop in the traditional sense but still provide tactile satisfaction.
What materials do you already have at home that could work? Sometimes, everyday items can surprise you with their potential in crafts like this. Experimenting with different textures can lead to a unique and personalized toy.

Credit: www.youtube.com
Assembly Process
The assembly process is where your DIY Pop It fidget toy truly comes to life. With all your materials ready, it’s time to piece everything together. This part of the project is not just about following instructions but also adding your personal flair.
Attaching Bubbles To Base
Start by laying out your base, which could be a sturdy piece of cardboard or foam. Align your bubble molds or silicone molds on top of it. Ensure they’re evenly spaced for a consistent popping experience.
As you place each bubble, press gently to make sure it adheres well. This is where creativity kicks in—consider arranging them in fun patterns or shapes. Perhaps a heart or a star? Your imagination is the limit!
Securing With Adhesive
Once you’re happy with the layout, it’s time to secure everything with adhesive. Opt for a strong, clear glue that dries quickly. Be generous with the application, but avoid overdoing it to prevent mess.
Apply the adhesive to the base and press the bubbles down firmly. You might want to hold them in place for a few seconds to ensure they stick. Wondering if it’s secure enough? Give it a gentle test pop to check!
Feeling adventurous? Add a dash of glitter or a splash of paint around the edges for some extra pizzazz. After all, your Pop It should be as unique as you are. Now, let it dry completely before enjoying your creation.
Customizing Your Pop It
Customizing your DIY Pop It fidget toy makes it truly yours. It’s not just about making it fun to play with but also about expressing your style. Adding colors, patterns, or personal symbols can turn a simple toy into a unique creation that stands out.
Painting And Decorating
Choose vibrant acrylic paints or markers designed for plastic surfaces to decorate your Pop It. You can create patterns like stripes, polka dots, or even small drawings on each bubble. Let each layer dry completely before adding new details to avoid smudging.
Try using stencils if freehand drawing feels tricky. This helps keep your designs clean and neat. You might want to seal your paint with a clear spray to protect your artwork and make it last longer.
Adding Personal Touches
Think about adding small stickers or gems for a bit of sparkle and dimension. You could also write your name or a favorite quote around the edges to make it special. Using different textures like felt or foam around the border can add a fun tactile element.
Have you considered mixing colors on each bubble for a rainbow effect? Layering different effects like glitter or glow-in-the-dark paint can surprise you with how cool your Pop It looks. What personal symbols or colors represent you best?

Credit: www.youtube.com
Safety Tips
Safety is very important when making a DIY Pop It fidget toy. Using the right materials and tools keeps everyone safe. Small parts and sharp tools can cause harm if not handled carefully. Following simple safety tips helps avoid accidents and makes the project fun and easy.
Choose Non-toxic Materials
Always pick materials that are safe and non-toxic. Children may put the toy in their mouth. Avoid paints, glues, or plastics with harmful chemicals. Look for labels that say “safe for kids” or “non-toxic.”
Supervise Children During Crafting
Keep an eye on kids while making the toy. Help with cutting or using hot glue guns. Supervision stops accidents and ensures the toy is made correctly.
Use Tools Carefully
Cutting tools and hot glue guns need extra care. Work on a clean surface and keep fingers away from blades. Turn off tools when not in use. Store tools where children cannot reach them.
Avoid Small Parts For Young Kids
Small pieces can be a choking hazard for children under three. Use larger buttons or beads. Make sure all parts are secure and glued well to avoid loose pieces.
Work In A Well-ventilated Area
Some glues and paints give off fumes. Use these materials in open spaces or near windows. Fresh air helps keep breathing safe and comfortable.
Troubleshooting Common Issues
Troubleshooting your DIY Pop It fidget toy can save you time and frustration. Small issues often pop up, but most have simple fixes. Getting your toy to work smoothly will make your project more satisfying and fun to use.
Pop Bubbles Won’t Stay Popped
If your bubbles keep popping back up immediately, check if the silicone or material you used is too stiff or thick. Thinner, more flexible silicone works best for easy pressing and popping.
Try gently warming the material before use; warmth can make it more pliable. Also, make sure your bubbles aren’t glued or stuck to the base, which blocks the popping action.
Bubbles Are Hard To Press
Hard-to-press bubbles usually mean the material is too dense or the air pockets inside are too small. You can soften the silicone by adding a bit of oil or a silicone-friendly lubricant.
Check if you applied enough bubble depth during molding. Shallow bubbles won’t give enough pop feeling. Would adjusting your mold depth improve your toy’s feel?
Edges Are Rough Or Uncomfortable
Sharp or rough edges can make your toy uncomfortable to use. Sand down the edges gently with fine sandpaper or use a craft knife to smooth them out.
Consider adding a silicone sealant or paint to cover any rough spots. This also protects the toy and gives it a polished look.
Material Tears Or Cracks Easily
Cracks usually appear if the silicone mix isn’t right or if it dried too fast. Use a silicone formula meant for flexible crafts and avoid exposing the toy to extreme temperatures during curing.
Have you tried mixing your silicone thoroughly? Uneven mixing can cause weak spots. Also, curing in a humid environment helps keep the material soft and durable.

Credit: www.youtube.com
Care And Maintenance
Proper care and maintenance keep your DIY Pop It fidget toy in good shape. Clean and store it right to extend its life. Small efforts make a big difference in how long it lasts.
Cleaning Your Pop It Toy
Use mild soap and warm water for cleaning. Avoid harsh chemicals that can damage the material. Gently scrub with a soft brush to remove dirt. Rinse well and let it air dry fully before use.
Storing Your Pop It Toy
Keep the toy in a cool, dry place. Avoid direct sunlight to prevent fading or warping. Store it flat or in a container to protect its shape. Do not place heavy objects on top of it.
Handling Tips To Prevent Damage
- Press bubbles gently without force.
- Do not bend the toy excessively.
- Keep away from sharp objects.
- Avoid exposing it to extreme temperatures.
Frequently Asked Questions
What Materials Are Needed To Make A Diy Pop It Toy?
You need silicone molds, colored silicone, a mixing cup, and a spatula. These materials are easy to find online or at craft stores. Using safe, non-toxic silicone ensures the toy is child-friendly and durable.
How Long Does It Take To Make A Diy Pop It Toy?
Making a DIY Pop It toy usually takes 1 to 2 hours. This includes mixing silicone, pouring it into molds, and allowing it to cure. Drying time depends on the silicone brand and room temperature.
Can I Customize The Colors Of My Pop It Toy?
Yes, you can customize your Pop It toy using colored silicone or pigment. Mixing different colors creates unique designs. This personalization makes your toy more fun and visually appealing.
Is Making A Diy Pop It Toy Safe For Kids?
Yes, it is safe if you use non-toxic, skin-friendly silicone materials. Adult supervision is recommended during the crafting process. Always follow the product instructions to avoid any accidents.
Conclusion
Making your own DIY Pop It fidget toy is fun and simple. You only need a few materials and some patience. This project helps you relax and focus. Plus, it’s a great way to reuse things around your home. Try different colors and shapes to make it unique.
Enjoy the process and share your creation with friends. Keep practicing to improve your skills. A homemade fidget toy can bring joy anytime you want. Give it a try and see how satisfying it feels.


