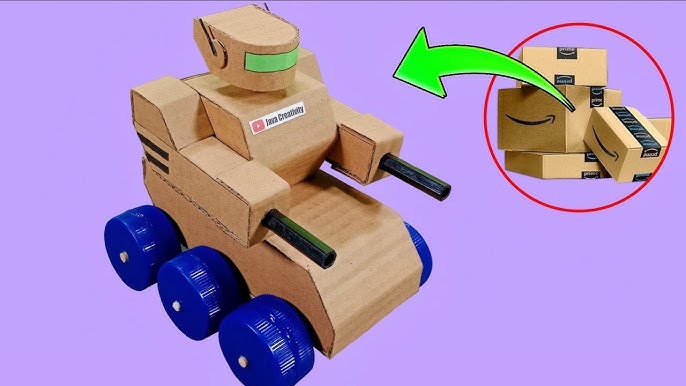
Looking for a fun and creative way to keep yourself or your kids entertained? Making DIY cardboard toys is a simple, affordable, and eco-friendly project you can start right now.
Imagine turning everyday cardboard into cool, personalized toys that bring joy and spark imagination. In this guide, you’ll discover easy steps and handy tips that make crafting these toys a breeze. Ready to unlock your creativity and make something amazing with your own hands?
Let’s dive in!
Choosing The Right Cardboard
Choosing the right cardboard is key to making durable and fun DIY toys. Not all cardboard is created equal, and picking the right type can save you time and frustration. Understanding what works best will help your creations hold up during playtime.
Types Of Cardboard
Cardboard comes in many forms, but the most common are corrugated and paperboard. Corrugated cardboard has three layers: two flat outer layers with a wavy middle layer. This makes it strong and ideal for building sturdy toys like cars or castles.
Paperboard is thinner and often used for cereal boxes or packaging. It’s easy to cut and fold but less durable. Use it for smaller, lighter toys or details on bigger projects. Knowing the difference helps you pick the right material for your toy’s purpose.
Sourcing Recyclable Materials
Finding good cardboard doesn’t mean you need to buy new sheets. You can reuse boxes from your home or ask local stores for their discarded packaging. This not only saves money but also helps the environment.
Look for clean, dry cardboard without too much tape or labels. Wet or greasy cardboard won’t hold glue well and might tear easily. Have you checked your recycling bin lately? It might hold the perfect material for your next toy project.

Credit: www.youtube.com
Essential Tools And Supplies
Gathering the right tools and supplies sets the foundation for creating fun and sturdy DIY cardboard toys. Having what you need on hand saves time and frustration. It also helps you focus on being creative rather than hunting for items mid-project.
Cutting Tools
A sharp blade is your best friend when working with cardboard. Craft knives or utility knives offer precision and control, making it easier to cut out detailed shapes.
Scissors can handle simpler cuts, but they might struggle with thick or layered cardboard. Always cut on a safe surface to protect your workspace and fingers.
Do you have a steady hand? If not, consider using a ruler or stencil to guide your cuts for cleaner edges.
Adhesives And Fasteners
Choosing the right glue can make your toy stronger and longer-lasting. White glue works well for light pieces, but hot glue bonds thicker cardboard faster and more securely.
Double-sided tape is great for quick assembly or adding small decorations. For parts that move or need extra strength, small brads or paper fasteners can add flexibility and durability.
Think about how your toy will be used. Will it get rough play? Pick adhesives and fasteners that hold up under pressure.
Decorating Materials
Adding color and details brings your cardboard toy to life. Markers and colored pencils let you add fine lines and shading with control.
Paints give vibrant color but require drying time, so plan accordingly. Stickers and washi tape add fun patterns without mess.
Have you considered recycling old magazines or wrapping paper for unique textures and designs? Using what you already have can inspire creative decoration ideas.
Simple Toy Ideas
Simple DIY cardboard toys can spark creativity and provide hours of fun with just a few materials. You don’t need fancy tools or complicated instructions to make toys that children will love and learn from. Let’s explore some easy ideas that you can start building today.
Building Blocks
Cardboard building blocks are a classic toy that encourages imagination and fine motor skills. Cut different-sized squares and rectangles from sturdy cardboard, then stack and arrange them in endless ways.
You can paint or decorate each block with bright colors or numbers to add an educational twist. Have you noticed how kids naturally try to balance and build higher towers? These blocks make that possible with safe, lightweight materials.
Miniature Vehicles
Creating simple cars, trucks, or trains from cardboard is surprisingly easy. Use small boxes for the body and bottle caps or cardboard circles for wheels.
Glue the wheels securely and add details like windows or headlights with markers or colored paper. Once your child sees their vehicle roll, they’ll feel proud and inspired to customize more designs.
Animal Figures
Animals are always a favorite theme for toys. Cut out animal shapes from cardboard and join pieces to create 3D figures. You can make simple animals like cats, dogs, or birds by layering and attaching parts.
Decorate these figures with crayons or paint to bring them to life. What’s fun is watching kids invent stories and adventures around their handmade creatures, turning cardboard into a whole new world.

Credit: www.pinkstripeysocks.com
Step-by-step Construction Tips
Building DIY cardboard toys is fun and creative. Following clear steps helps you create sturdy, exciting toys. Focus on precise measuring, careful assembling, and adding unique details. These tips make the process easier and more enjoyable. Let’s explore how to bring your cardboard toy ideas to life.
Measuring And Cutting
Start by measuring the cardboard accurately. Use a ruler or measuring tape for straight lines. Mark the shapes clearly with a pencil. Cut slowly with a sharp craft knife or scissors. Cutting carefully prevents rough edges and keeps pieces neat. Always cut on a safe surface to avoid damage.
Assembling Pieces
Arrange the cut pieces before gluing or taping. Check how parts fit together. Use strong glue or tape to join edges firmly. Hold pieces in place until the glue sets. Reinforce joints with extra tape if needed. Make sure the structure is stable and balanced. Patience here ensures your toy lasts longer.
Adding Details
Decorate your toy with markers, paint, or stickers. Add eyes, buttons, or other small parts for character. Use colored paper for extra design elements. Glue details carefully to avoid mess. Personal touches make the toy unique and fun. Let the decorations dry completely before playing.
Safety Tips For Kids
Making DIY cardboard toys is a fun activity, but safety should always be your top priority when kids are involved. Children can get excited and sometimes forget to be careful, so setting clear safety rules helps everyone enjoy the project without accidents. Let’s look at how you can keep your kids safe while crafting.
Supervision Guidelines
Always stay close when your kids are working on their cardboard toys. Even if they seem confident, small mistakes can lead to cuts or choking hazards. Ask yourself: Are you ready to jump in if something goes wrong?
Keep distractions to a minimum during the activity. Turn off the TV or put away phones so your full attention is on the kids. This simple step can prevent many accidents.
Encourage kids to clean up scraps and tools after each session. A tidy workspace reduces the risk of stepping on sharp objects or slipping. Have a small bin nearby specifically for cardboard scraps.
Safe Use Of Tools
Teach your kids how to handle scissors, craft knives, and glue safely before starting. Show them the right way to cut and hold tools to avoid injuries. For younger children, use safety scissors designed just for them.
- Use blunt-tipped scissors instead of sharp ones.
- Keep craft knives out of reach unless you are helping.
- Choose non-toxic glue and supervise its use closely.
Explain why it’s important to cut away from their bodies and never run with tools in hand. Share a quick story: I once saw a child run with scissors and trip, causing a minor scare. That moment reminded me why strict rules about tool use matter.
Do you have a plan for emergencies? Keep a first aid kit nearby just in case. Preparing for accidents is part of responsible crafting.
Encouraging Creativity
Creating DIY cardboard toys sparks imagination and hands-on learning. Simple materials like boxes and glue turn into fun, unique playthings. This activity boosts creativity and problem-solving skills in a fun, easy way.
Encouraging Creativity When it comes to DIY cardboard toys, the sky’s the limit for creativity. The beauty of creating toys from cardboard lies in the opportunity it gives for self-expression and innovation. By transforming simple materials into imaginative playthings, you allow yourself and your kids to think outside the box and explore endless possibilities. Engaging in this creative process together strengthens bonds and builds memorable experiences. Remember the last time you turned a cardboard box into a spaceship? The pure joy and pride from creating something unique are unforgettable. So, why not dive into this creative adventure once again?Customizing Designs
Customizing your cardboard toy designs is where creativity truly shines. Start with basic shapes and see where your imagination takes you. Maybe a castle, a race car, or a dollhouse? Encourage kids to brainstorm what they want to create and sketch it out on paper. This step not only helps in planning but also enhances their design skills. Remember, there’s no right or wrong way, just endless possibilities.Incorporating Colors And Textures
Colors and textures can transform a plain cardboard structure into a vibrant masterpiece. Use paints, markers, or even colored paper to bring your creations to life. Experiment with different textures by adding fabric scraps, stickers, or glitter. This not only makes the toys visually appealing but also stimulates sensory play, making the experience more enriching. Let your imagination run wild. What if your cardboard creation could look like a jungle or a bustling city? The choice is yours!Maintaining And Storing Toys
Maintaining and storing DIY cardboard toys helps them last longer. Proper care keeps toys safe and enjoyable for kids. Simple habits prevent damage and clutter. This section covers easy ways to repair and store cardboard toys effectively.
Repairing Damages
Cardboard toys may tear or bend after play. Fix small tears with glue or tape. Use craft glue for strong bonds. Clear tape works well for quick fixes. Replace broken parts with new cardboard pieces. Cut shapes matching the original toy parts. Attach firmly and let dry completely. Check toys regularly for weak spots. Early repairs stop bigger damage later.
Proper Storage Solutions
Store toys in dry places to avoid moisture damage. Use boxes or bins to keep toys organized. Label containers to find toys easily. Keep toys away from direct sunlight. Sunlight fades colors and weakens cardboard. Stack toys gently to prevent crushing. Soft cloth or paper layers protect delicate parts. Encourage kids to put toys back after use. A tidy space helps toys stay in good shape.

Credit: www.youtube.com
Frequently Asked Questions
What Materials Are Needed For Diy Cardboard Toys?
You need cardboard sheets, scissors, glue, markers, and paint. Optional items include tape, stickers, and small decorations. Choose sturdy cardboard for durability. Gather these materials before starting your project to ensure a smooth crafting process.
How Do I Make Cardboard Toys Safe For Kids?
Use non-toxic glue and paint for safety. Avoid sharp edges by sanding or covering them with tape. Always supervise young children during crafting and play. Ensure the toy parts are securely attached to prevent choking hazards.
Can Cardboard Toys Be Recycled After Use?
Yes, cardboard toys are eco-friendly and recyclable. When no longer usable, break them down and place in recycling bins. Avoid using non-recyclable materials like certain tapes or paints to maintain recyclability. This makes cardboard toys a sustainable choice.
How Long Does It Take To Make Cardboard Toys?
Simple toys can take 30 minutes to an hour. Complex designs may require several hours or multiple sessions. Time depends on the toy’s size, detail, and drying time for glue or paint. Plan accordingly for best results.
Conclusion
Creating DIY cardboard toys brings fun and learning together. It saves money and helps the environment. Kids enjoy crafting and using their imagination. Adults can join and share quality time too. Simple tools and old boxes are all you need.
Give it a try and watch creativity grow. Making toys this way feels rewarding and fun. It’s a great way to spend free time. Start today and enjoy the magic of handmade playthings.


