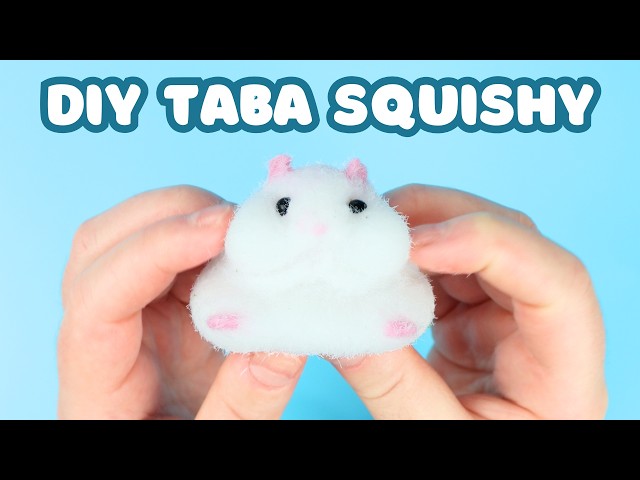
Are you ready to create your very own squishy toys that are soft, fun, and totally unique? Making DIY squishy toys is easier than you think, and it’s a fantastic way to unleash your creativity while relieving stress.
Imagine squeezing a toy you made yourself—feeling that satisfying, slow bounce back every time. In this guide, you’ll discover simple steps and tips to craft squishies that look amazing and feel just right. Keep reading, and by the end, you’ll have your own collection of personalized squishy toys to enjoy or share with friends.
Let’s get started!
Materials Needed
Creating your own DIY squishy toys is a fun and simple craft project. Gathering the right materials helps make the process smooth and enjoyable. This section lists essential items and optional extras for your squishy toy making.
Basic Supplies
- Memory foam or sponge pieces
- Fabric paint or acrylic paint
- Fabric glue or hot glue gun
- Scissors with a sharp tip
- Marker pens for drawing details
- Plastic or nylon fabric for covering
- Needle and thread (optional for sewing)
Optional Add-ons
- Glitter for sparkle effects
- Scented oils to add fragrance
- Foam beads or stuffing for texture
- Stencils to create shapes easily
- Fabric markers for vibrant colors
- Small buttons or beads for decoration
- Sealant spray to protect paint
Choosing Your Squishy Design
Choosing the right design for your DIY squishy toy is an exciting part of the process. It shapes the final look and feel of your creation. The design should match your style and the type of squishy you want to make. Think about the size, shape, and colors that appeal to you.
Planning your design helps guide the materials and techniques you will use. It also makes the crafting process smoother and more fun. Explore ideas and imagine the squishy toy you want to hold in your hands.
Popular Shapes And Themes
Many DIY squishy makers choose shapes that are easy to recognize and fun to squeeze. Some popular shapes include:
- Fruits like strawberries, pineapples, and watermelons
- Animals such as cats, dogs, and bears
- Food items like cupcakes, donuts, and ice cream cones
- Simple geometric shapes like hearts, stars, and circles
Themes can add personality to your squishy. Cute faces, pastel colors, or cartoon styles make your squishy more appealing. Choose themes that bring joy and fit your personality.
Customizing Your Idea
Adding your own touch makes your squishy unique. Think about colors, patterns, and textures you want to include. You can mix different shapes or create a new design from scratch.
Personal details like smiley faces or glitter can give your squishy charm. Experiment with small changes to see what works best. Customizing lets you express creativity and make your squishy stand out.
Making The Foam Base
Making the foam base is the heart of creating your own DIY squishy toy. This step determines how soft, bouncy, and satisfying your squishy will feel. Paying attention to the quality of your foam base can make all the difference in your final product.
Mixing Ingredients
Start by gathering your main ingredients: white glue and shaving foam. The glue acts as the sticky binder, while the shaving foam gives the squishy its soft, airy texture.
Pour about half a cup of white glue into a bowl. Then, add shaving foam little by little—around one cup total—while stirring gently. You want the mixture to be light and fluffy, but not runny.
Adding a few drops of food coloring here can personalize your squishy’s look. Have you experimented with different foam brands? Some create firmer squishies, while others make them extra squishy. Try what works best for you.
Shaping The Foam
Once your foam base is mixed, it’s time to shape it. Use your hands to knead the mixture until it forms a smooth, pliable dough. This step is essential to activate the foam’s stretchiness and eliminate lumps.
Press and mold the foam into the desired shape—maybe a simple ball or a cute character. Remember, this is your creation, so take your time to perfect its form. If the foam feels sticky, sprinkle a bit of baking soda and knead it in to improve texture.
Have you noticed how shaping the foam changes its bounce? Experiment with different pressures and sizes to find what feels best in your hands.

Credit: www.youtube.com
Adding Color And Texture
Adding color and texture to your DIY squishy toys makes them more fun and realistic. It brings your creations to life and gives them a unique look. Different techniques help you customize the squishies easily. You can choose simple paint or mix materials for interesting effects.
Painting Techniques
Use acrylic paint for bright and lasting colors. It sticks well to foam and dries fast. Apply thin layers to avoid cracking when the squishy stretches. Let each layer dry before adding the next. Use small brushes for details and larger ones for broad areas.
Try sponging paint to create soft, blended colors. Dab a damp sponge in paint and gently press it on the toy. This gives a smooth, textured look. You can also use paint pens for fine lines or patterns.
Using Fabric Or Clay
Fabric adds a soft texture to your squishy toy. Choose stretchy fabric like felt or fleece. Cut shapes and glue them onto the squishy surface. This creates a cozy, tactile feel. Use fabric glue or a hot glue gun for secure attachment.
Air-dry clay works well for small decorations. Shape tiny pieces and stick them on before the clay dries. Paint the clay after it hardens to match your design. Avoid heavy clay, which can weigh down the squishy toy.
Sealing And Finishing
Sealing and finishing your DIY squishy toys is a crucial step that protects your creation and gives it a polished look. Without proper sealing, your squishy may lose its charm quickly as the paint or decoration peels off. Taking the time to finish your squishy properly ensures it stays soft, colorful, and durable for longer playtime.
Protective Coatings
Applying a protective coating adds a strong layer against wear and tear. You can use clear acrylic sprays or brush-on sealants designed for flexible surfaces. These coatings help prevent paint from chipping and keep your squishy looking fresh.
Choose a non-toxic, water-based sealant if your squishy will be handled by kids. Spray coatings offer an even layer, but brush-on sealants allow more control on detailed spots. Test the sealant on a small piece to make sure it doesn’t harden or crack your squishy.
Adding Final Details
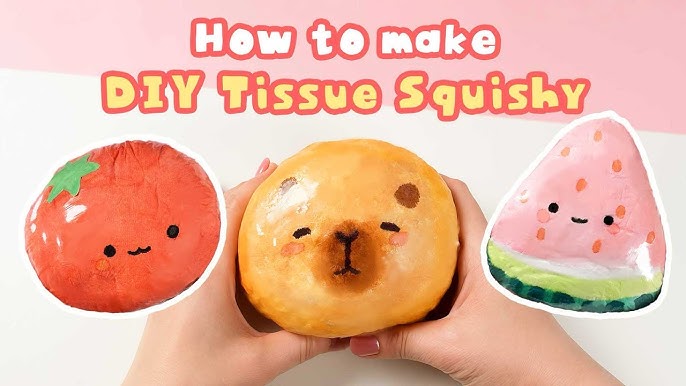
Once your squishy is sealed, you can add extra touches like glitter, small decals, or hand-painted highlights. These details make your squishy unique and can bring out its personality. Use fine brushes or stickers to keep your additions neat and precise.
Think about what makes your squishy special. Is it a cute face or fun patterns? Adding these last details carefully will make your squishy stand out and feel complete. What small extra could you add that would surprise someone holding your squishy?
Credit: www.youtube.com
Tips For Longevity
Creating DIY squishy toys requires choosing soft materials that last long and resist tearing. Keeping them clean and storing them properly helps maintain their shape and softness over time. Regularly checking for damage ensures your squishy toys stay fun and safe to use.
Crafting your own DIY squishy toys can be a fun and rewarding experience. But how do you ensure that these creations last as long as possible? Ensuring the longevity of your squishy toys involves a few simple yet effective strategies. By focusing on proper care and smart storage, you can keep your squishies looking new and feeling squishy for much longer.Proper Care
Taking good care of your squishy toys starts with gentle handling. Always squeeze them softly to avoid tearing or damaging them. Regularly check for any small tears or holes. Addressing these issues promptly with a bit of glue can prevent them from growing larger. Cleaning your squishies should be done with a damp cloth, avoiding harsh chemicals. This helps keep their color vibrant and prevents deterioration.Storage Suggestions
Where you store your squishy toys can significantly impact their lifespan. Keep them in a cool, dry place away from direct sunlight to prevent fading and melting. Consider using a dedicated box or container for your collection. This not only keeps them organized but also protects them from dust and dirt. If you’re stacking multiple squishies, place the larger ones at the bottom to prevent them from being squished out of shape. How do you currently store your squishies? A little rearranging might just extend their life! Ensuring your DIY squishy toys last isn’t just about preserving their look—it’s about maintaining the joy they bring. With these simple tips, you’ll enjoy your creations for longer, keeping them as delightful as the day you made them.Benefits Of Making Squishies
Making your own DIY squishy toys offers more than just fun. It brings several benefits that can positively impact your daily life. From calming your mind to boosting your creativity, crafting squishies is a simple way to add value to your routine.
Stress Relief
Handling a soft, squeezable squishy can help reduce tension almost instantly. The repetitive motion of squeezing and releasing provides a calming effect, similar to meditation. If you’ve ever felt overwhelmed, you might find that making and using squishies offers a surprising way to ease anxiety.
Creating your own squishy adds another layer of relaxation. Focusing on the process distracts your mind from worries and channels energy into something tangible. How often do you find an activity that both occupies your hands and soothes your thoughts?
Creative Expression
Designing squishies allows you to bring your ideas to life in a playful form. You get to choose shapes, colors, and textures, making each toy uniquely yours. This hands-on creativity can boost your confidence and inspire new projects.
Even if you don’t consider yourself artistic, making squishies encourages experimentation without pressure. You learn from each attempt and see your skills improve over time. What new designs could you dream up if you gave yourself permission to play with colors and shapes?

Credit: www.youtube.com
Frequently Asked Questions
What Materials Are Needed To Make Diy Squishy Toys?
You need foam, fabric, glue, scissors, and paint. Soft foam creates the squishy texture. Fabric and glue hold it together. Paint adds color and design. These basic materials help you craft fun, safe, and customizable squishy toys at home.
How Long Does It Take To Make A Squishy Toy?
Making a DIY squishy toy typically takes 30 to 60 minutes. Time varies based on design complexity. Drying time for glue or paint may add extra minutes. Planning and preparation speed up the process. It’s a quick and enjoyable craft project.
Can Kids Safely Make Squishy Toys At Home?
Yes, kids can safely make squishy toys with adult supervision. Use non-toxic materials and child-safe scissors. Avoid small parts to prevent choking hazards. This craft encourages creativity and fine motor skills. Always monitor the activity for a safe experience.
How Do You Customize The Shape And Design Of Squishies?
You customize squishies by cutting foam into any shape you want. Paint or decorate with markers for unique designs. Add features like eyes or patterns using fabric or stickers. Customization lets you create personalized toys tailored to your style and preferences.
Conclusion
Making DIY squishy toys is fun and simple to try. You only need a few materials and some creativity. These toys can help you relax and enjoy your free time. You can make them in any shape or color you like.
Each squishy toy is unique and special. Start small and practice to improve your skills. Enjoy the process and share your toys with friends or family. Handmade squishy toys bring joy and stress relief. Give it a go and have fun crafting!


