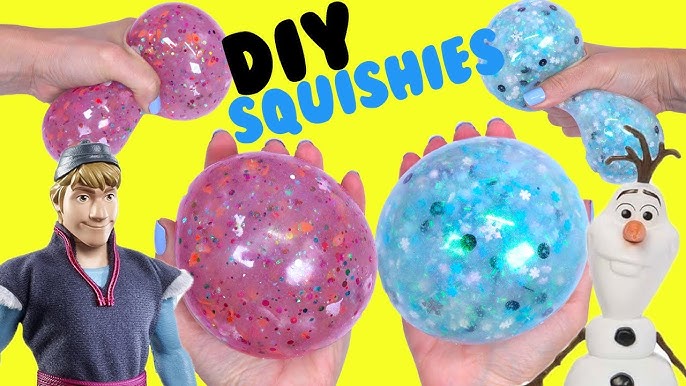
Are you ready to create something fun, soft, and totally satisfying to squeeze? Making your own DIY squishy toy is easier than you think—and it’s a perfect way to relax and get creative.
Imagine having a toy that feels amazing in your hands, shaped exactly how you want it, and made with materials you can find at home. In this guide, you’ll discover simple steps to craft your very own squishy toy that’s not just fun to make but also a great stress buster.
Keep reading, and by the end, you’ll have a cool squishy toy that’s uniquely yours!

Credit: www.youtube.com
Materials Needed
Making a DIY squishy toy requires some basic materials. Gathering the right supplies helps create a soft and fun toy. This section explains what materials you need to start your project. Each material plays a special role in making your squishy toy perfect.
Choosing The Right Foam
Foam is the core of a squishy toy. It gives the toy its soft and squishy feel. Look for foam that is soft, lightweight, and easy to shape. Memory foam or polyurethane foam works well. Avoid hard or stiff foam as it won’t squish easily.
Selecting Fabric Options
The fabric covers the foam and adds color and texture. Choose fabrics that are soft and stretchable. Cotton, fleece, or felt are good choices. Bright colors make the toy more attractive. Make sure the fabric is easy to sew and clean.
Additional Supplies
- Sewing needle and thread to stitch the fabric
- Fabric scissors for cutting shapes
- Fabric glue for extra hold
- Markers or fabric paint to decorate
- Stuffing material for extra softness, like polyester fiberfill
- Templates or paper to draw shapes before cutting

Credit: www.youtube.com
Preparing Your Workspace
Preparing your workspace is a crucial first step before making a DIY squishy toy. A well-organized area helps you focus and prevents messes that could ruin your materials. It sets the tone for creativity and ensures safety throughout the process.
Setting Up A Clean Area
Choose a flat surface like a table or desk where you can work comfortably. Wipe it down with a damp cloth to remove dust and dirt that might stick to your squishy materials.
Clear away any unnecessary items. This gives you plenty of room to spread out your tools and supplies without knocking things over.
Have a small trash bin or bag nearby. Cleaning as you go makes the whole project less stressful and helps you stay focused on the fun part.
Gathering Tools
Collect all the tools you need before you start to avoid interrupting your flow. Common tools include scissors, glue, paintbrushes, and measuring cups.
Don’t forget materials like foam, fabric, or sponges, depending on the type of squishy toy you want to make. Having everything at hand lets you be more creative and efficient.
Think about safety too. Keep sharp objects in a safe spot and use gloves if you’re working with glue or paint that might irritate your skin.
Creating The Squishy Shape
Shape the squishy by gently molding soft foam or dough into your desired form. Press and smooth edges carefully to create a neat, rounded toy. Keep the shape simple for easy squishing and durability.
Creating the perfect squishy shape is a fun and creative process. It involves designing, cutting, and shaping your material to form a delightful squishy toy. This part of the DIY project allows you to unleash your imagination and craft a unique squishy that reflects your personality.Designing Your Template
Start by sketching your desired squishy shape on paper. Keep it simple for easier cutting. Think of basic shapes like circles or hearts. Once satisfied, cut out your paper template. This will guide your foam cutting process. Ensure the template size fits comfortably in your hand for optimal squishiness.Cutting Foam Pieces
Place your template on a foam sheet. Trace the shape with a marker. Carefully cut along the traced lines with sharp scissors or a craft knife. Keep your cuts smooth and steady to avoid jagged edges. For thicker squishies, stack multiple foam layers. Secure them together using a strong adhesive or fabric glue. Let the pieces dry completely before moving to the next step.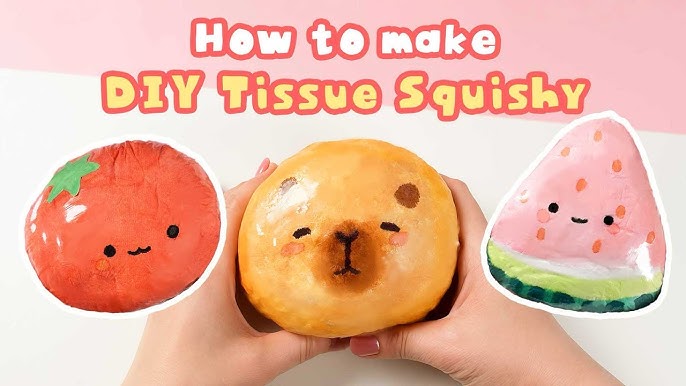
Credit: www.youtube.com
Assembling The Toy
Assembling your DIY squishy toy is a fun and creative process. This step brings your design to life. It requires patience and attention to detail. You will join the fabric pieces and add stuffing to create the soft texture. Follow simple techniques to achieve a neat and durable squishy toy.
Sewing Or Gluing Fabric
Choose between sewing and gluing fabric based on your comfort. Sewing gives a stronger hold and a cleaner finish. Use a needle and thread that match the fabric color. Stitch carefully along the edges, leaving a small opening for stuffing.
Gluing is faster and easier for beginners. Use fabric glue designed for soft materials. Apply glue evenly along the edges. Press the pieces together firmly until the glue dries. Avoid excess glue to prevent lumps inside the toy.
Stuffing The Squishy
Select soft stuffing material like polyester fiberfill or memory foam. Fill the toy slowly to control the shape and softness. Use small amounts and distribute evenly inside. Avoid overstuffing, which can make the toy stiff.
After stuffing, close the opening by sewing or gluing it securely. Check for any gaps or loose edges. Your squishy toy should feel soft and squeezable. Test its bounce and adjust the stuffing if needed.
Customizing Your Squishy
Customizing your DIY squishy toy lets you make it truly unique. It reflects your style and creativity. Small changes can turn a simple squishy into a fun and personal item.
Colors, patterns, and accessories make a big difference. They bring life and character to your creation. This process is simple and enjoyable for all skill levels.
Adding Colors And Patterns
Start with soft paint or fabric markers for bright colors. Use light strokes to avoid damaging the squishy material. Patterns like stripes, dots, or shapes add charm.
- Try blending colors for a gradient effect.
- Use stencils to keep designs neat.
- Draw simple faces or symbols to make it cute.
Allow the paint to dry fully before squeezing or decorating more. This keeps your colors sharp and clear.
Personalizing With Accessories
Accessories add fun and personality to your squishy. Use small items like beads, tiny bows, or fabric scraps. Attach them carefully with fabric glue or thread.
- Glue small charms for a playful look.
- Sew on buttons or patches for texture.
- Add ribbons or lace for a soft touch.
Keep accessories light to maintain the squishy’s softness. Personal touches make your toy one-of-a-kind and special.
Tips For Durability
Keeping your DIY squishy toy durable makes it last longer and keeps the fun going. Small mistakes in material choice or sealing can cause your squishy to lose shape or even break apart quickly. Let’s look at how to pick the right materials and seal your toy properly to make sure it stands up to repeated squishing and handling.
Choosing Strong Materials
The base of any durable squishy toy is strong materials. Use high-quality, soft foam or memory foam as your core because they bounce back well without tearing.
Consider adding a thin layer of silicone or fabric on the outside to protect against rips and stains. Have you tried mixing different foams to find the perfect balance between softness and toughness?
- Pick foams with a density rating above 20 kg/m³ for better durability.
- Look for non-toxic, skin-friendly materials if kids will be using the toy.
- Test small pieces first to see how they react to pressure and stretching.
Proper Sealing Techniques
Sealing your squishy toy well is crucial to prevent stuffing or foam bits from escaping. Use flexible glue that won’t crack when squeezed repeatedly.
Try sealing the edges with multiple thin layers rather than one thick coat for better strength. Have you noticed how a poorly sealed edge can ruin an otherwise great squishy?
- Use fabric glue or hot glue carefully around seams.
- Allow each glue layer to dry fully before adding the next.
- Consider sewing edges together before gluing for extra hold.
Taking time on these steps can save you from frustration later. Your squishy will stay intact, soft, and ready for endless squeezes.
Troubleshooting Common Issues
Making your own DIY squishy toy is fun, but some problems can happen. Small leaks or tears can spoil your creation. The softness may change after some time. Knowing how to fix these issues keeps your squishy toy nice and soft for longer.
Fixing Leaks And Tears
Leaks and tears often appear around seams or weak spots. Use strong glue made for fabric or silicone to seal small holes. Press the edges together and hold until dry. For bigger tears, patch with a piece of soft fabric or foam. Cut the patch slightly bigger than the tear. Glue it firmly over the damaged area. Let everything dry fully before using the toy again.
Maintaining Softness Over Time
Squishy toys can lose their softness after use. Keep your toy soft by storing it in a cool, dry place. Avoid direct sunlight and heat, which can harden the material. Gently knead or squeeze the toy often to keep it flexible. If it feels too firm, add a few drops of water or a fabric softener spray on the surface. Let it soak for a short time, then squeeze out the extra moisture. This helps restore softness without damaging the toy.
Frequently Asked Questions
What Materials Do I Need To Make A Diy Squishy Toy?
You need foam, glue, paint, scissors, and fabric or a balloon. These materials are affordable and easy to find. Using safe, non-toxic supplies ensures the toy is child-friendly and fun to make.
How Long Does It Take To Make A Squishy Toy?
Making a DIY squishy toy takes about 30 to 60 minutes. Drying and shaping time may vary depending on materials used. Patience during crafting yields better results and a more durable toy.
Can I Customize The Shape And Size Of My Squishy?
Yes, you can create any shape and size. Use molds, cut foam pieces, or shape clay. Customizing lets you personalize your toy to your liking or theme.
Is It Safe For Kids To Play With Homemade Squishies?
Yes, as long as you use non-toxic, child-safe materials. Avoid small parts for young children to prevent choking hazards. Always supervise kids during crafting and play for safety.
Conclusion
Making a DIY squishy toy is simple and fun. You only need a few materials and some patience. Each step helps you create a soft, squeezable toy. Kids and adults enjoy this creative activity together. Try different shapes and colors to make it unique.
Squishy toys provide stress relief and hours of play. Give it a try and enjoy your handmade squishy toy today. It’s a great way to relax and be creative.


