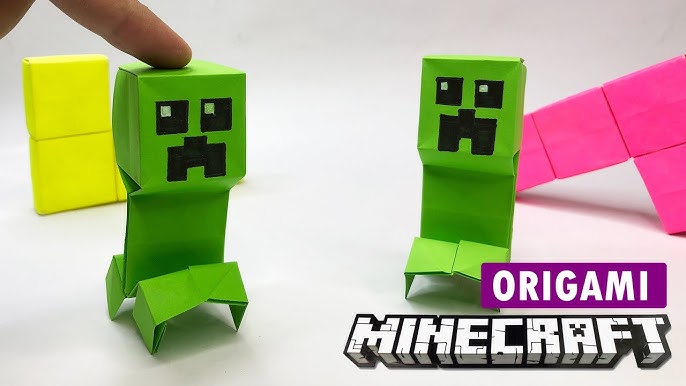
Are you a Minecraft fan looking for a fun and easy project to bring your favorite Creeper to life? Making your own DIY Minecraft Creeper toy is a creative way to add a personal touch to your collection.
Imagine holding a cool, handmade Creeper right in your hands—something you built yourself. In this guide, you’ll discover simple steps and tips that anyone can follow, even if you’re new to crafting. Ready to turn your Minecraft passion into a fun craft?
Let’s get started!

Credit: www.youtube.com
Materials Needed
Gathering the right materials is key to making your DIY Minecraft Creeper toy. Simple items help you create a cool craft that looks just like the Creeper from the game. Choose supplies that are easy to find and safe for kids.
This list splits into two groups. First, the essential supplies needed to build the toy. Second, optional decorative items to add extra detail and fun.
Essential Supplies
- Green construction paper or cardstock
- Black marker or black paper for face details
- Scissors for cutting shapes
- Glue stick or craft glue
- Ruler for measuring pieces
- Pencil for drawing outlines
- Template or printed Creeper pattern (optional but helpful)
Optional Decorative Items
- Green paint or colored pencils for shading
- Googly eyes for a playful touch
- Glitter or stickers for extra sparkle
- Foam sheets to add texture
- Pipe cleaners to create legs or arms
- Small beads or buttons for eyes
- Black washi tape for clean face lines

Credit: www.youtube.com
Preparing The Base
Preparing the base is the foundation of your DIY Minecraft Creeper toy. Taking time to shape and smooth the foam blocks ensures your Creeper looks crisp and professional. It also makes painting and decorating much easier later on.
Cutting The Foam Blocks
Start by choosing the right foam blocks. Polystyrene foam works well because it’s lightweight and easy to cut. Use a sharp craft knife or a hot wire cutter for clean edges.
Cut the foam into the basic Creeper shape: a tall rectangular body and a square head. Make sure your cuts are straight—uneven edges can ruin the final look. If you want, mark the dimensions with a pencil before cutting to stay precise.
Sanding And Smoothing
After cutting, your foam blocks may have rough or uneven surfaces. Use fine-grit sandpaper to gently smooth out any bumps or jagged edges. This step is crucial for a neat finish and helps paint stick better.
Don’t rush sanding—take your time to get a smooth texture. It can be satisfying to see the foam transform from rough to ready. Have you noticed how a smoother base makes the final toy look much more polished?
Assembling The Creeper
Assembling the Creeper is the key moment in making your DIY Minecraft toy come alive. This stage brings all the parts together to form the iconic Creeper shape. Careful assembly ensures the toy looks good and lasts long during play.
Gluing The Parts Together
Start by arranging all the Creeper pieces on a flat surface. Apply glue sparingly to the edges where parts meet. Use craft glue or hot glue for a strong hold. Press the parts firmly for a few seconds to bond them well.
Attach the legs to the body first. Then fix the head on top of the body carefully. Let the glue dry completely before moving the toy. Avoid using too much glue to prevent mess and uneven surfaces.
Ensuring Stability
Check the toy’s balance by placing it on a flat surface. The Creeper should stand without tipping over. If it wobbles, add small glue dots inside the legs for extra support.
Reinforce weak joints with extra glue layers. Allow each layer to dry fully before adding the next. Stability makes the toy safe for kids to play with and display.

Credit: www.youtube.com
Painting The Toy
Painting your DIY Minecraft Creeper toy is a fun and creative process. It brings your handmade toy to life with vibrant colors and designs. With some patience and the right materials, you can achieve a realistic look. Follow these steps to transform your creeper toy into a masterpiece.
Choosing The Right Colors
Selecting the right colors is crucial for authenticity. Minecraft Creepers are primarily green with shades of black. Choose a bright green for the body. Use darker greens for shadow effects. Black paint is ideal for the face and details. Avoid using too many colors to maintain a realistic look.
Applying Base Coat
Start with a solid base coat of green paint. This will serve as the primary color for your creeper toy. Ensure the base coat is even and covers all areas. Let the base coat dry completely before moving to the next step. This prevents smudging and ensures vibrant colors.
Adding Details And Patterns
Once the base coat is dry, add details and patterns. Use black paint to create the Creeper’s iconic face. A simple square pattern works best. Use a small brush for precision. Add darker green patches for a pixelated effect. This adds depth and a realistic touch. Allow each layer to dry before adding more detail.
Adding Final Touches
Adding final touches to your DIY Minecraft Creeper toy is where your creation truly comes to life. These small details not only protect your hard work but also make your toy stand out. Paying attention now ensures your Creeper looks great and lasts longer, giving you pride every time you see it.
Sealing The Paint
Once the paint on your Creeper has dried completely, sealing it is essential. It protects the colors from fading and shields the surface from scratches and moisture. You can use a clear acrylic spray or a brush-on varnish depending on the finish you want.
Make sure to apply thin, even coats. Let each coat dry fully before adding the next. This keeps the paint vibrant and the surface smooth. Have you noticed how a sealed paint job feels sturdier to touch? That’s the extra durability you want.
Optional Accessories
Adding accessories can give your Creeper a personal touch and make it unique. Consider small items like tiny paper or felt blocks to mimic Minecraft elements like TNT or grass blocks. You might also add googly eyes or LED lights for a fun twist.
Think about what accessories match your style or the space where you’ll display your toy. You could even create a mini diorama with other Minecraft characters. What small detail would surprise someone who loves Minecraft?
Safety Tips
Creating your own DIY Minecraft Creeper toy is a fun and rewarding project. But before you dive into crafting, it’s important to keep safety in mind. Taking simple precautions ensures that your experience is enjoyable and injury-free.
Handling Tools Carefully
Sharp tools like scissors, craft knives, or hot glue guns can cause accidents if you’re not careful. Always cut away from your body and keep your fingers clear of blades. If you’re working with kids, supervise them closely to prevent slips or cuts.
Have you ever rushed through a project and ended up with a painful paper cut or worse? Taking your time and focusing on your tool use can save you from those small but irritating injuries. Keep your workspace clean and organized to avoid knocking tools off the table unexpectedly.
Non-toxic Materials
Choosing non-toxic paints, glues, and crafting supplies is crucial, especially if children are involved. Many craft stores offer materials labeled as safe for kids, so check the packaging before buying. This reduces the risk of harmful chemical exposure during and after the project.
Think about the last time you crafted with harsh-smelling glue or paint. Did you notice headaches or irritation? Switching to non-toxic options keeps your environment healthier and your Creeper toy safe to handle afterward. Always wash your hands after crafting, even if you used safe materials.
Creative Variations
Creative variations make your DIY Minecraft Creeper toy unique and fun. Changing colors and sizes lets you personalize your craft. Small tweaks give your toy a fresh look and feel. These ideas inspire creativity and keep the project exciting.
Customizing Colors
Colors change the mood of your Creeper toy. Use different shades of green to create depth. Try bright neon or pastel tones for a playful twist. Mix colors with paint, markers, or colored paper. Add patterns like stripes or spots for extra style.
- Use acrylic paints for bold, lasting colors.
- Try watercolor for a soft, blended effect.
- Apply colored tape or paper for clean, sharp edges.
- Experiment with glow-in-the-dark paint for night fun.
Different Sizes And Styles
Size changes make your Creeper toy stand out. Make a tiny keychain version or a large plush for display. Use various materials like cardboard, fabric, or clay to vary texture. Change the shape by adjusting the block sizes or adding limbs. These changes add personality and charm.
- Create mini Creepers for desk decorations.
- Build a tall Creeper using stacked blocks.
- Sew a soft Creeper from felt or fleece.
- Shape a clay model for a smooth finish.
Frequently Asked Questions
What Materials Are Needed For A Diy Minecraft Creeper Toy?
You need green and black craft foam, scissors, glue, a ruler, and a marker. These materials are easy to find and affordable.
How Long Does It Take To Make A Creeper Toy?
Making the toy usually takes about 30 to 45 minutes. This depends on your crafting skills and tools.
Can Kids Safely Make A Diy Minecraft Creeper Toy?
Yes, kids can make it with adult supervision. Using child-safe scissors and non-toxic glue ensures safety during crafting.
What Are The Key Steps To Build The Creeper Toy?
Cut foam into blocks, glue pieces together, and add facial details. Follow instructions carefully for best results.
Conclusion
Making a DIY Minecraft Creeper toy is fun and simple. You can use easy materials found at home. This project lets you be creative and enjoy crafting. Kids and adults both will love this hands-on activity. Try customizing colors or sizes to make it unique.
Enjoy the process and share your toy with friends. Crafting toys helps build skills and brings joy. Start your Minecraft Creeper toy today and have fun!


