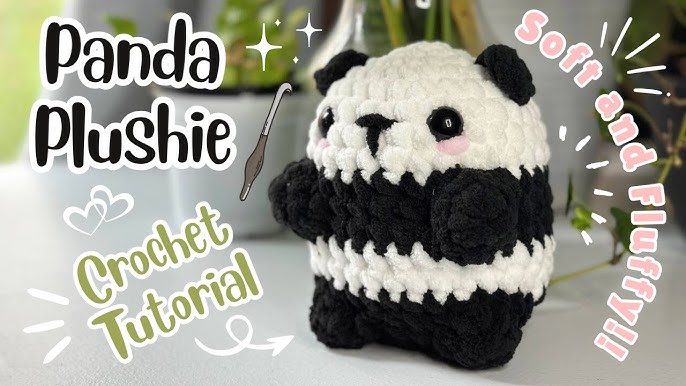
Are you ready to create something soft, cuddly, and truly special with your own hands? Making DIY soft toys is not just a fun craft—it’s a chance to bring your imagination to life and make personalized gifts that warm the heart.
Whether you want to surprise someone you love or add a unique touch to your home, this guide will show you simple steps to craft adorable soft toys. Keep reading, and you’ll discover how easy and rewarding it is to turn fabric and stuffing into your very own handmade treasures.
Your creativity is about to take shape!
Materials Needed
Gathering the right materials is key to making soft toys that feel great and last long. Using quality supplies will help your DIY soft toy look neat and stay cuddly. Focus on fabrics, stuffing, and tools that suit your project size and design.
Fabric Choices
- Cotton: Soft, breathable, and easy to sew. Great for beginners.
- Fleece: Warm and plush. Ideal for fluffy toys.
- Minky: Very soft and smooth. Perfect for baby toys.
- Felt: Sturdy and holds shape well. Good for small details.
- Velvet: Luxurious and soft. Adds a special touch.
Stuffing Options
- Polyester Fiberfill: Light and fluffy. Commonly used for soft toys.
- Wool Roving: Natural and eco-friendly. Adds firmness.
- Cotton Batting: Soft and natural. Works well for gentle toys.
- Fabric Scraps: Reuse old cloth pieces. Eco-friendly and cheap.
- Beans or Pellets: Provide weight and texture. Use in paws or base.
Essential Tools
- Sewing Needles: Choose sharp needles for fabric type.
- Thread: Match color and strength to your fabric.
- Scissors: Sharp fabric scissors for clean cuts.
- Pins: Hold fabric pieces before sewing.
- Measuring Tape: Ensure accurate sizes and shapes.
- Stuffing Tool: Helps fill small areas evenly.
- Marking Tools: Fabric chalk or pencils for outlines.

Credit: scratchandstitch.com
Basic Sewing Techniques
Basic sewing techniques form the foundation of making soft toys. Understanding these skills helps create neat, durable toys. Sewing can be done by hand or machine, each with its own advantages.
Learning how to finish seams properly gives your toys a clean, professional look. It also prevents fabric from fraying and keeps stuffing inside. These simple techniques make the crafting process easier and more enjoyable.
Hand Stitching Methods
Hand stitching gives you control over small details. Common stitches include running stitch, backstitch, and whipstitch.
- Running Stitch:Simple and quick, good for temporary seams.
- Backstitch:Strong and secure, perfect for main seams.
- Whipstitch:Ideal for closing openings after stuffing.
Use sharp needles and matching thread for best results. Take small, even stitches to avoid gaps.
Using A Sewing Machine
A sewing machine speeds up the process. It creates consistent, strong stitches quickly. Choose a medium stitch length for soft toys.
Practice on scrap fabric first. This helps adjust tension and stitch length. Keep fabric edges aligned while sewing to avoid puckering.
Use pins or clips to hold pieces in place. Remove them as you sew to avoid needle damage.
Seam Finishing Tips
Finishing seams prevents fabric from fraying and strengthens the toy. Common finishing methods include zigzag stitching, pinking shears, and binding.
- Zigzag Stitch:Sew along raw edges to stop fraying.
- Pinking Shears:Cut edges with these scissors for a jagged finish.
- Binding:Sew bias tape around edges for extra durability.
Trim seam allowances to reduce bulk. Press seams flat for a smooth look. These simple steps improve the toy’s shape and lifespan.
Simple Soft Toy Patterns
Simple soft toy patterns are your best friends when starting a DIY soft toy project. They keep the process fun and stress-free while allowing you to customize your creations. These patterns don’t require advanced sewing skills, making it easy to bring your ideas to life quickly.
Animal Shapes
Animal shapes are classic and easy to make. You can start with simple outlines like bears, bunnies, or cats. These shapes often use basic geometric forms like circles and ovals, which make cutting and stitching straightforward.
Try adding small details such as embroidered eyes or felt ears to give your toy personality. Have you ever noticed how a tiny nose or floppy ears can completely change a toy’s character? These small touches make your soft toy special and unique.
Character Designs
Creating character designs lets you bring your favorite stories or original ideas to fabric. Stick figures, superheroes, or fantasy creatures are fun to design with simple shapes and bold colors. You don’t need to be an artist; basic outlines and simple features work well.
Think about what makes a character memorable—maybe a big smile, quirky glasses, or a unique hat. Adding these elements keeps your toy interesting and personal. What character would you love to see as a soft toy on your shelf?
Abstract Forms
Abstract forms give you freedom from realistic shapes. They let you focus on colors, textures, and unique silhouettes. Think blobs, stars, or geometric shapes like triangles and hexagons.
These designs are perfect if you want a modern or artistic look. Experimenting with different fabrics and stuffing amounts can create playful and tactile toys. Have you tried combining unexpected fabrics to see what fun shapes emerge?

Credit: www.youtube.com
Step-by-step Toy Assembly
Creating your own soft toy is a fun and rewarding activity. Follow these easy steps to bring your plush friend to life. You’ll need some basic materials and a little patience. Let’s begin the assembly!
Cutting Fabric Pieces
Start by gathering your fabric. Soft cotton or fleece works best. Use a template to trace the toy’s pattern on the fabric. Ensure each piece is cut neatly. Sharp scissors help with precision. Cut out the body, arms, legs, and other parts. Keep the pieces organized for easy access.
Sewing And Stuffing
Pin the fabric pieces together, ensuring the right sides face each other. Use a sewing machine or hand sew the edges. Leave a small opening for stuffing. Once sewn, turn the toy right side out. Use polyester fiberfill for stuffing. Fill the toy evenly, giving it a soft feel. Stitch the opening closed once filled.
Adding Details
Now, bring your toy to life with details. Sew on buttons for eyes or embroider them. Add a mouth using fabric paint or thread. Stitch on any additional features like ears or tails. Personalize the toy with unique touches. Each detail adds character and charm.
Personalizing Your Toys
Personalizing your DIY soft toys makes each one truly special. It lets you add character and charm that store-bought toys often lack. Custom touches show creativity and give the toy a unique story. Small details can change the whole look and feel of your creation.
Using Embroidery
Embroidery adds fine details to soft toys. You can stitch eyes, smiles, or patterns. Use colorful threads to create contrast. Simple stitches like satin or backstitch work well. Embroidery gives a handmade touch and brings personality to your toy’s face or body.
Attaching Accessories
Accessories enhance your toy’s style and uniqueness. Sew on buttons, ribbons, or tiny hats. Use felt pieces for ears or wings. Accessories add dimension and fun. They also let you customize for seasons or themes, like a scarf for winter or flowers for spring.
Choosing Colors And Textures
Colors and textures set the mood for your toy. Soft, pastel colors create a gentle look. Bright colors add energy and playfulness. Mixing fabrics like cotton, fleece, or velvet adds interest. Textures invite touch and make the toy more cuddly and appealing.
Safety Tips For Kids
Making DIY soft toys for kids is a wonderful way to encourage creativity and provide personalized gifts. However, safety should always be your top priority. Ensuring that every part of the toy is safe to handle can prevent accidents and give you peace of mind while your child plays.
Selecting Non-toxic Materials
Choose fabrics and fillings that are labeled non-toxic and hypoallergenic. Avoid materials treated with harsh chemicals or dyes that can irritate sensitive skin. Cotton, felt, and fleece are excellent choices because they are soft and safe for children.
Look for stuffing like polyester fiberfill that is certified safe for toys. If you prefer natural options, opt for untreated wool or cotton stuffing. Always read labels carefully and consider how your child’s allergies might affect material choices.
Securing Small Parts
Small parts like buttons, beads, or eyes can be choking hazards if not attached securely. Instead of using glued-on decorations, sew these parts tightly with strong thread. If you’re making toys for very young kids, consider using embroidered features instead of loose pieces.
Ask yourself: How easily could a small part come off if pulled? Test each attachment by tugging gently before giving the toy to a child. This simple check can save a lot of worry later on.
Durability Checks
Soft toys need to withstand rough play without falling apart. After finishing your toy, inspect all seams and stitches carefully. Use a strong thread and double-stitch areas that might experience more stress, like limbs or ears.
Put the toy through a gentle stress test by pulling and squeezing it. If you notice any weak spots, reinforce them immediately. A durable toy means your child can enjoy it safely for a long time without the risk of loose stuffing or parts.
Care And Maintenance
Taking good care of your DIY soft toys keeps them looking fresh and extends their life. Regular maintenance helps you spot small issues before they become big problems. Do you ever wonder how to keep your handmade toys as charming as the day you finished them?
Cleaning Instructions
Soft toys can gather dust and stains quickly, especially if they are loved by kids. To clean them, start by checking the fabric type and any embellishments like buttons or glued parts. Spot cleaning with a mild detergent and a soft cloth often works well and avoids damage.
If your toy is machine washable, place it inside a pillowcase or laundry bag to protect it. Use cold water and a gentle cycle. Avoid harsh detergents and fabric softeners that could weaken the fabric or cause colors to fade.
After washing, let the toy air dry completely. Avoid using a dryer because high heat might shrink or deform your soft toy. Have you noticed how some toys shrink or lose shape after washing? That’s why air drying is best.
Repairing Worn Areas
Soft toys get worn over time, especially at seams or where the stuffing shifts. Check your toy regularly for loose threads, holes, or thinning fabric. Fixing these early prevents stuffing from coming out and preserves the toy’s shape.
Use a needle and thread that matches the fabric color to sew up holes or reinforce seams. Small patches of fabric can cover worn spots and add character. If the stuffing becomes lumpy or sparse, open a seam carefully and add fresh stuffing before stitching it back up.
Have you ever fixed a tear that made your soft toy look almost new again? It’s satisfying and saves money. Your toy will thank you for the extra care and attention.

Credit: www.youtube.com
Frequently Asked Questions
What Materials Do I Need For Diy Soft Toys?
You need fabric, stuffing, sewing tools, scissors, and patterns. Choose soft, safe fabrics like cotton or fleece for comfort. Use polyester fiberfill or cotton for stuffing. Basic sewing supplies include needles, thread, pins, and a sewing machine if available. Patterns help shape your toy accurately.
How Can Beginners Sew Soft Toys Easily?
Start with simple designs and use felt fabric for easier cutting and sewing. Follow step-by-step tutorials or patterns. Use a sewing machine or hand stitch with basic stitches like running or backstitch. Take your time and practice to improve your skills gradually.
What Stuffing Is Best For Diy Soft Toys?
Polyester fiberfill is lightweight, hypoallergenic, and easy to use. It provides a soft, fluffy feel and holds shape well. Alternatively, use cotton stuffing for a natural option, but it may clump over time. Avoid heavy or hard fillings for child-safe toys.
How Do I Make My Diy Soft Toys Safe For Kids?
Use non-toxic, washable materials and avoid small parts that can detach. Sew securely to prevent stuffing from escaping. Choose fabrics free of harmful dyes. Always check for loose threads and sharp edges before giving toys to children.
Conclusion
Making DIY soft toys can be fun and rewarding. You only need simple materials and a bit of patience. Start small and try different shapes and colors. Each toy you make will improve your skills. Handmade toys also make great gifts for friends and family.
Keep practicing, and enjoy the creative process. Soon, you will have a collection of soft toys made by you. Give it a try and see how much joy it brings!


