Have you ever wanted to create a collectible toy that stands out on every shelf? Imagine holding a unique piece that tells a story, crafted by your own hands.
Making your own collectible toy isn’t just fun—it’s a way to bring your creativity to life and even start a small business. In this guide, you’ll discover simple steps to design, build, and customize a toy that others will want to treasure.
Ready to turn your ideas into a collectible masterpiece? Let’s dive in and make it happen!
Materials Needed
Gathering the right materials sets the foundation for creating a collectible toy. Choose items that suit your design and skill level. Quality materials help bring your ideas to life and ensure durability. Below are key materials needed for crafting your toy.
Choosing The Right Clay
Clay is the base material for shaping your collectible toy. Pick clay that is easy to mold and hardens well. Polymer clay works great for beginners and pros alike. Air-dry clay offers a simple, no-bake option. Consider the size and detail of your toy when selecting clay.
Essential Tools
Tools help shape and add details to your toy. Basic tools include sculpting knives, needles, and smoothing tools. Use a rolling pin to flatten clay evenly. A small brush cleans off dust and debris. Having a clean workspace with these tools speeds up your process.
Paints And Finishes
Paints add color and character to your collectible toy. Acrylic paints dry quickly and stick well to clay surfaces. Choose non-toxic paints for safety. Finishes protect your paint and give a polished look. Matte or glossy sealants keep your toy looking new longer.
Designing Your Toy
Designing your collectible toy is where your imagination begins to take shape. This phase is crucial because it transforms your idea into a visual and tangible form. Paying close attention to design details will set your toy apart and make it truly collectible.
Sketching Your Concept
Start by putting your ideas on paper. Sketch multiple versions to explore different styles and features. Don’t worry about perfection—focus on capturing the character and personality of your toy.
Use simple tools like pencils and markers, or digital apps if you prefer. Ask yourself what makes your toy unique. Is it the facial expression, the outfit, or a special accessory? Try to highlight those elements in your sketches.
Creating A Prototype
Once your sketches feel right, move on to making a prototype. This first model helps you see how your design works in three dimensions. You can use clay, foam, or 3D printing if you have access.
Test how the parts fit together and how sturdy the toy is. Don’t hesitate to make quick changes—it’s easier to tweak at this stage than later. What parts feel awkward or don’t look as good as expected?
Refining Details
After your prototype, focus on refining the small details that bring your toy to life. Pay attention to textures, colors, and facial features. These elements add personality and can turn a simple figure into a collector’s treasure.
Think about paint choices and finishes—matte, glossy, or metallic—and how they affect the overall look. Ask yourself if your toy tells a story just by looking at it. If not, what can you add or improve?
Sculpting Techniques
Sculpting techniques shape the soul of a collectible toy. These methods turn simple clay into detailed art. Each technique adds depth and personality to your creation. Understanding these basics helps you create toys that look professional and unique.
Basic Shaping Methods
Start with a solid base form. Use your hands to roll, flatten, and pinch the clay. Simple shapes like spheres and cylinders build the body parts. Use tools like knives and sculpting sticks to refine edges. Keep the shapes smooth or rough, depending on your design.
Adding Textures
Textures bring life to your toy’s surface. Use tools like needles, brushes, or sponges to create patterns. Press fabrics or leaves gently into the clay for natural textures. Small dots, lines, or scratches add realism. Experiment with texture depth to make details stand out.
Working With Small Parts
Small parts need careful handling. Use fine tools like dental picks or tweezers for precision. Attach tiny elements by scoring and adding a bit of liquid clay as glue. Build small parts separately before joining them. Work patiently to avoid breaking or deforming delicate pieces.
Credit: stationerypal.com
Assembling Components
Carefully fit each part together to build your collectible toy. Use glue or screws to hold pieces firmly in place. Check that all components align for a smooth, polished look.
Assembling components is a crucial part of creating a collectible toy. It’s where the magic happens, bringing your vision to life. Each piece you attach contributes to the final personality and functionality of the toy. This stage requires patience and precision, but the satisfaction of seeing your creation come together is unparalleled. Let’s explore some key elements to consider during this process.Attaching Limbs And Features
The first step in assembling your toy is attaching the limbs and features. Depending on your design, you might be working with different materials like plastic, metal, or even fabric. Use strong adhesive or screws for a secure fit. This ensures the limbs stay in place during play or display. Have you ever considered how a minor adjustment can change the entire look of your toy? A slightly tilted arm can add character or suggest movement.Using Armatures
Armatures are the hidden skeletons that give your toy structure and flexibility. They allow for movement and help maintain the toy’s shape over time. Choose the right material for your armature based on the toy’s size and intended flexibility. Metals like aluminum or brass are popular choices. Experiment with bending and posing the armature before securing it, ensuring the final product can move as intended. Are you ready to give your toy the freedom to express itself?Ensuring Stability
Stability is key to a well-functioning collectible toy. No one wants a toy that topples over at the slightest touch. Consider the weight distribution and balance of your design. Adding small weights or adjusting the base can enhance stability. Test your toy on different surfaces to ensure it stands firm. Have you ever noticed how a slight tweak can make a toy stand proud and steady?Painting And Finishing
Painting and finishing your collectible toy is where your creation truly comes alive. This stage allows you to express creativity and add personality through colors and textures. Careful attention here can transform a simple figure into a treasured piece.
Choosing Color Schemes
Think about the mood and story you want your toy to tell. Bright colors can make it playful, while muted tones add realism or vintage charm.
Try to limit your palette to a few complementary colors to avoid overwhelming the design. Have you ever noticed how certain color combos instantly catch your eye? That’s the power of a well-chosen scheme.
Test swatches on a spare piece before committing. This small step saves you from surprises later.
Applying Base Coats
Start with a smooth, even base coat to set the foundation for your colors. Use thin layers to prevent losing any sculpted details on your toy.
Spray paints or airbrushes work great for a uniform finish, but brushes can also do the job if applied carefully.
Let each layer dry completely before adding the next. Patience here pays off with a cleaner look.
Detail Painting Tips
Use fine-tipped brushes for delicate features like eyes, buttons, or patterns. Steady your hand by resting your elbow on a solid surface.
Layering colors can add depth—start with darker tones and highlight with lighter shades to create dimension.
Don’t rush; details often define the quality of your collectible. What small detail could make your toy stand out?
Sealing And Protection
Seal your work with a clear coat to protect the paint from scratches and fading. Choose matte, satin, or gloss finishes depending on the look you want.
Spray sealants provide even coverage but apply in thin coats to avoid drips.
Allow the sealant to cure fully before handling your toy. This final step ensures your hard work lasts and keeps your collectible looking fresh.

Credit: edm.com
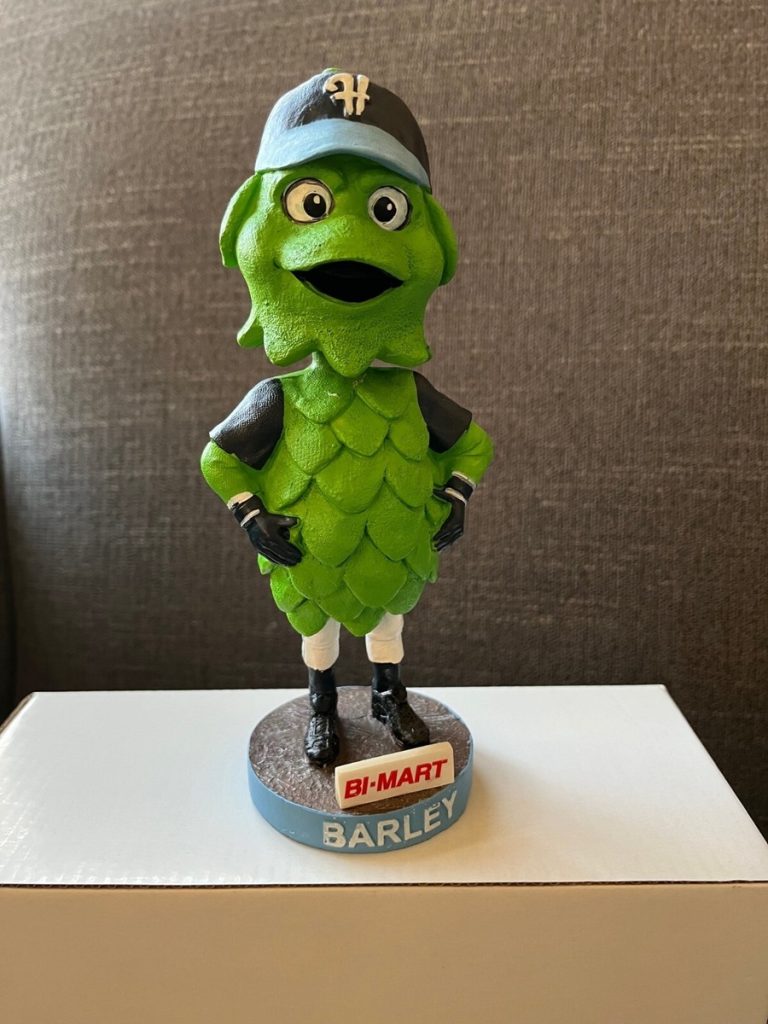
Packaging Your Toy
Packaging your collectible toy protects it and keeps it looking new. Use sturdy boxes and clear windows to show the toy inside. Add labels and artwork to make the package attractive and unique.
Packaging your collectible toy is as important as designing it. It enhances the toy’s appeal and protects it. The right packaging can make your toy more desirable. This section will guide you through creating effective packaging.Designing Collectible Packaging
Your packaging should grab attention and reflect the toy’s theme. Use bright colors or unique shapes. It should also be easy to open but secure enough to protect the toy. Consider using transparent windows to showcase the toy. This allows buyers to see the toy without opening the packaging. Ensure the design is both functional and visually appealing.Materials For Packaging
Select materials that are durable and eco-friendly. Cardboard is a popular choice for its strength and recyclability. Plastic can be used for transparency but opt for biodegradable options. Foam inserts can protect delicate parts of the toy. Ensure your materials are safe and non-toxic.Adding Certificates Or Extras
Adding a certificate can increase the toy’s value. It can verify authenticity and provide a unique number for the toy. Include extras like stickers or small booklets. These can offer information about the toy’s background or story. Extras make the toy feel special and enhance the collector’s experience.Selling And Marketing
Selling and marketing your collectible toy is where your creativity meets real-world demand. It’s not just about making a great figure; you need to connect with the right audience and set the right price. How you present and promote your toy can make all the difference in turning your passion into profit.
Pricing Your Figures
Pricing your collectible figures correctly is key. Consider the cost of materials, time spent, and uniqueness. Don’t forget to research similar toys in the market to see what collectors are willing to pay.
Try creating a simple table to compare your figure with competitors:
| Figure | Price | Material Quality | Edition Size |
|---|---|---|---|
| Your Figure | $50 | High | Limited (100) |
| Competitor A | $45 | Medium | Open Edition |
| Competitor B | $60 | High | Limited (50) |
Ask yourself: Is your price fair enough to attract buyers but still values your work? Sometimes a slightly higher price signals exclusivity and quality.
Building An Online Presence
Your online presence is your storefront. Use social media platforms like Instagram and TikTok to share photos and videos of your figures. Show behind-the-scenes moments, like the painting process or packaging, to create a story around your product.
Create a dedicated website or online store to list your figures with clear descriptions and high-quality images. Make it easy for visitors to buy directly or connect with you.
Think about this: How does your online space make buyers feel? Is it easy to navigate and visually appealing? A strong online presence builds trust and attracts more collectors.
Engaging With Collectors
Collectors love connection. Respond to comments, answer questions, and ask for feedback. Building relationships can turn one-time buyers into loyal fans.
Join online forums or groups focused on collectible toys. Share your insights and listen to what collectors want. This engagement can inspire new ideas and boost your reputation.
Have you considered hosting live Q&A sessions or giveaways? These activities increase interaction and excitement around your figures. Remember, collectors appreciate feeling part of a community, not just customers.
Maintaining Your Collection
Maintaining your collectible toy collection keeps it looking great and protects its value. Regular care helps avoid damage and fading over time. Simple habits make a big difference in preserving each piece.
Cleaning Tips
Use a soft, dry cloth to dust toys regularly. Avoid water or harsh cleaners that can damage paint or materials. For tough dirt, slightly dampen the cloth with water only. Clean small crevices with a soft brush or cotton swabs. Always test cleaning methods on a hidden spot first.
Storage Solutions
Store toys in a cool, dry place away from sunlight. Use display cases or shelves to keep toys safe and visible. Avoid crowded spaces to prevent scratches or dents. Keep toys in original packaging when possible to protect them. Consider silica gel packets to reduce moisture in storage areas.
Repairing Damages
Fix small damages quickly to stop them from worsening. Use glue made for plastic or the toy’s material. Replace missing parts carefully with matching pieces. Avoid using strong chemicals or paints that can harm the toy. Seek professional help for valuable or complex repairs.

Credit: www.youtube.com
Frequently Asked Questions
What Materials Are Best For Making Collectible Toys?
High-quality materials like resin, vinyl, and polymer clay ensure durability and detail. These materials hold paint well and allow intricate designs. Choosing safe, non-toxic substances enhances the toy’s collectible value and user safety.
How Do I Design A Unique Collectible Toy?
Start with sketching original concepts that reflect a theme or story. Focus on distinctive features and vibrant colors. Use 3D modeling software for precise designs. Unique designs attract collectors and increase toy value.
What Tools Are Essential For Toy Making?
Basic tools include sculpting knives, paintbrushes, airbrushes, and molding kits. A 3D printer can help produce prototypes. Proper tools improve accuracy, detail, and finish quality in your collectible toys.
How Can I Make My Collectible Toy Marketable?
Research trends and target audience preferences. Create limited editions to increase exclusivity. Use attractive packaging and promote through social media and toy conventions. Effective marketing boosts toy desirability and sales.
Conclusion
Creating a collectible toy takes patience and care. Start with a clear idea and simple materials. Shape your toy step by step, paying attention to details. Paint and finish your toy to make it unique. Enjoy the process and learn from each try.
Collectible toys bring joy to many people. Keep practicing to improve your skills over time. Your handmade toy can become a special treasure. Have fun making toys that tell a story. Creativity grows with each new project you start.