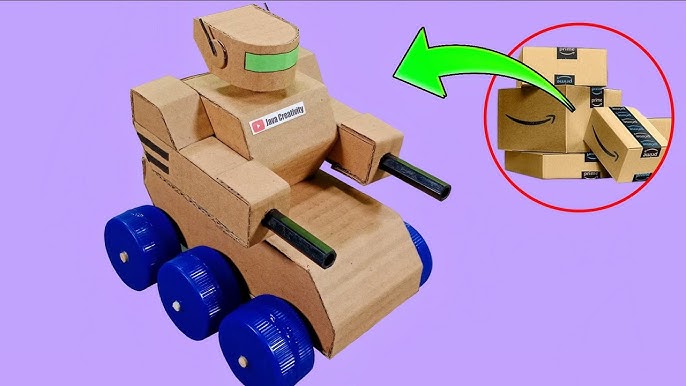
Have you ever wanted to build your very own toy remote control robot? Imagine controlling a cool little robot that moves, turns, and responds to your commands—all made by you!
This guide will show you exactly how to create one step-by-step, even if you have no experience. By the end, you’ll have a fun, working robot to impress your friends or enjoy as a new hobby. Ready to bring your robot to life?
Let’s get started!

Credit: www.youtube.com
Materials Needed
Gathering the right materials is key to building a toy remote control robot. This list covers everything needed to start your project. Having all parts and tools ready makes the assembly smooth and fun.
Basic Components
- Microcontroller board (like Arduino or Raspberry Pi)
- Remote control transmitter and receiver
- Electric motors (servo or DC motors)
- Motor driver module
- Wheels or tracks for movement
- Battery pack and batteries
- Chassis or frame for the robot body
- Jumper wires and connectors
- Switches for power control
- Optional sensors (ultrasonic or infrared)
Tools Required
- Soldering iron and solder wire
- Screwdrivers (Phillips and flathead)
- Wire cutters and strippers
- Hot glue gun or strong adhesive
- Multimeter for electrical testing
- Small pliers or tweezers
- Drill or rotary tool (if needed for chassis)
- Safety glasses for protection
Planning Your Robot
Planning your toy remote control robot is the foundation of a successful build. It helps you visualize the final product and anticipate challenges before you start assembling parts. Taking time here saves frustration and lets your creativity flow freely.
Design Ideas
Think about what you want your robot to look like and how it should move. Do you prefer a humanoid shape, a rover with wheels, or something more abstract? Sketching a few rough designs on paper can clarify your vision.
Consider the size of your robot—will it fit on a desk, or do you want it bigger? Also, decide if you want it to have arms, sensors, or lights. Each extra feature adds complexity but also makes your robot more exciting to control.
Ask yourself: what will make your robot unique? Maybe it could dance, pick up small objects, or follow a line. These ideas guide your choice of motors, sensors, and overall design.
Choosing The Remote Control Type
Selecting the right remote control system is crucial for smooth operation. You can pick from simple infrared (IR) remotes, radio frequency (RF) controllers, or even Bluetooth connections.
IR remotes are easy to use but require line-of-sight, meaning your robot must be in view of the controller. RF controllers offer greater range and don’t need direct sight, which is handy if your robot moves behind obstacles.
Bluetooth lets you control your robot from a smartphone or tablet, adding flexibility and extra features through apps. However, it may require more programming knowledge to set up.
Which control method fits your project best? Think about where you’ll use the robot and how complex you want the control to be. This choice affects your components and build strategy significantly.
Building The Robot Body
Building the robot body forms the foundation of your remote control robot. A sturdy and well-designed frame holds all parts together. It also supports movement and balance. Careful assembly ensures your robot works smoothly and lasts longer.
Assembling The Frame
Start by choosing a lightweight and strong material like plastic or aluminum. Cut pieces to fit the robot’s shape and size. Use screws or bolts to connect parts firmly. Make sure the frame is balanced to avoid tipping over. Check all joints for tightness before moving on.
- Gather frame parts and tools
- Align pieces according to the design
- Secure connections with screws or bolts
- Double-check stability and balance
Attaching Motors
Motors give your robot the power to move. Attach them to the frame where wheels or limbs will go. Use brackets or mounts to fix motors securely. Connect motor shafts to wheels or gears carefully. Test motor placement to ensure free rotation.
- Select motors suitable for your robot size
- Mount motors firmly on the frame
- Attach wheels or gears to motor shafts
- Verify smooth motor and wheel movement
Setting Up The Electronics
Connect the motor, battery, and receiver carefully to ensure the robot moves smoothly. Secure all wires to avoid loose connections or short circuits. Test the electronics before final assembly to confirm everything works properly.
Setting up the electronics is crucial for your toy robot. It brings your creation to life. This process involves wiring and connecting components. Proper setup ensures smooth operation.Wiring The Circuit
Start by gathering your electronic components. You’ll need wires, a breadboard, and a microcontroller. Use the breadboard to organize your circuit. Connect the microcontroller to the breadboard. This helps in easy wiring. Ensure all connections are secure. Loose wires can cause malfunctions. Color-coded wires help identify connections. Use red for power and black for ground.Connecting The Remote Receiver
The remote receiver links the controller to the robot. Attach the receiver to the microcontroller. Ensure it matches the circuit diagram. Align the receiver’s pins with the microcontroller. Secure the connections firmly. Test the remote to ensure it’s working. Check for response from the robot. Adjust the setup if needed.Programming The Robot
Programming your toy remote control robot is where your creation truly comes to life. This stage lets you define how your robot reacts to commands and navigates its environment. You’ll find that clear, simple programming helps avoid confusion and makes troubleshooting much easier.
Basic Control Commands
Start by setting up the fundamental commands your robot will recognize. These usually include moving forward, backward, turning left, turning right, and stopping.
- Move Forward:Sends power to the motors to drive the robot straight ahead.
- Move Backward:Reverses the motor direction for backward motion.
- Turn Left:Activates one motor or adjusts speed to pivot left.
- Turn Right:Similar to left turn but pivots right.
- Stop:Cuts power to the motors to halt movement immediately.
Try writing these commands in your robot’s programming environment using simple language or blocks, depending on your platform. Have you thought about how each command should respond if the robot encounters an obstacle?
Testing Movements
After programming, testing is essential. Run each command individually to observe how your robot behaves.
Keep a clear space free of obstacles and give your robot one command at a time. This helps you notice if the robot turns too sharply or moves slower than expected.
Use this test to adjust motor speeds or tweak the timing of commands. Don’t hesitate to experiment—sometimes the smallest change makes a big difference in performance.
Have you ever noticed how a robot’s movement can tell you exactly where the programming needs improvement? Testing is your chance to catch those subtle issues before they become bigger problems.

Credit: www.youtube.com
Final Assembly
The final assembly is where your toy remote control robot starts to take shape. This stage brings together all parts and circuits. Careful work here ensures the robot works smoothly. Focus on securing components firmly and adding neat finishing touches. These steps improve both function and look.
Securing Components
Hold each part in place before fixing it tightly. Use screws, glue, or tape depending on the material. Keep wires organized to avoid tangling. Make sure the battery fits securely in its holder. Check that the motors and sensors do not move. Tight connections prevent loose parts during robot movement.
Adding Finishing Touches
Cover exposed wires with small tubes or tape for safety. Paint or decorate the robot to make it attractive. Add stickers or labels for a fun look. Test the remote control buttons to confirm responsiveness. Make sure the robot stands firmly and moves without trouble. Small details improve the overall experience of your robot.
Troubleshooting Tips
Troubleshooting your toy remote control robot can be frustrating, especially when it suddenly stops responding or behaves oddly. However, understanding common issues and knowing quick fixes can save you time and keep your project on track. Let’s dive into some practical tips to help you identify and solve problems efficiently.
Common Issues
One frequent problem is the robot not responding to the remote control. This could be due to weak batteries, signal interference, or faulty wiring. Another common issue is the motors not running smoothly, often caused by loose connections or dirt blocking the gears.
Sometimes, your robot might move erratically or stop mid-action. This often points to software glitches or incorrect programming. Have you checked if your code matches the robot’s hardware setup?
Quick Fixes
- Check Batteries:Always start by replacing batteries in both the remote and the robot. Fresh power can solve many issues.
- Inspect Connections:Look closely at all wires and solder joints. A small loose wire can break the circuit.
- Clean Moving Parts:Dust and debris can jam gears or wheels. Use a small brush to keep everything clean.
- Test the Remote Signal:Try using the remote on another device or swap remotes to rule out transmitter problems.
- Review Your Code:Double-check your programming for logic errors or missing commands.
Have you ever fixed a problem just by re-uploading your code? Sometimes a simple reset is all your robot needs to get back in action.

Credit: www.youtube.com
Frequently Asked Questions
What Materials Are Needed To Build A Toy Remote Control Robot?
You need a microcontroller, motors, wheels, a chassis, a remote control, batteries, and connecting wires. These are basic parts for assembling a functional remote control robot.
How Do I Program The Robot’s Movements?
Use simple coding platforms like Arduino IDE. Write commands to control motors for forward, backward, left, and right movements. Upload the code to the microcontroller to make the robot respond to remote signals.
Can Beginners Make A Remote Control Robot Easily?
Yes, beginners can build a basic robot with guided tutorials. Start with simple components and learn step-by-step assembly and programming. This boosts understanding and confidence in robotics projects.
What Remote Control Types Work Best For Toy Robots?
Infrared (IR) and radio frequency (RF) remotes are common. IR is simple and affordable, while RF offers longer range and better signal stability for controlling your robot.
Conclusion
Building a toy remote control robot can be fun and rewarding. You get to learn about electronics and mechanics. Each step teaches you something new and useful. The robot you create moves and responds to your commands. It shows how simple parts work together.
Keep practicing to improve your skills. This project sparks creativity and problem-solving. Start small, and enjoy the process. Your robot can become a great learning tool and a fun toy. Give it a try and see what you can build!